The Add a Person functionality within Engagifii allows administrators to easily add new individuals (such as members, staff, or county members) to the system. This process involves assigning roles, entering contact and organization details, and optionally sending invitations to allow individuals to create their own profiles in Engagifii.
By adding people through the platform, you ensure streamlined membership management and keep all your association’s records in one place.
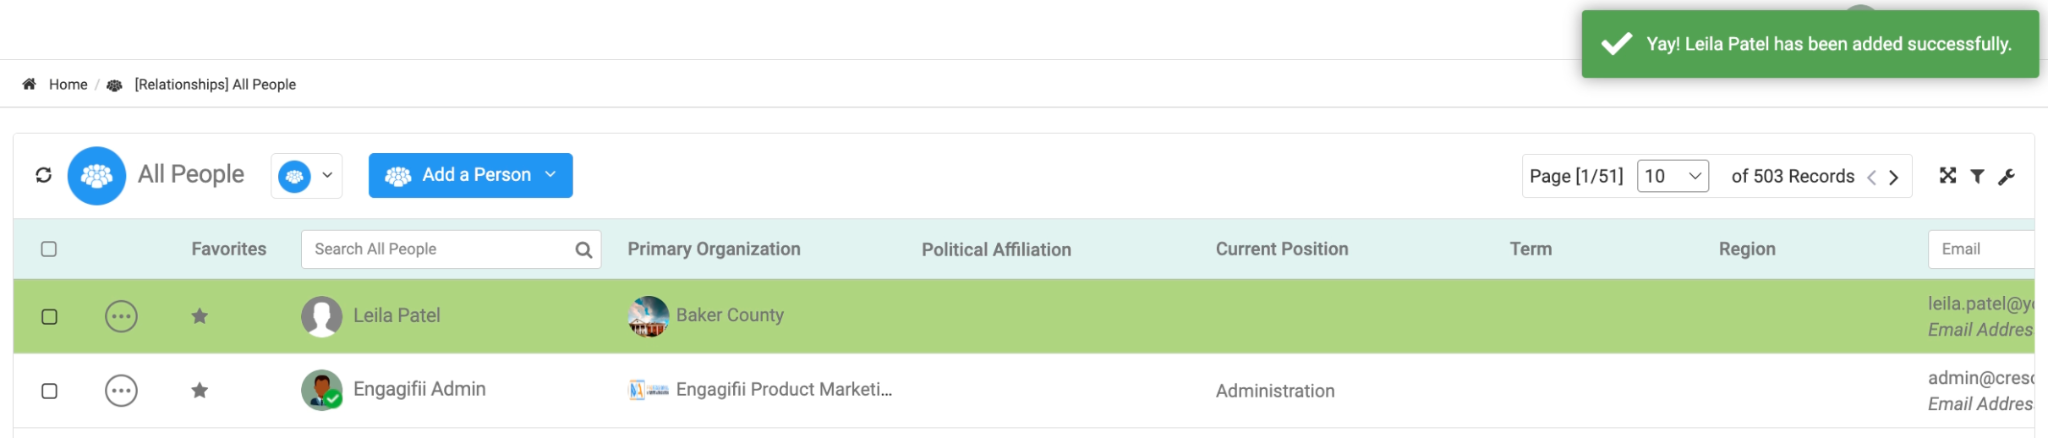
Step-by-Step Guide: Add a Person
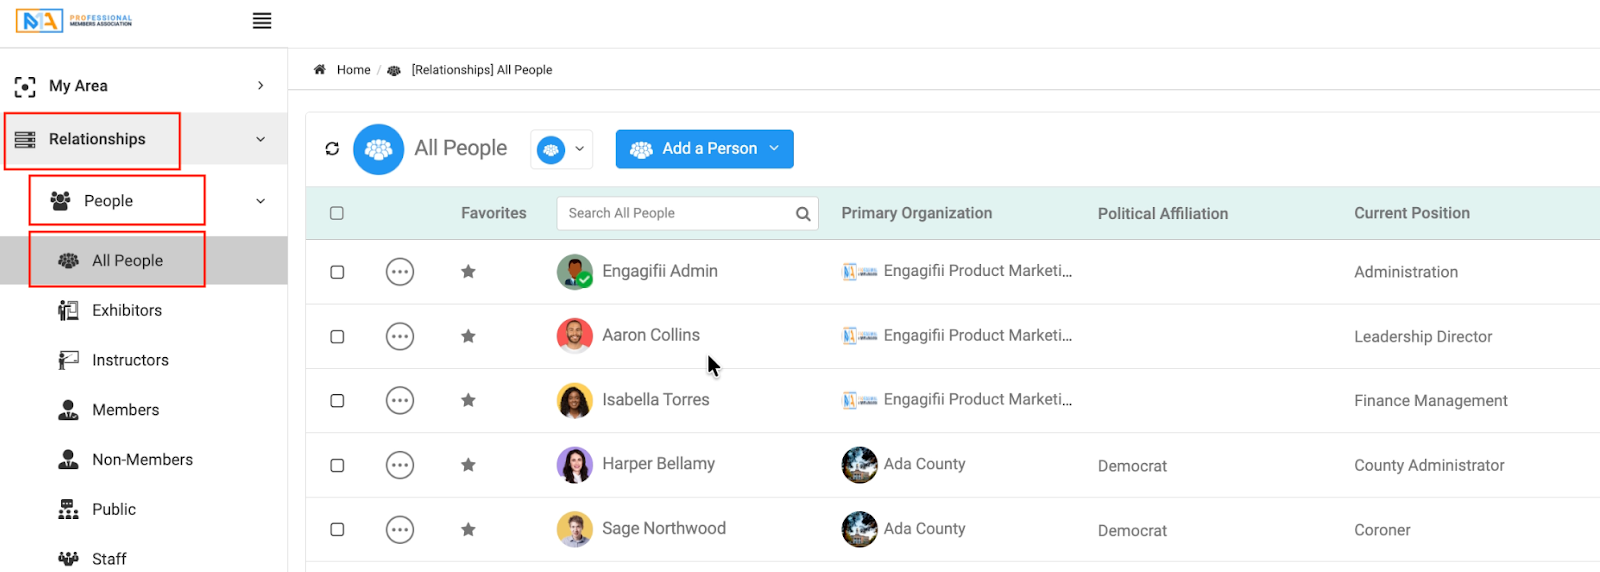
1. Navigate to the Relationships Module
First, log in to your Engagifii platform and go to the Relationships module.
- Path: Relationships → People → All People
This section will show a list of all the individuals currently in your system, including their roles, organizations, and contact information.
2. Click “Add a Person” and Select Person Type
Once you’re in the People section, click on the Add a Person button to begin adding a new individual.
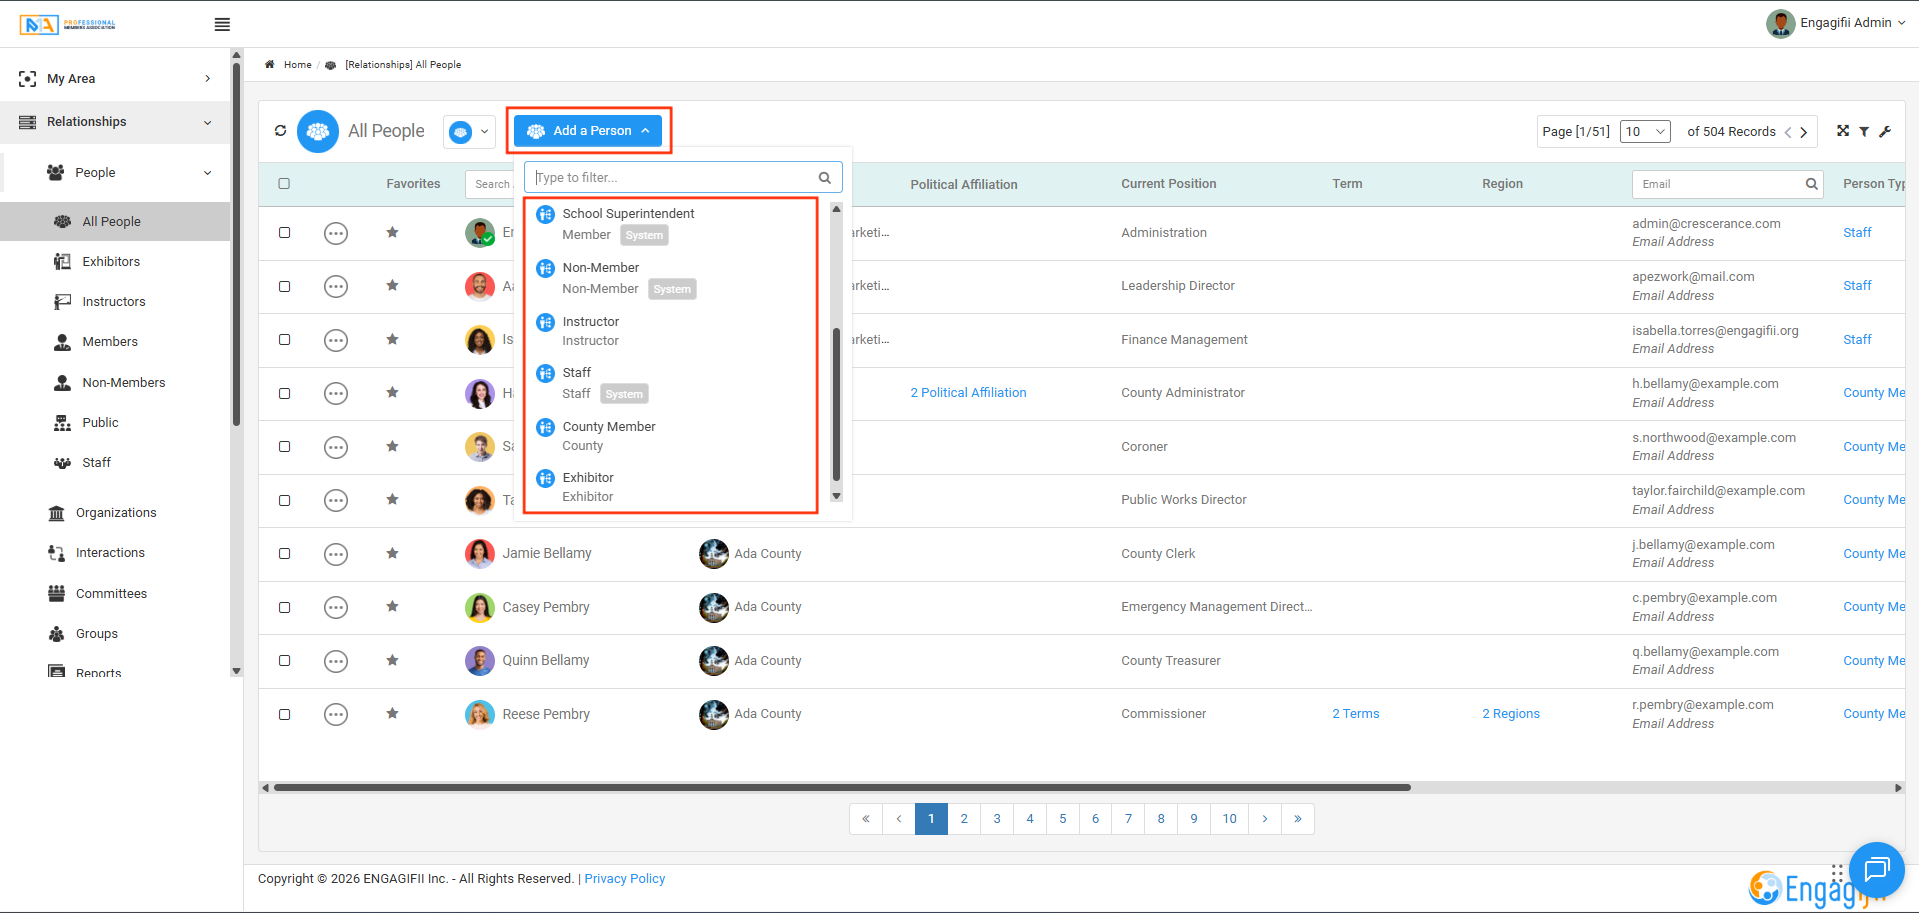
You’ll now be prompted to choose the Person Type for the individual you are adding. Select from the pre-configured person type options set up for your organization, such as:
- Member
- Non-Member
- County Member
- School Board Secretary
- Superintendent
- Staff
- Administrator
- Exhibitor
- And more
For this example, we’ll choose Member, but you can select the person type that fits the individual you are adding.
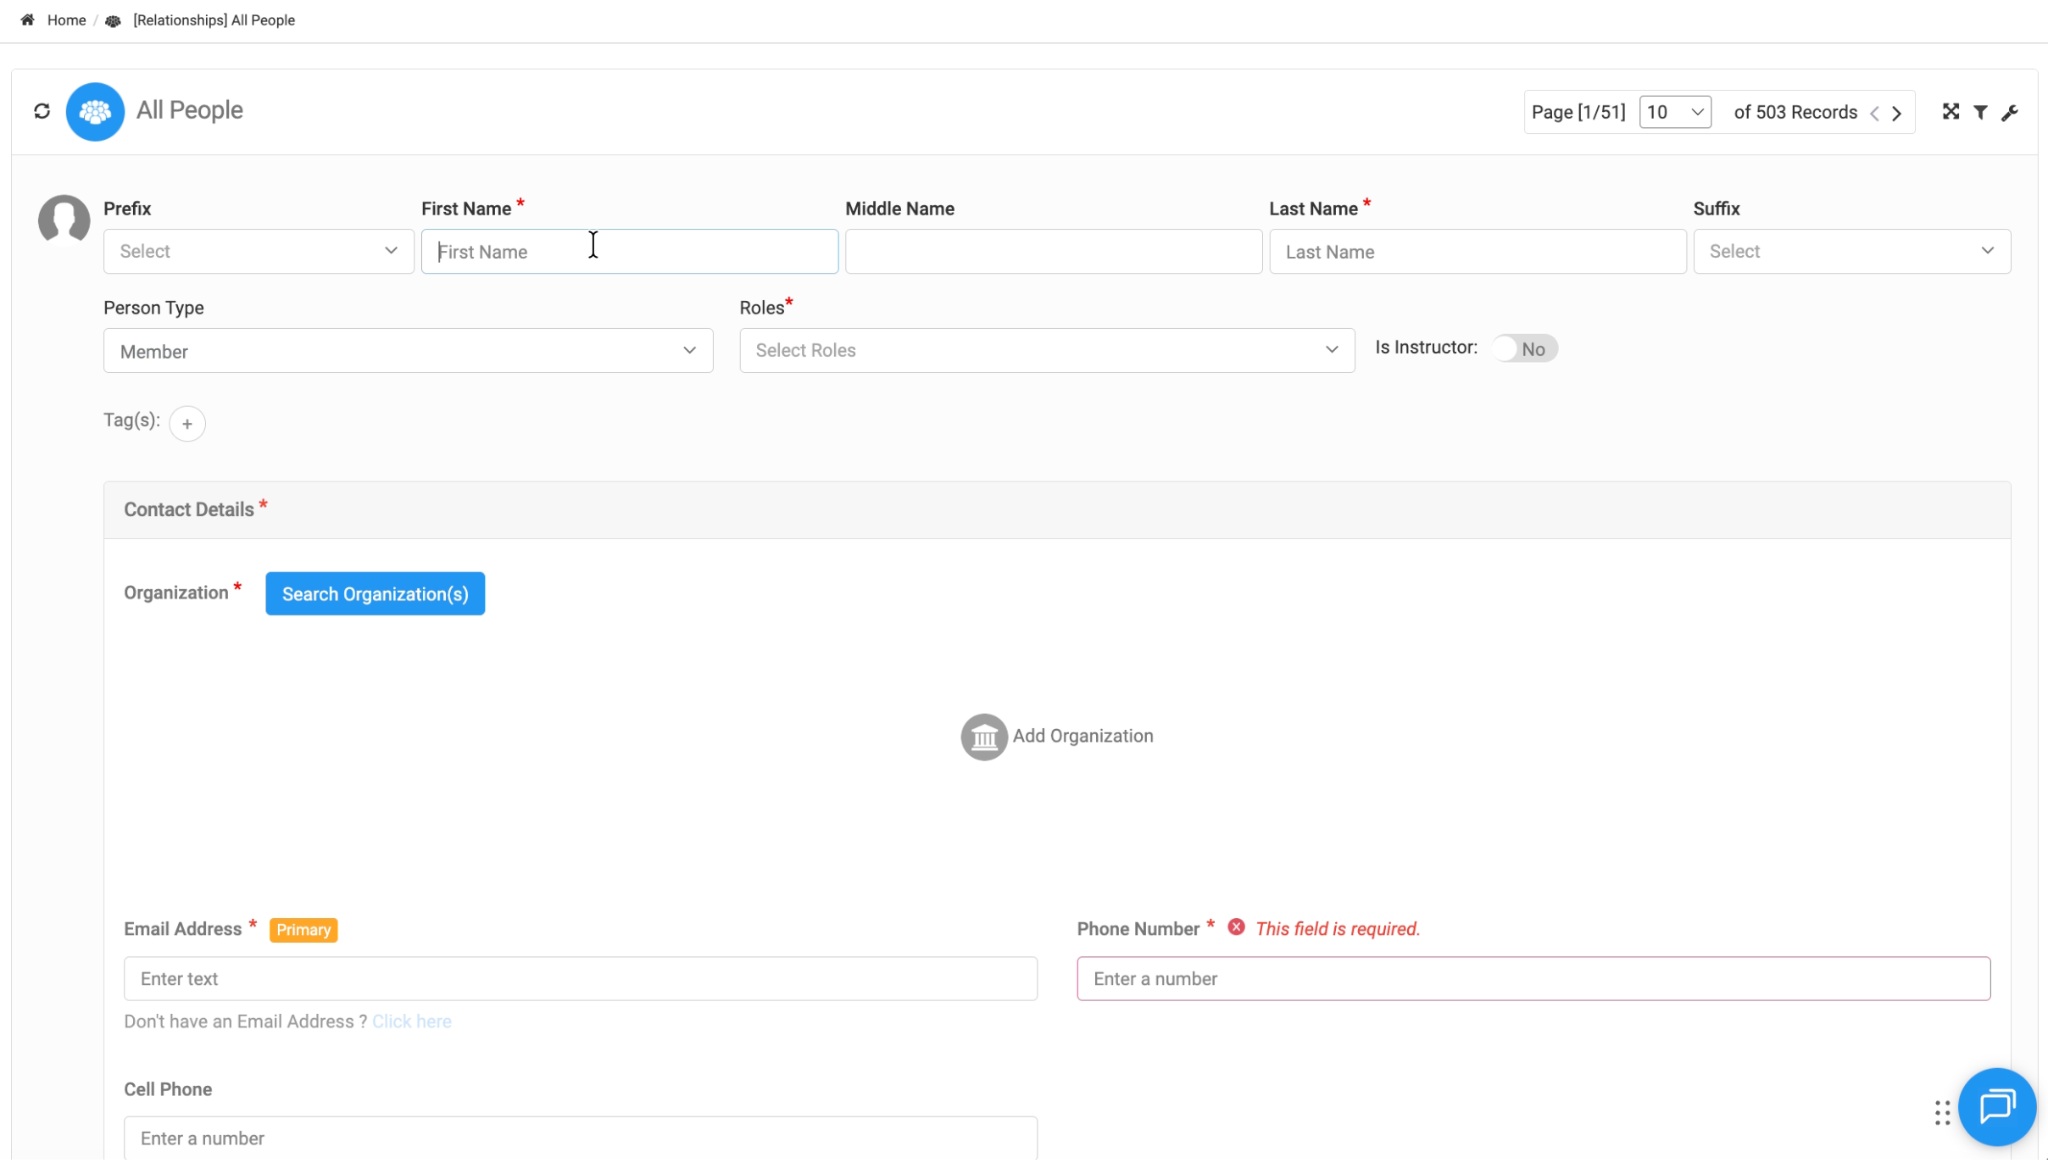
3. Enter Personal Information
Once you’ve selected the person type, you’ll need to input the individual’s personal details.
- First Name
- Last Name
- Role
- Email Address
These fields are required to create the profile for the individual. Also, optional fields can be completed as needed.
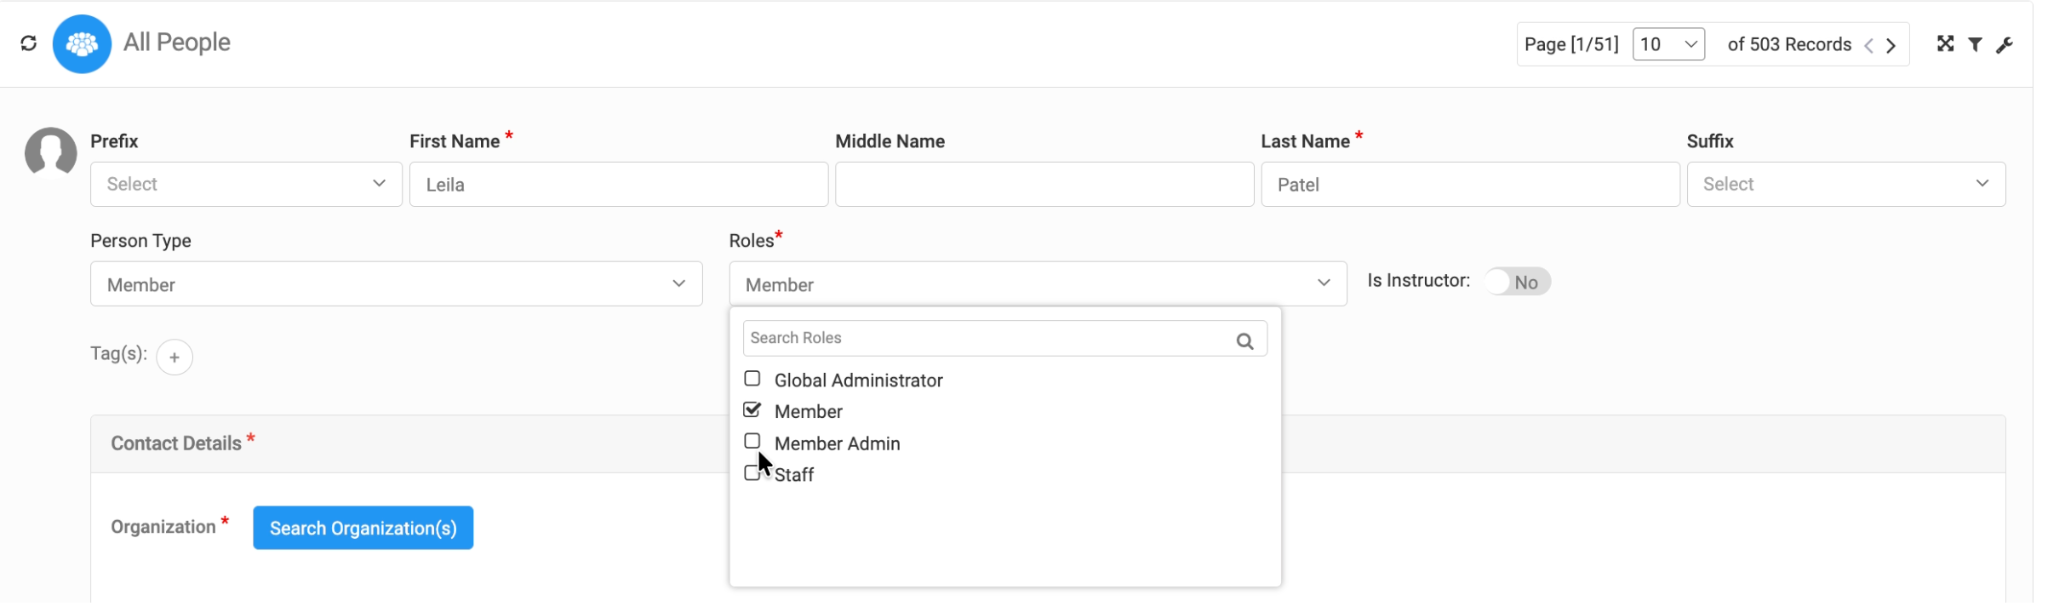
4. Assign Roles
When you select a Person Type, any roles associated with that type are automatically assigned to the individual. In most cases, you will not need to manually assign additional roles.
If you have the appropriate permissions, you may add additional roles on top of those included with the selected Person Type, depending on the individual’s responsibilities.
If the person will serve as an Instructor for classes or training, you can toggle the Instructor option on or off as needed.
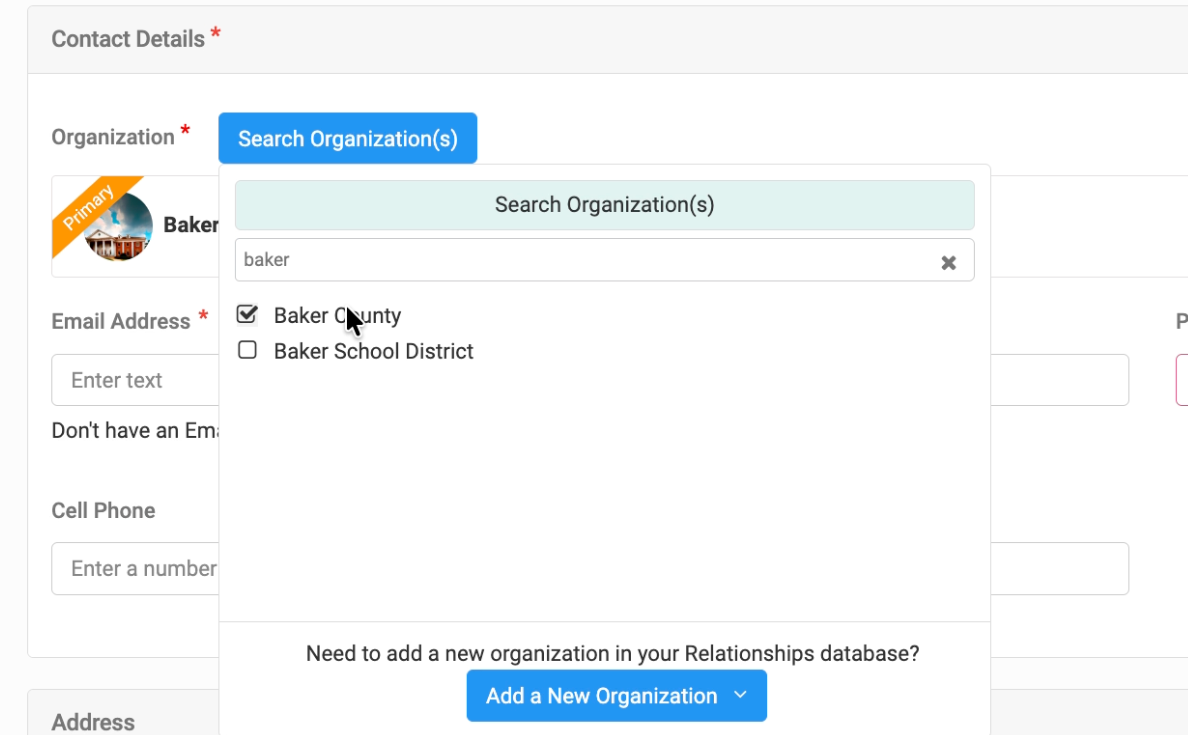
5. Add Organization Information
Next, associate the person with an organization. You can search for an existing organization from your system or create a new one if necessary.
- Search for the Organization
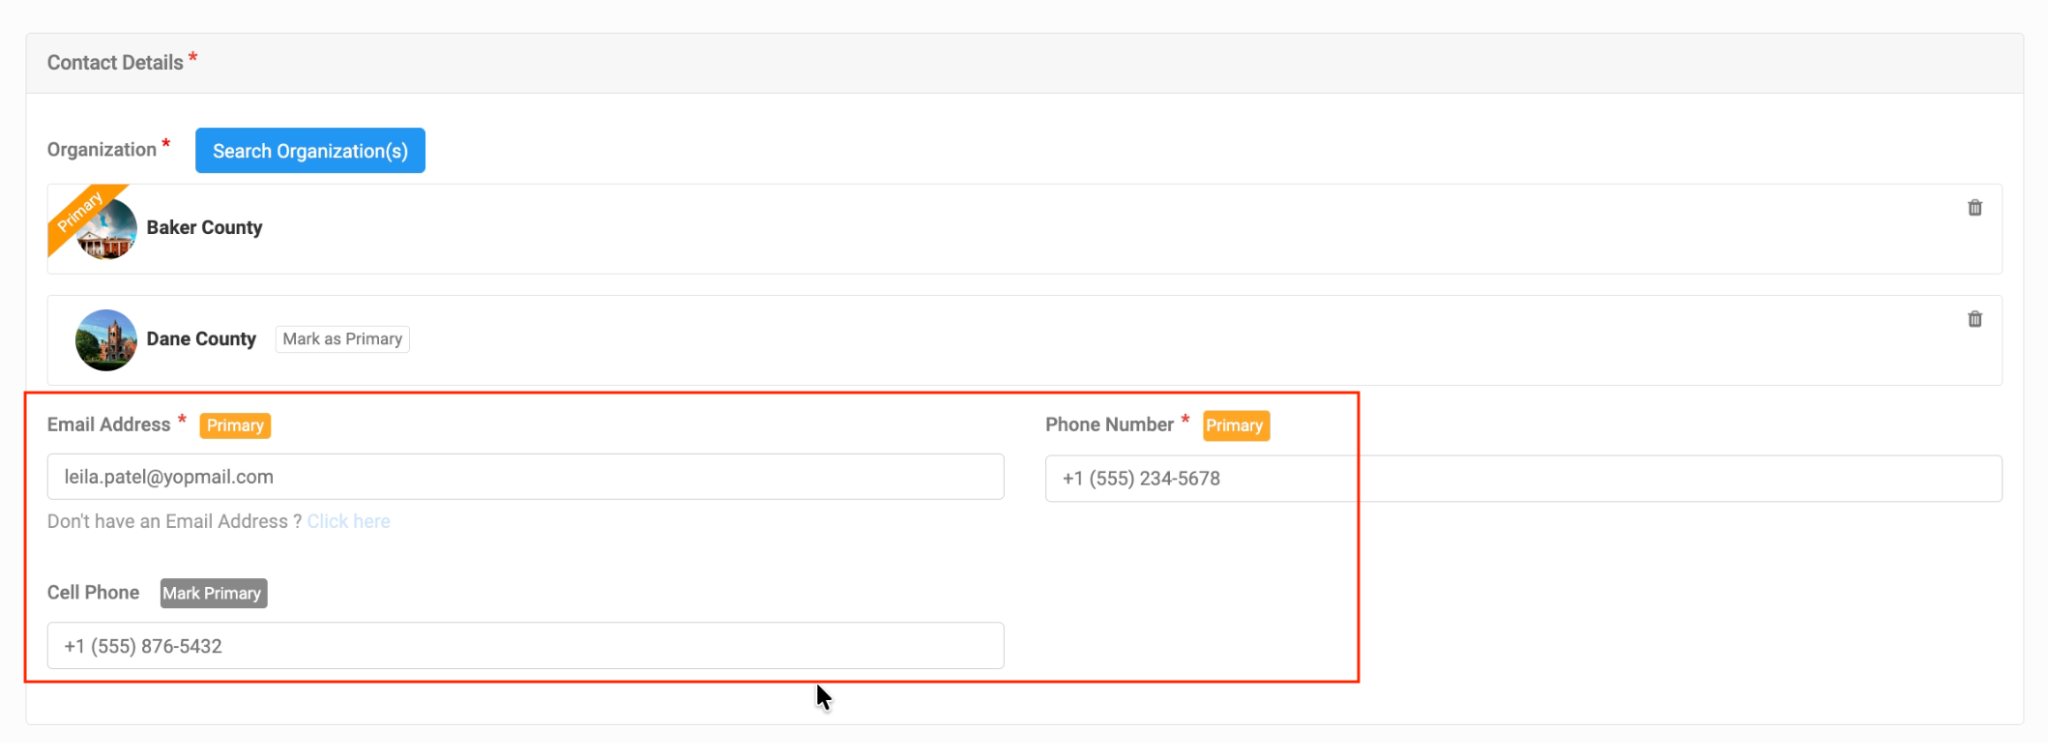
- Select the organization the individual belongs to (e.g., Baker County). If they belong to multiple organizations, mark the correct one as primary.

6. Add Contact Information
Now, fill in the person’s contact details:
- Email Address
- Phone Number
- Cell Phone Number (You can choose to mark this as the primary contact number if preferred)
Ensure that you’re entering accurate contact information, as this will be used for communications and invitations.
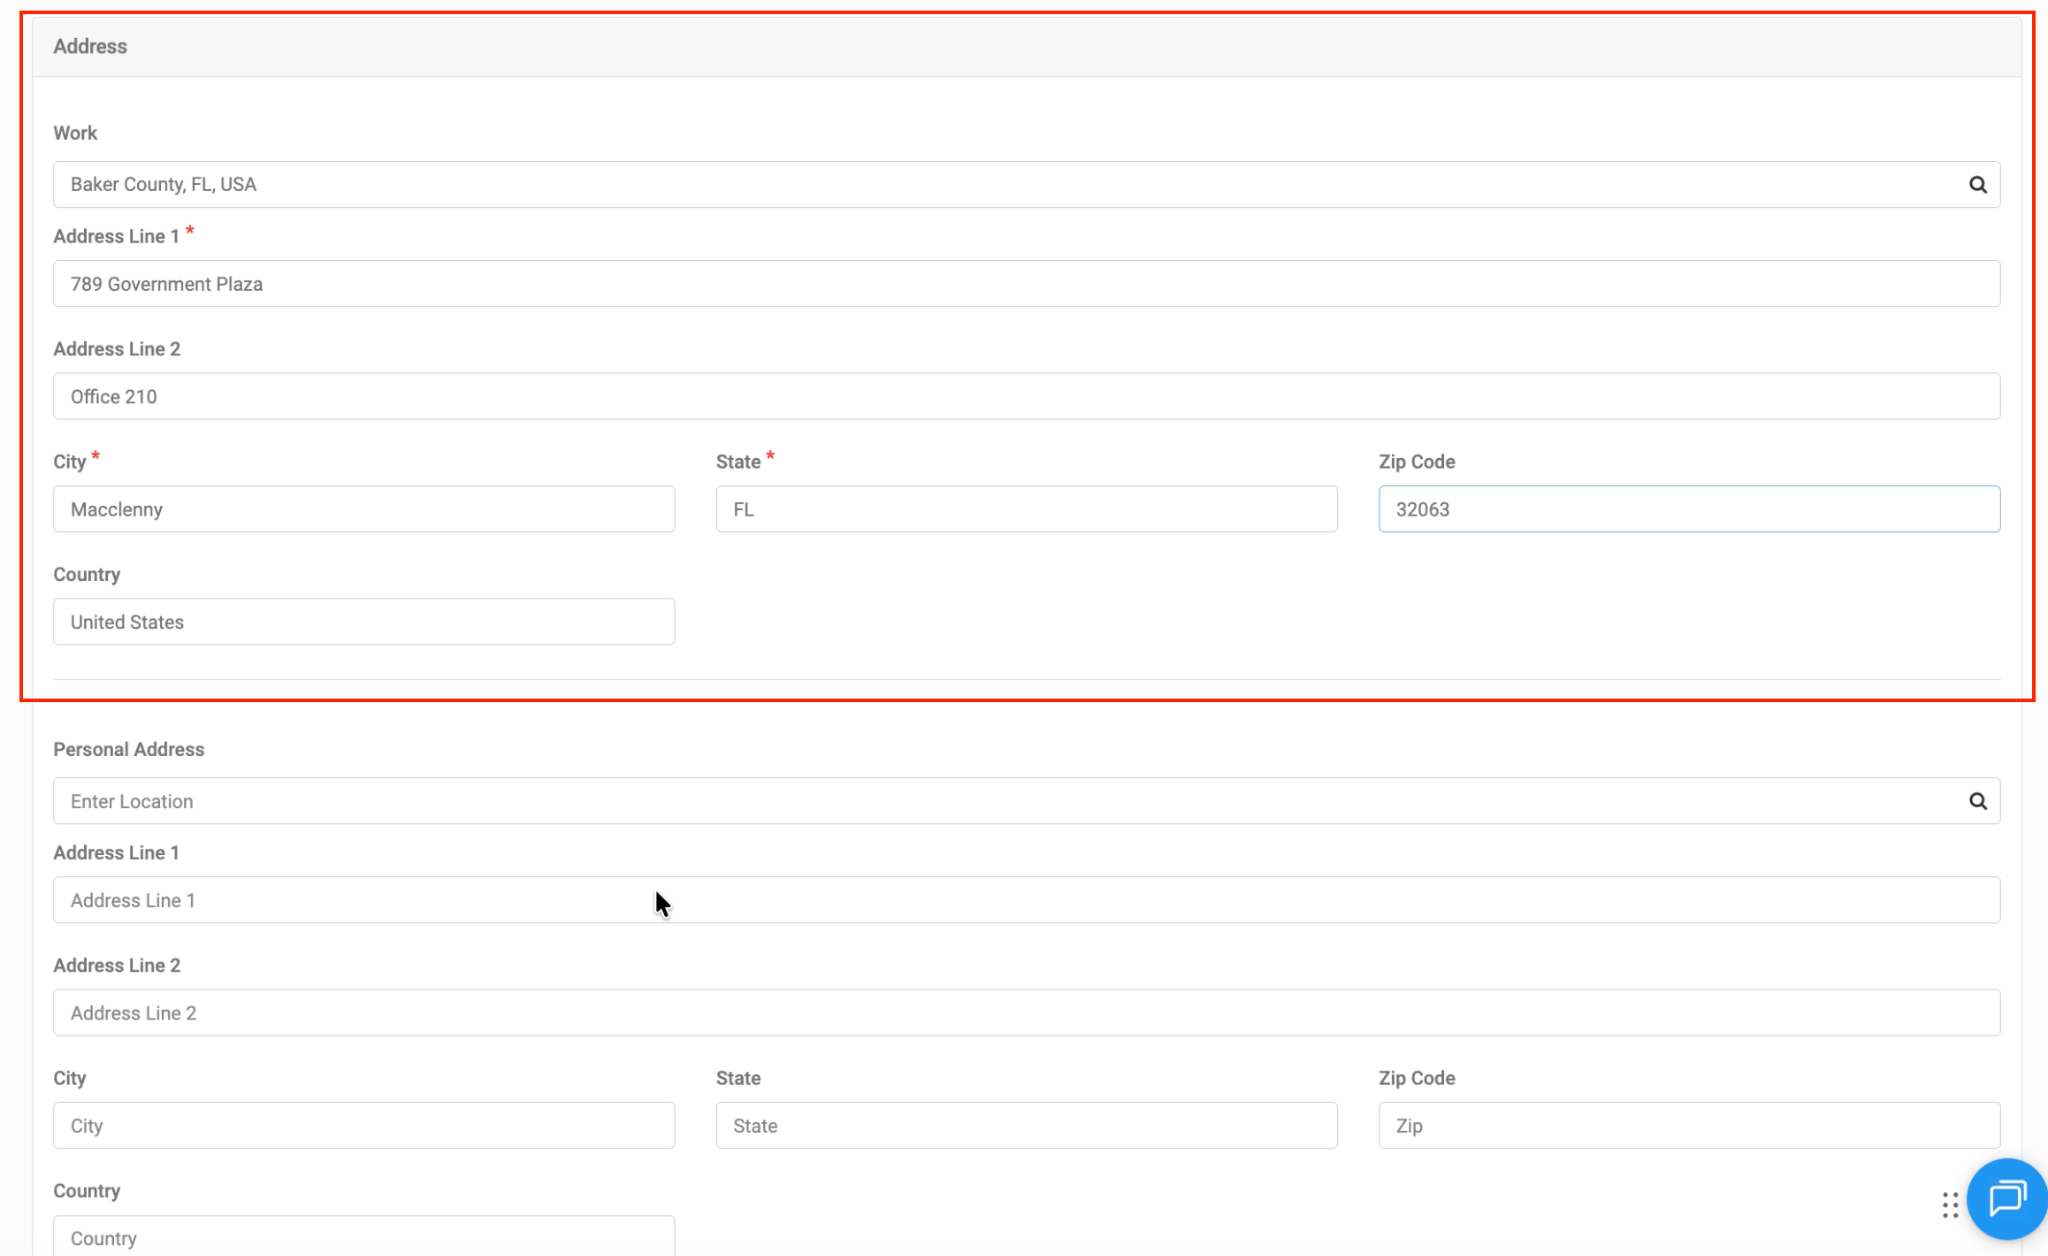
7. Enter Address Information
Add the person’s work address (this is typically their office address):
- Address Line 1
- Address Line 2 (Optional)
- City
- State
- Zip Code
Personal address is optional and can be left blank if not required.
Note: Your records may have additional fields custom to your configuration. See your internal administrator for help with adding or managing fields.
8. Save and Invite
Once all the information has been entered, you can click Save to finalize the process.
In many cases, administrators add individuals to the system simply to maintain accurate database records. Not every person added to Engagifii needs login access. For example, you may be tracking leadership history, board positions, or organizational contacts without requiring them to access the platform.
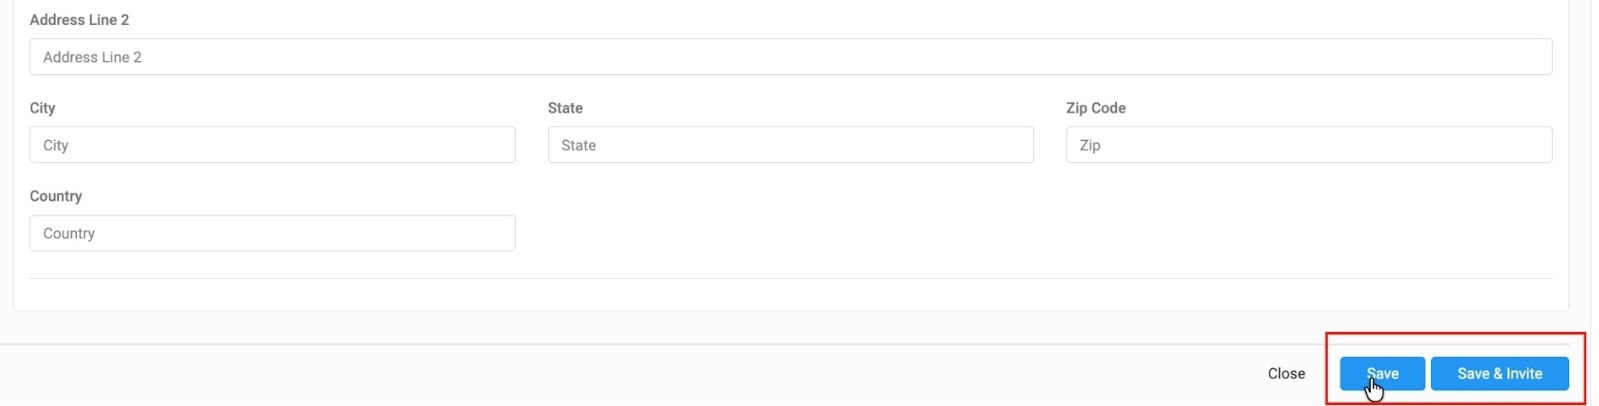
If the individual needs access to Engagifii, select Save and Invite. This will send them an email invitation to create their login credentials and access the platform.
9. Profile Customization
After saving, you can customize the individual’s profile further:
- Upload a Profile Picture
- Assign a Title (e.g., County Administrator)
- Send an Invite to the individual if it hasn’t been done earlier for account creation, and they will receive an email at the provided address.
- View/Edit the Profile to add or change details as needed.
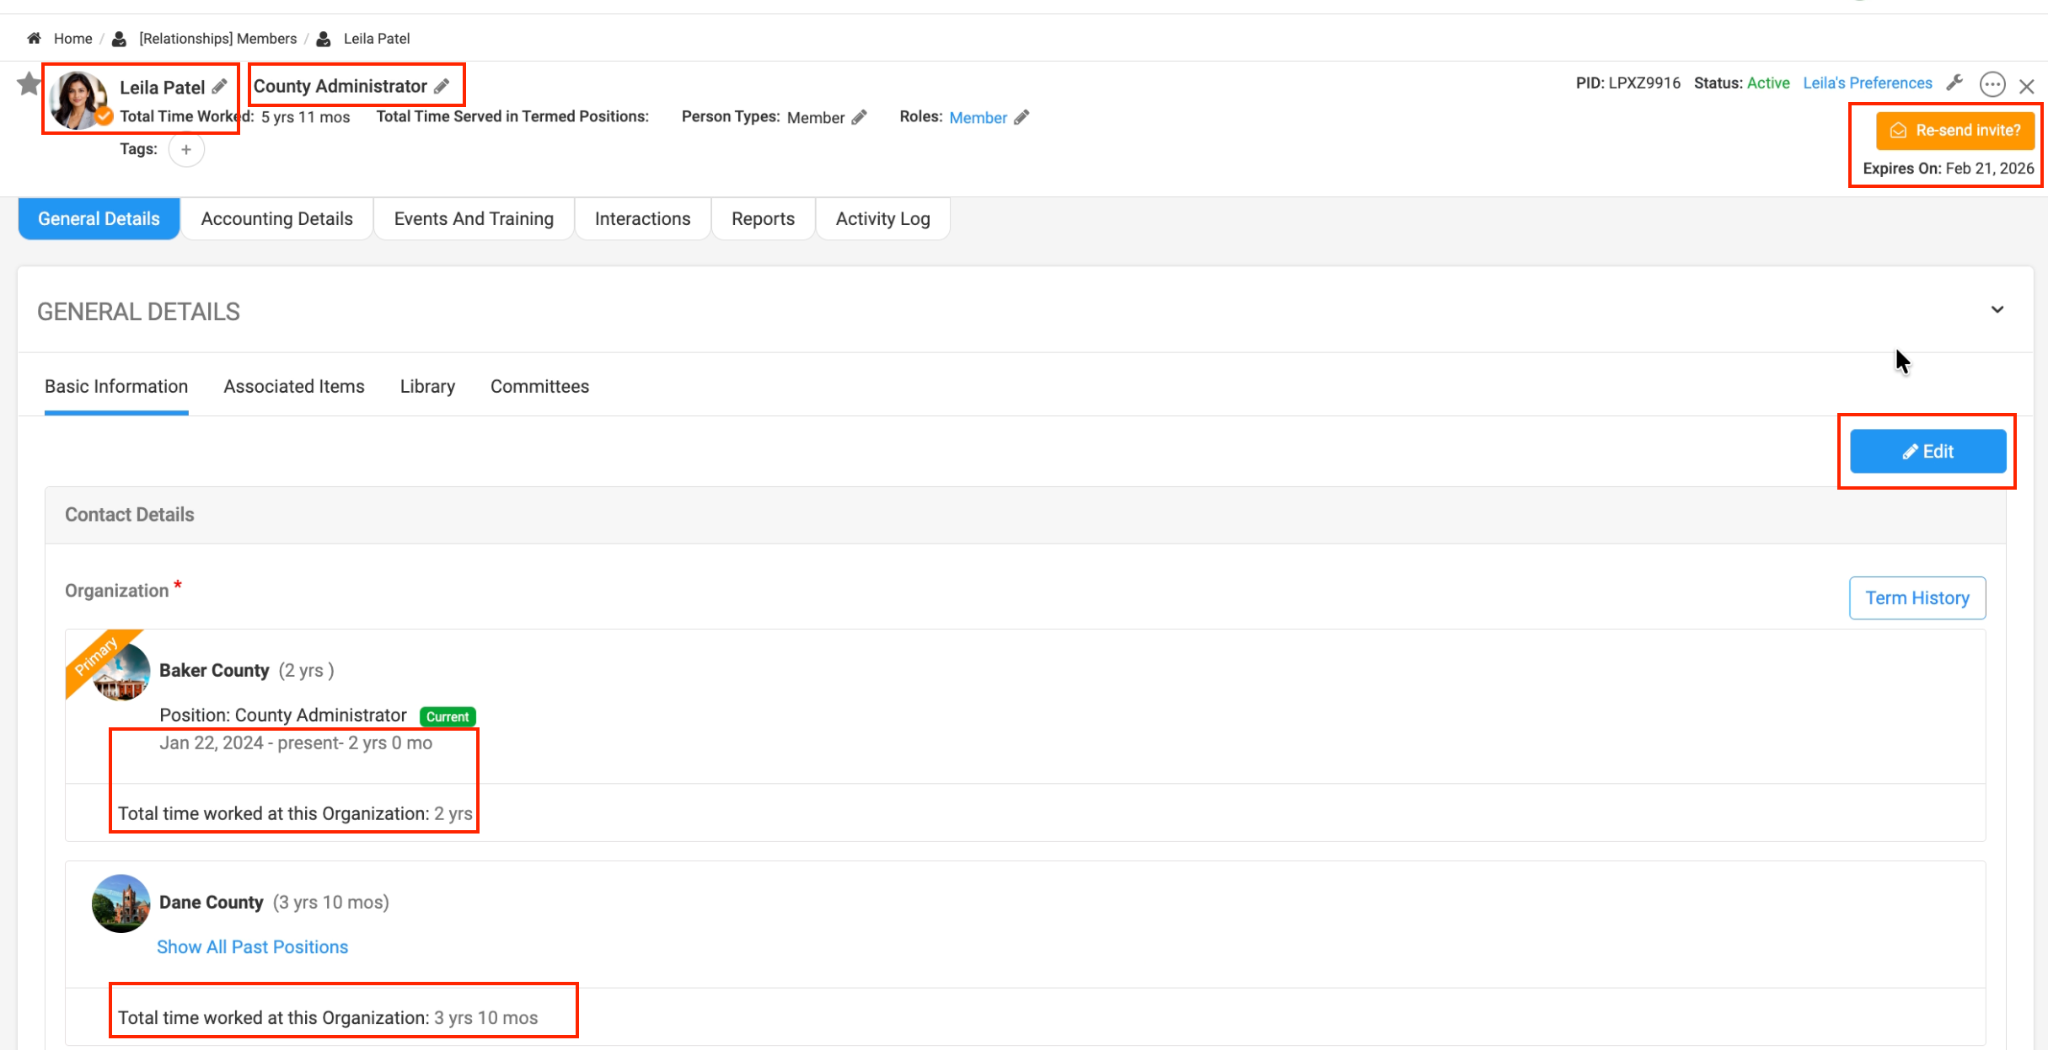
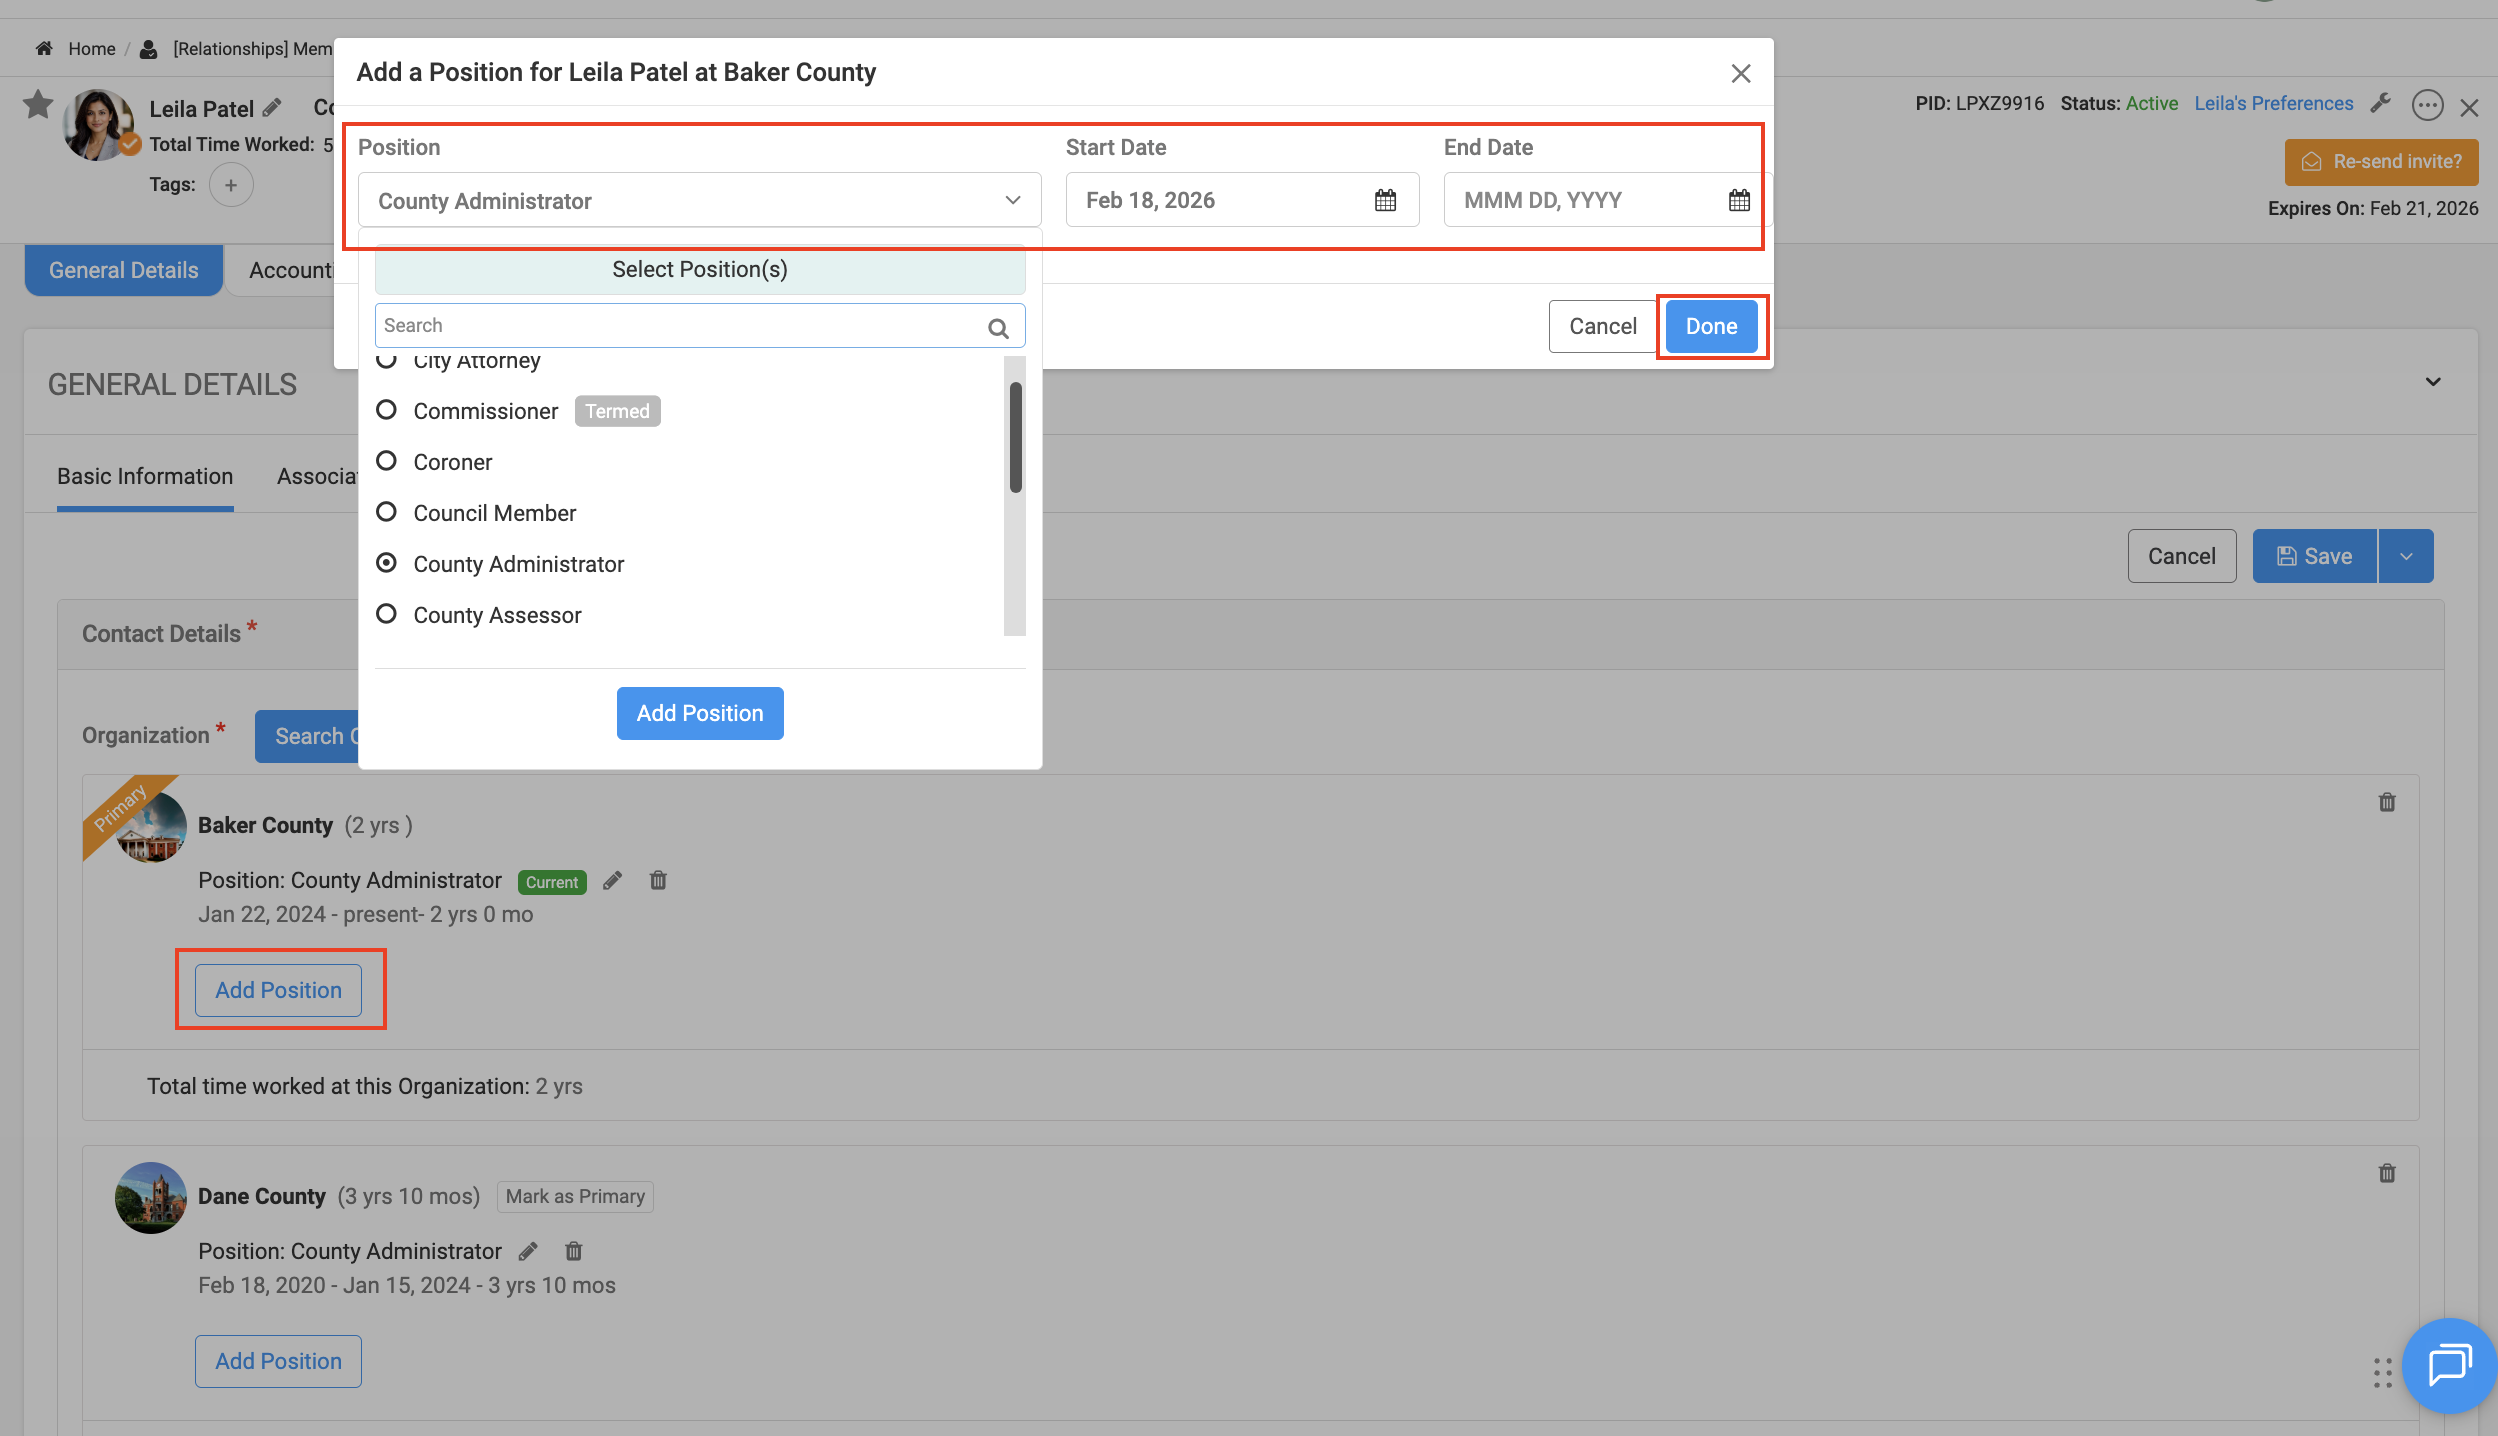
- Add Position for current and previous organizations
- Add/Edit tenure for current and previous organizations
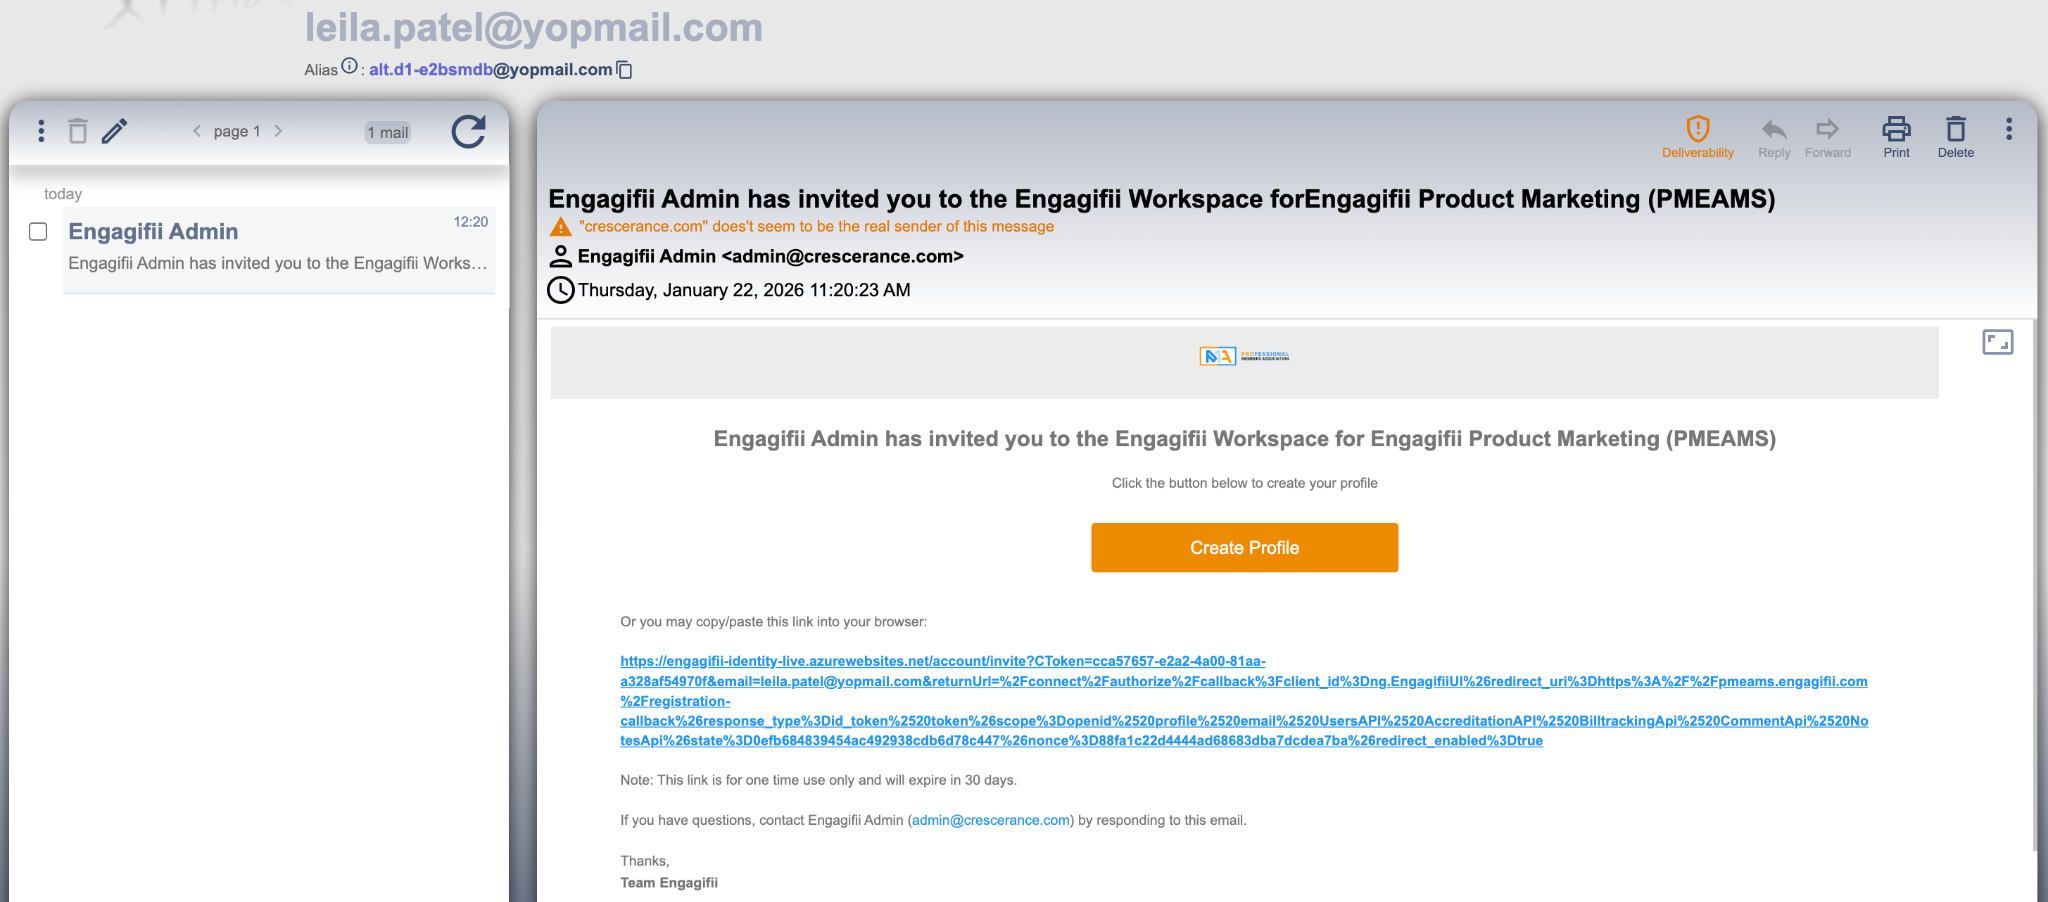
10. How the Person Will Receive the Invitation
If you selected the Send Invitation option, the individual will receive an email inviting them to create their profile on the Engagifii platform. They can follow the link in the email to set up their password and gain access to the system.
FAQs
Q: Can I add multiple people at once?
A: Currently, adding people is done one by one.
Q: What happens after I send an invite?
A: The recipient will receive an email with a link to create their profile and login credentials. Once they’ve created their profile, they can access the system.
Q: Can I assign multiple roles to a person?
A: Yes, you can assign multiple roles to a person depending on their responsibilities within your system. For example, someone can be both a Member and Staff.
We hope this update improves your experience with Engagifii.
Have questions or feedback? Please write to our support team at support@engagifii.com