Configure your AI-powered member support workspace
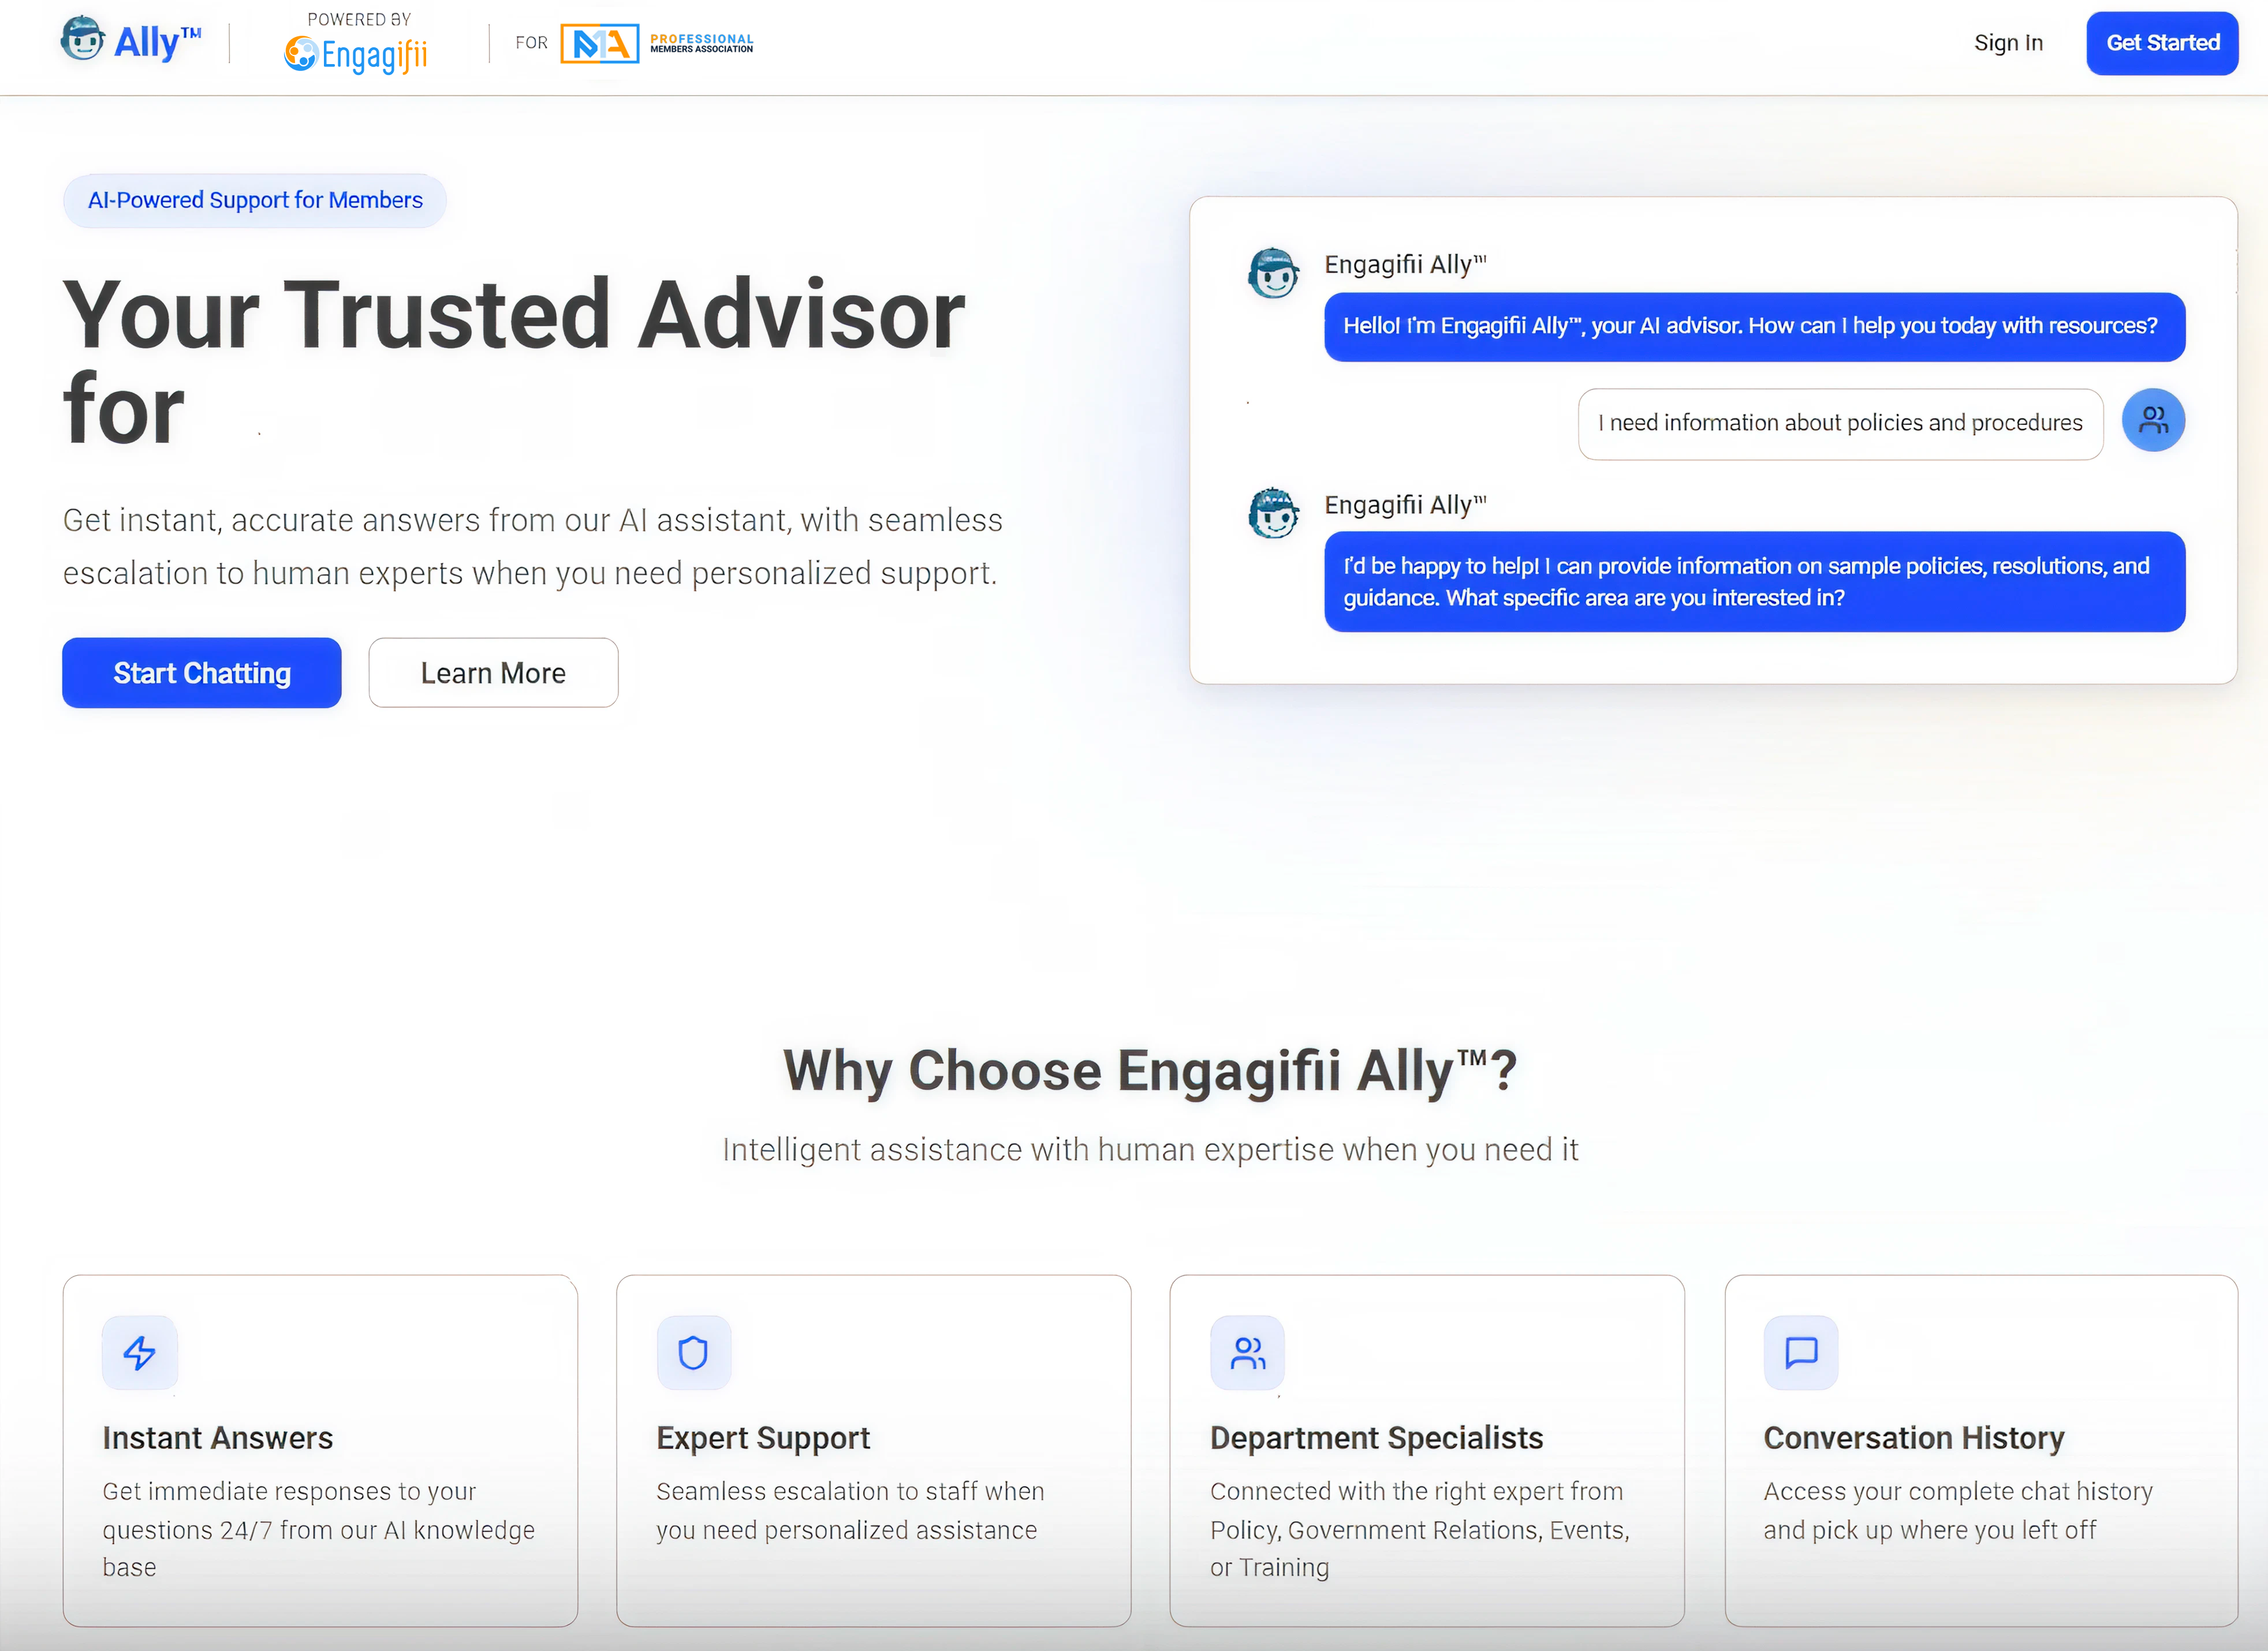
Engagifii ALLY enables members to ask questions anytime through a chatbot, reducing reliance on calls and emails. Administrators can customize their workspace through various settings such as organization details, branding, AI behavior, escalation rules, and integrations. By properly configuring these settings, organizations can deliver a seamless, branded, and efficient support experience while maintaining control over responses, human escalation, and system behavior.
Before You Begin
Understanding Personas
Engagifii ALLY includes three key personas:
- Admin – Organization admins who configure and manage their workspace
- Staff – Team members from the organzation who handle escalated conversations
- Member – End users who interact with Engagifii ALLY for support
Admins are responsible for setting up and managing their organization’s workspace.
Accessing Workspace Settings
- Navigate to the Engagifii ALLY sidebar menu
- Click Admin → Settings
- You will be redirected to the System Settings screen
This is where all configurations for your organization are managed.
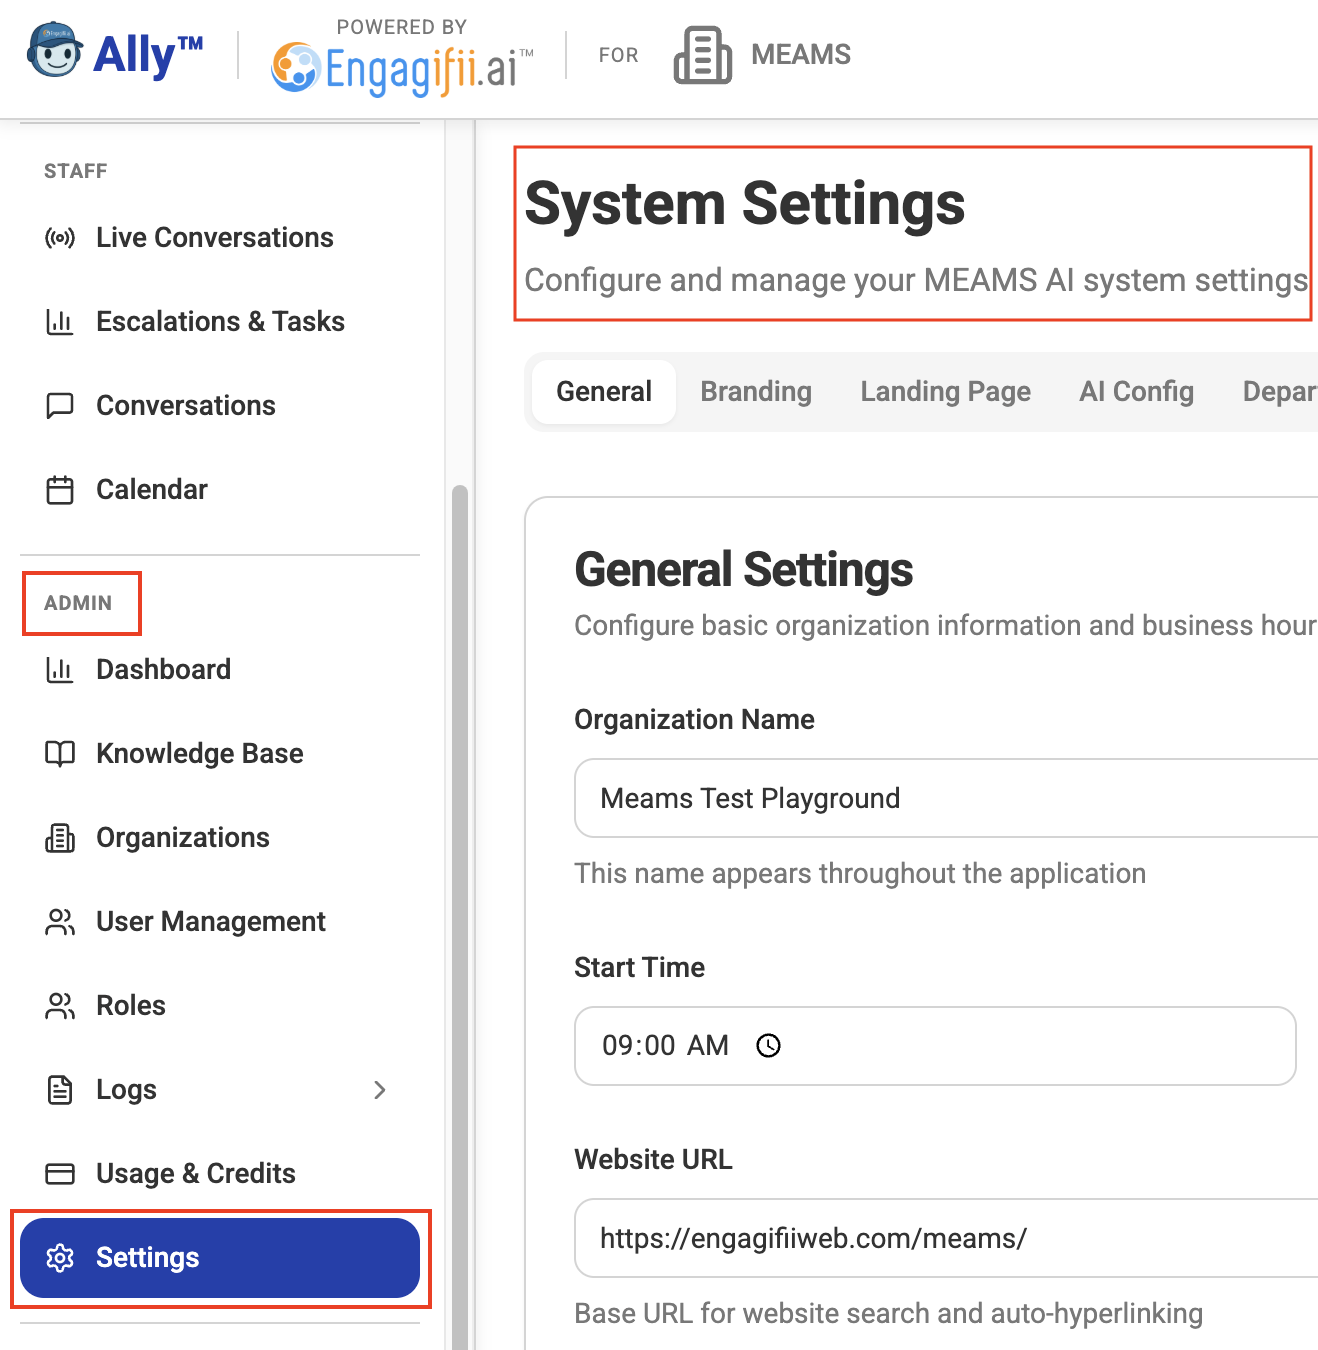
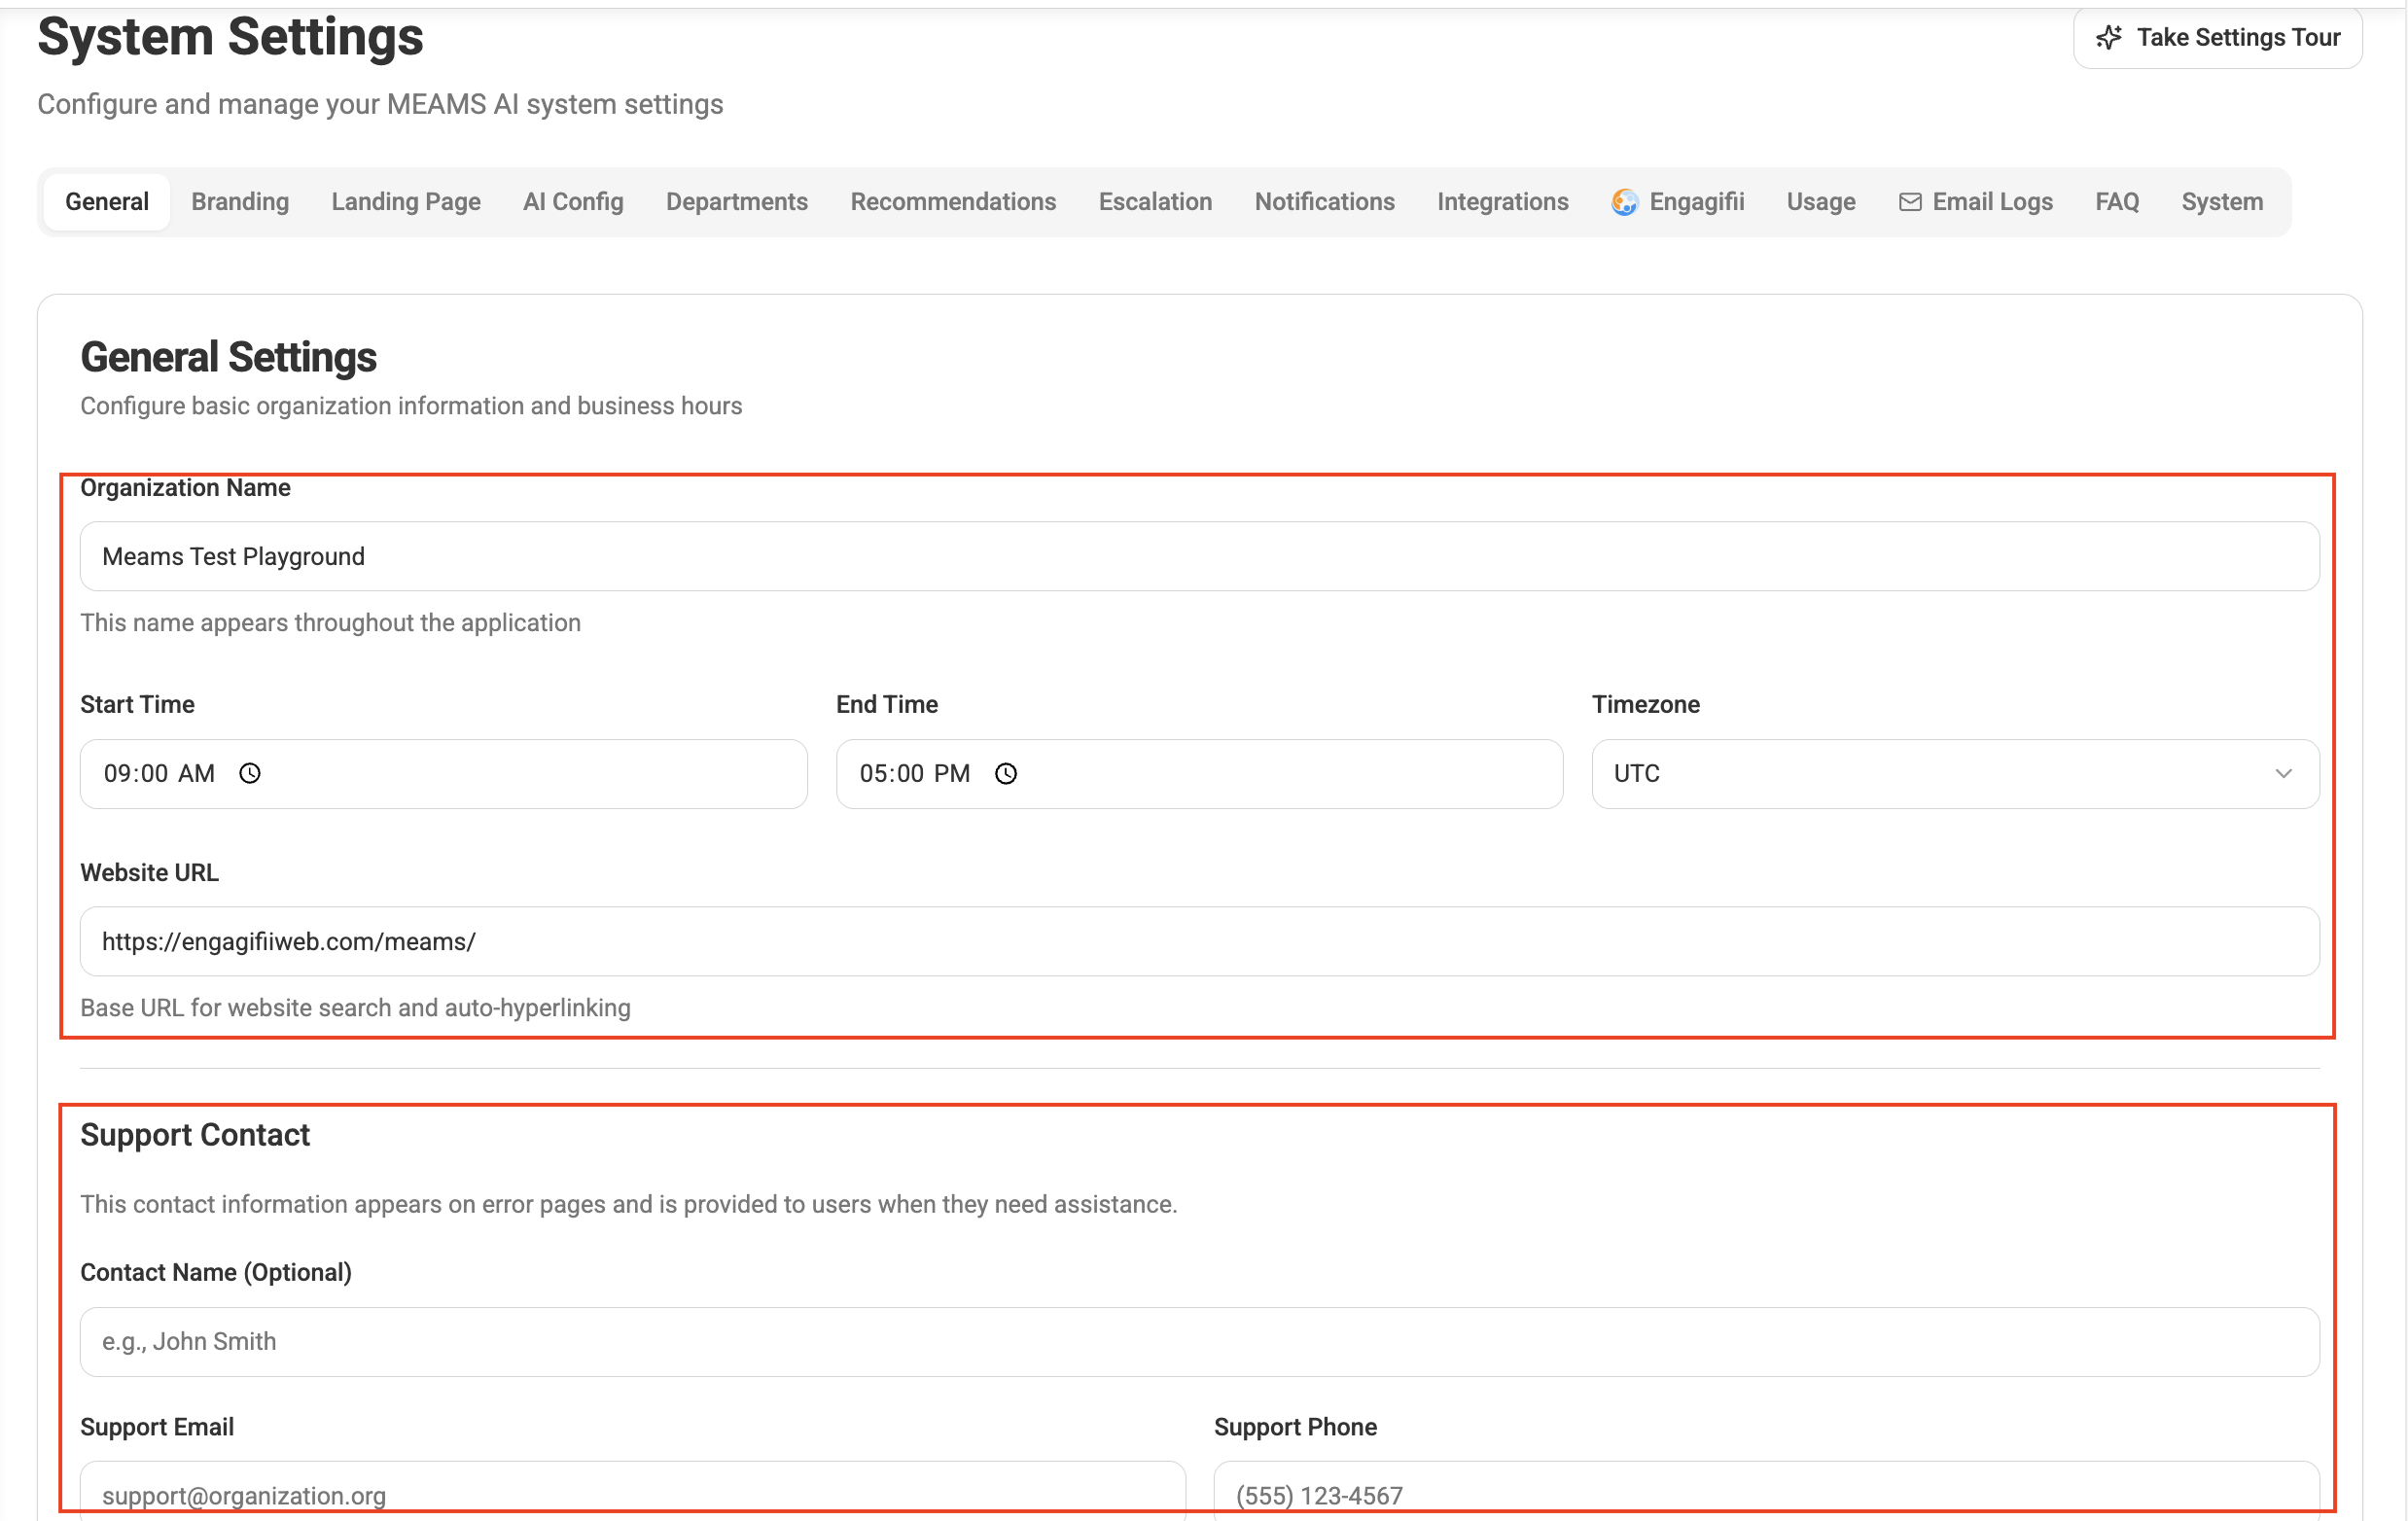
General Settings Tab
Configure your organization’s core details and support availability.
Organization Details
- Update your Organization Name
- Add your Website URL
Working Hours & Time Zone
- Set Start and End Time for support
- Define your Time Zone
These settings determine when human staff will respond to escalated chats. Outside these hours, only the chatbot will respond.
Support Contact Information
Add contact details visible to members during chats:
- Name (Optional)
- Phone Number
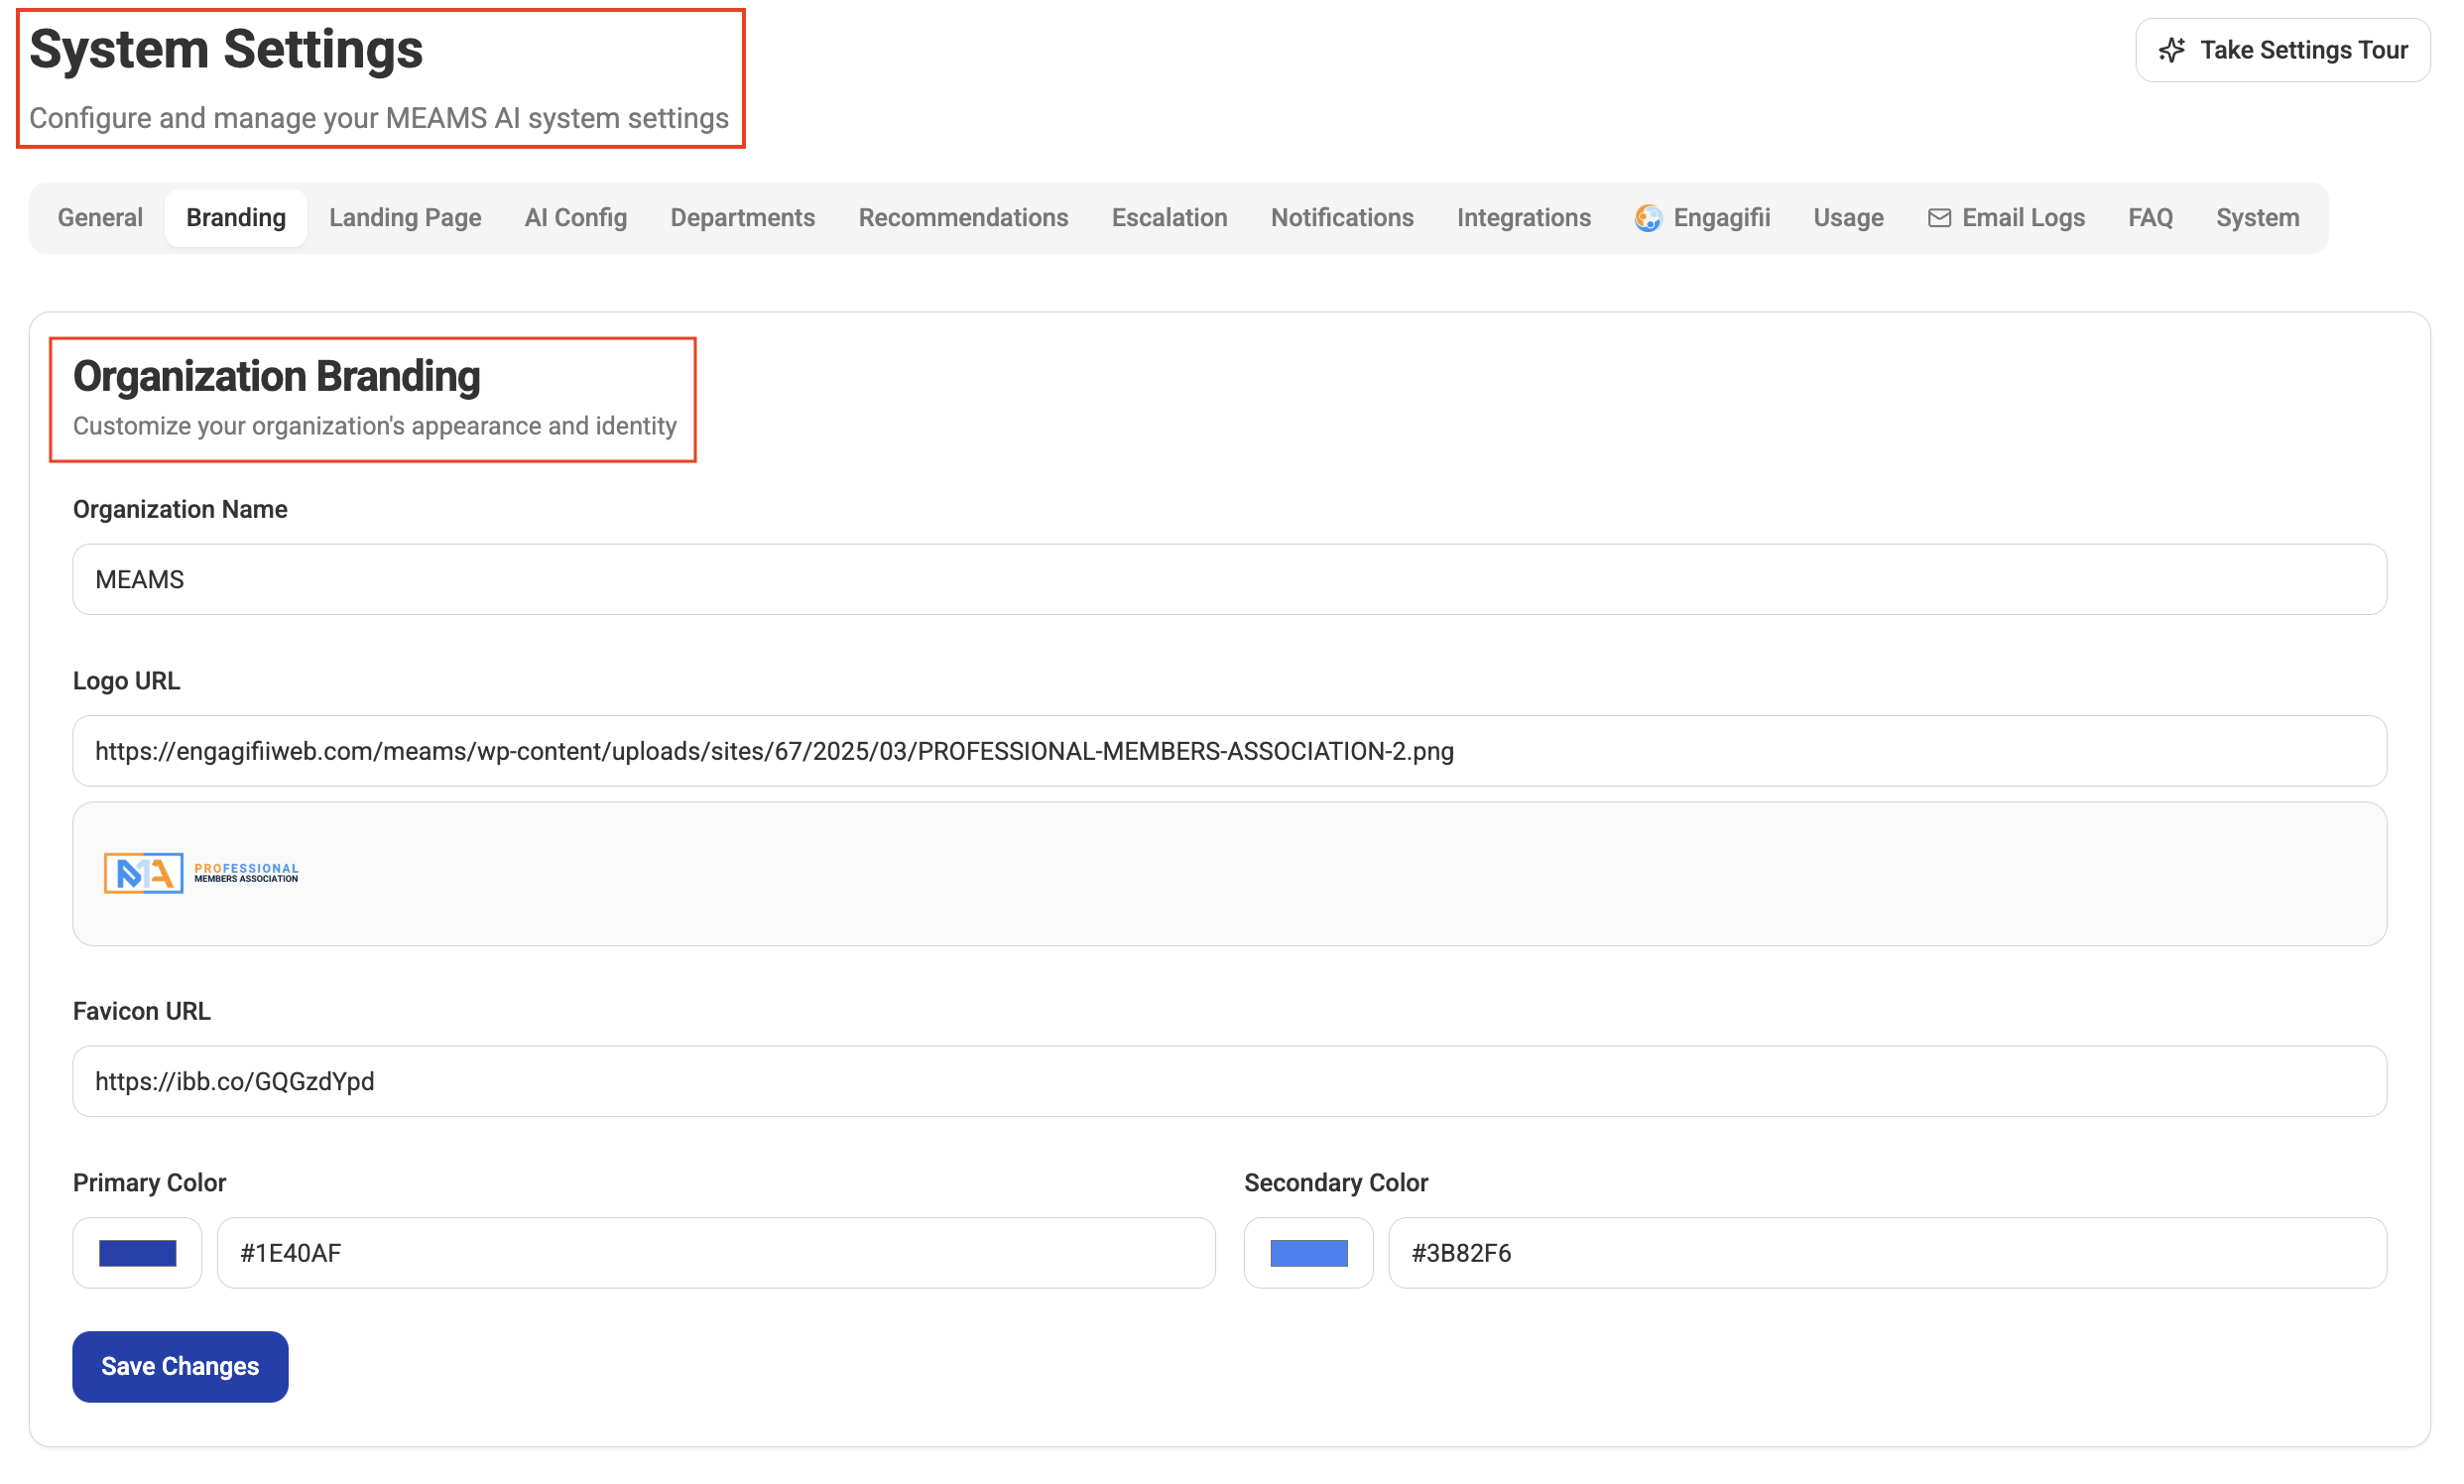
Branding Tab
Customize how your Engagifii ALLY workspace appears to members.
- Set Organization Name (Header Display)
- Upload Logo URL
- Add Favicon URL
- Define Primary and Secondary Colors
This ensures your chatbot experience aligns with your organization’s branding.
Landing Page Tab
Customize the public-facing Engagifii ALLY's landing page.
- Edit Hero Section headline, tagline and description
- Update icons, title and text labels in the Feature Section
- Customize footer content
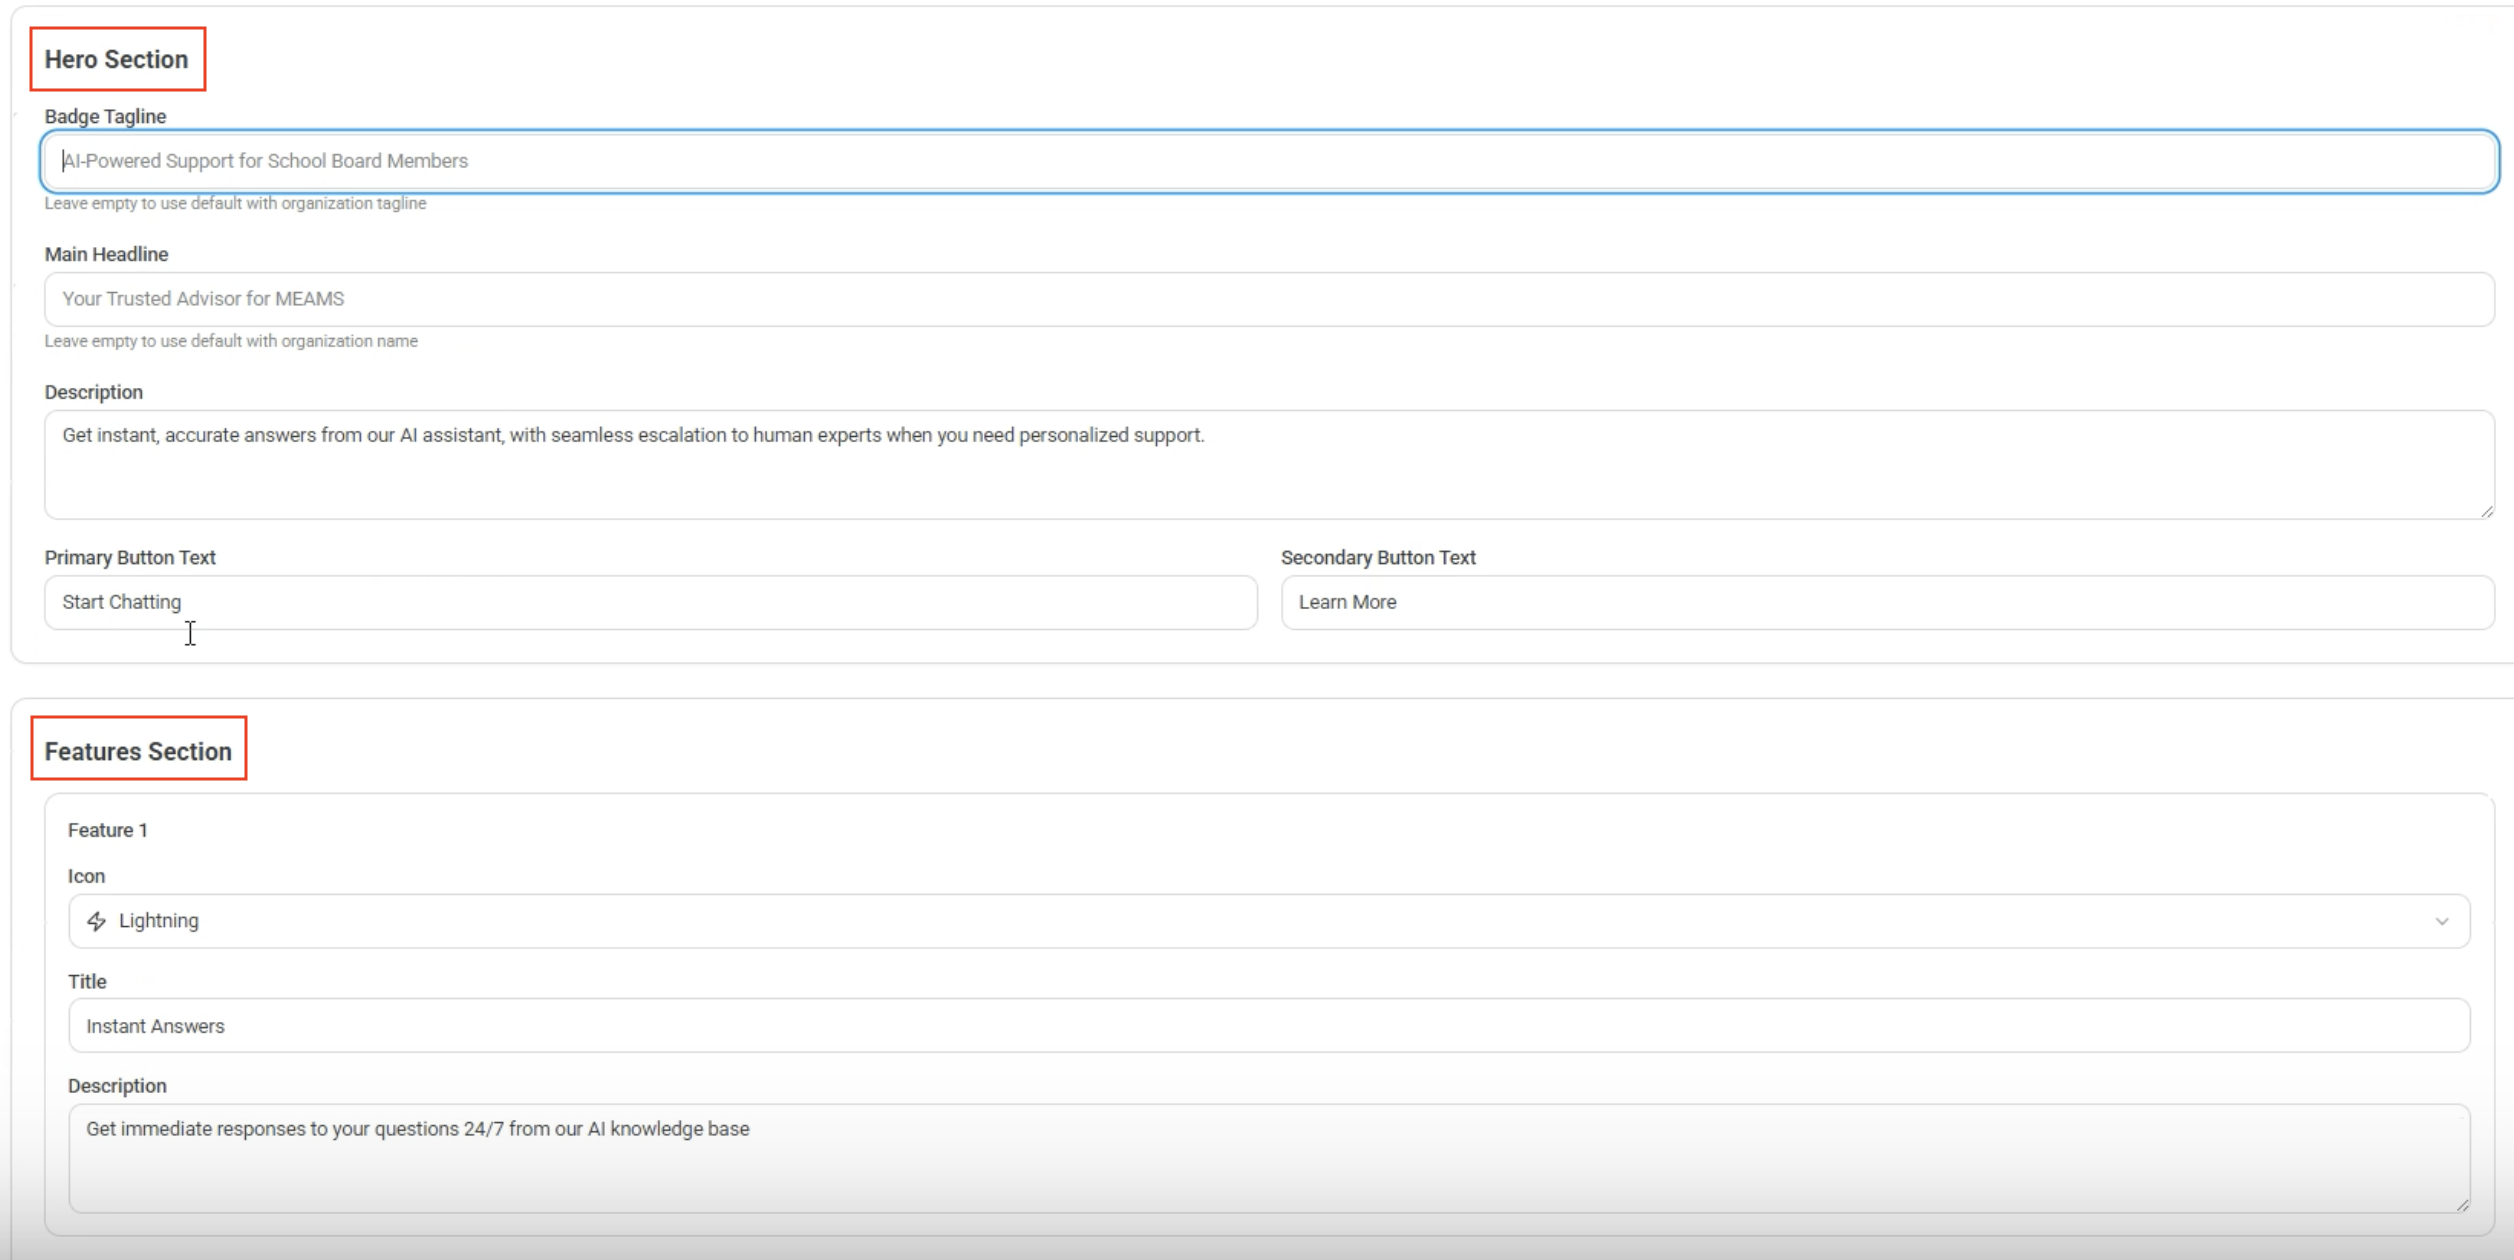
You can also get a preview of how the landing page is looking
This page is fully customizable to match your organization’s messaging and tone.
AI Configuration Tab
Control how the chatbot behaves and responds.
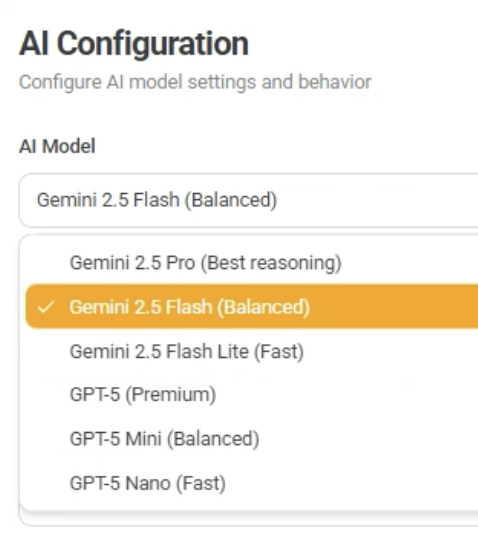
AI Model Selection
- Choose the AI model (affects cost and performance)
Response Behavior
- Temperature → Controls creativity of responses
- Max Tokens → Limits response length and cost
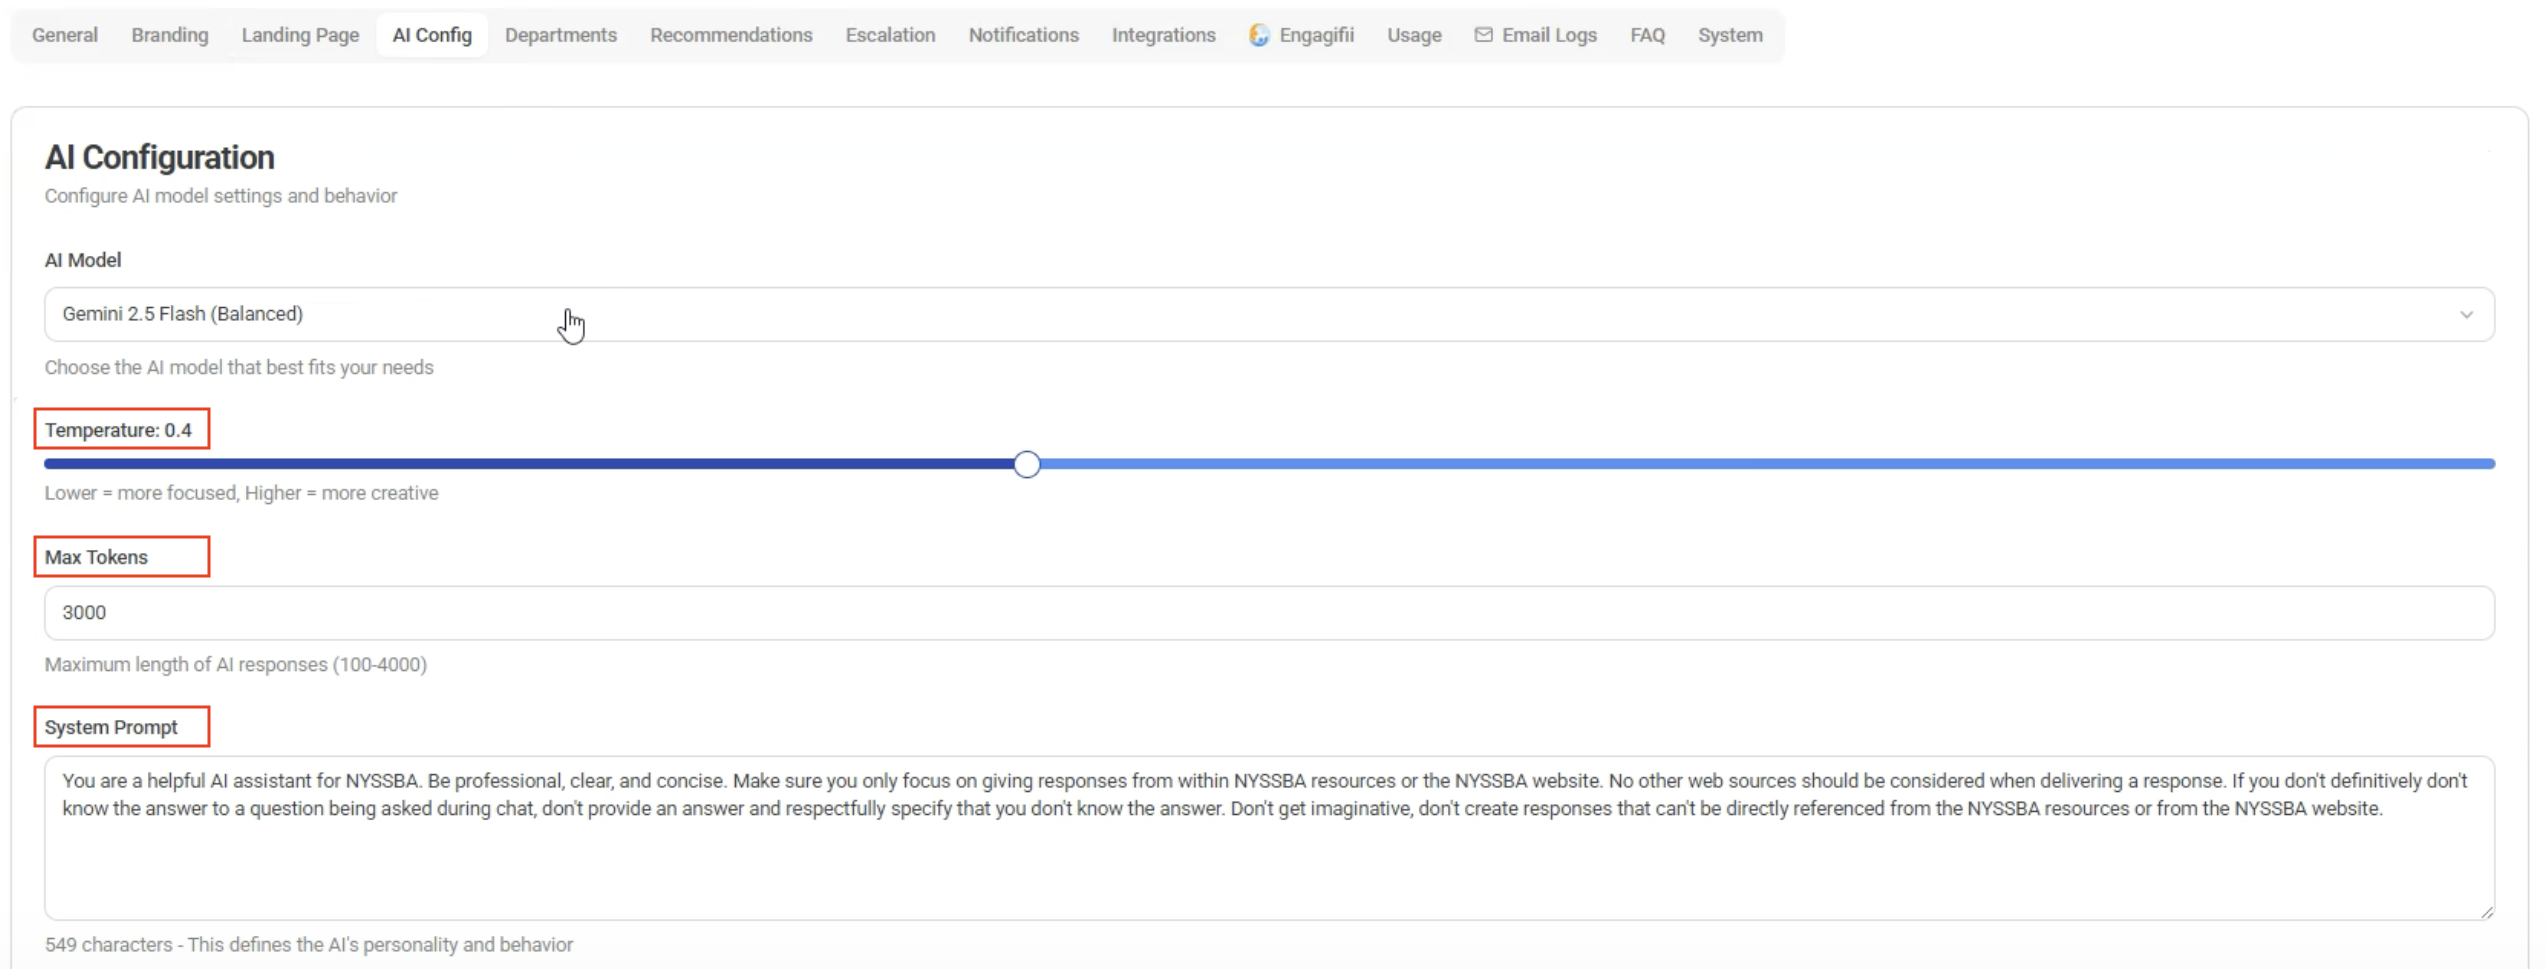
System Prompt
Define the chatbot’s personality and behavior, such as:
- Staying accurate
- Avoiding hallucinations
- Using only trusted knowledge sources
Knowledge Source Settings
- Toggle Website Links in Responses
- For Knowledge Source Priority choose between:
- Knowledge Base (resources which admin has uploaded for Ally's knowledge base)
- Website Content (information fetched by organization website scraping)
- Balanced approach (50-50)
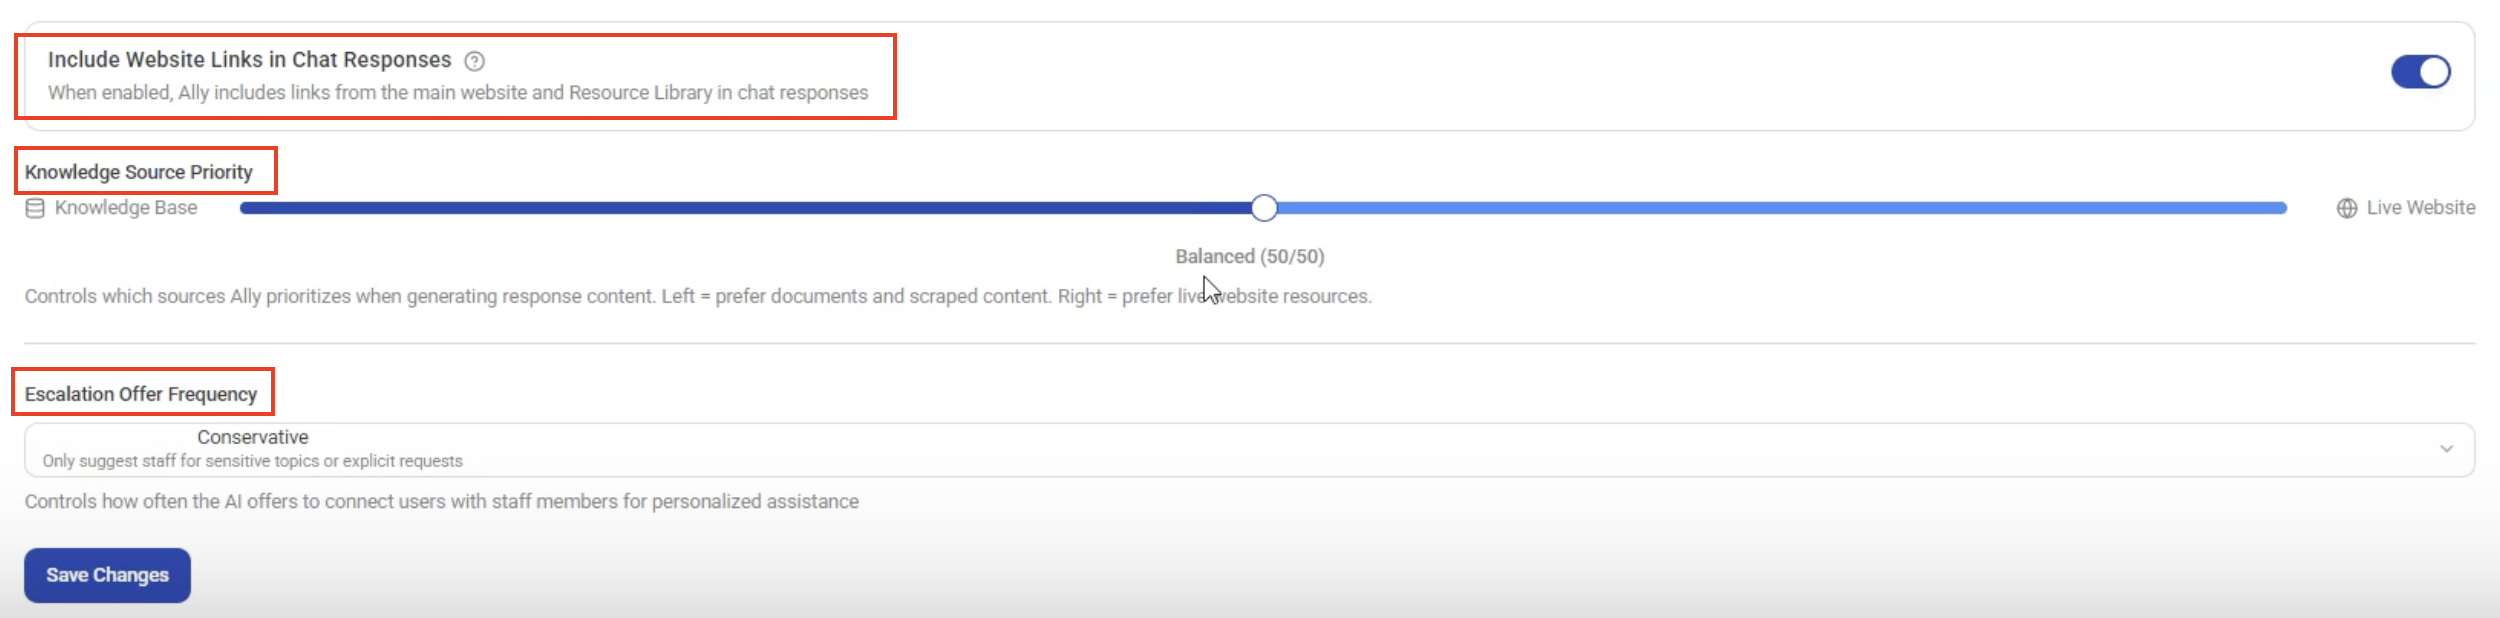
Additional Controls
- Configure Escalation Frequency
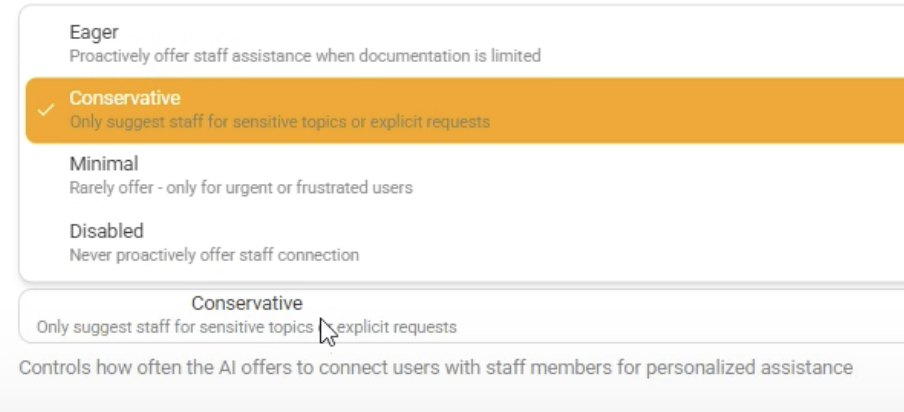
Escalations Tab
Define when and how chats are escalated to staff.
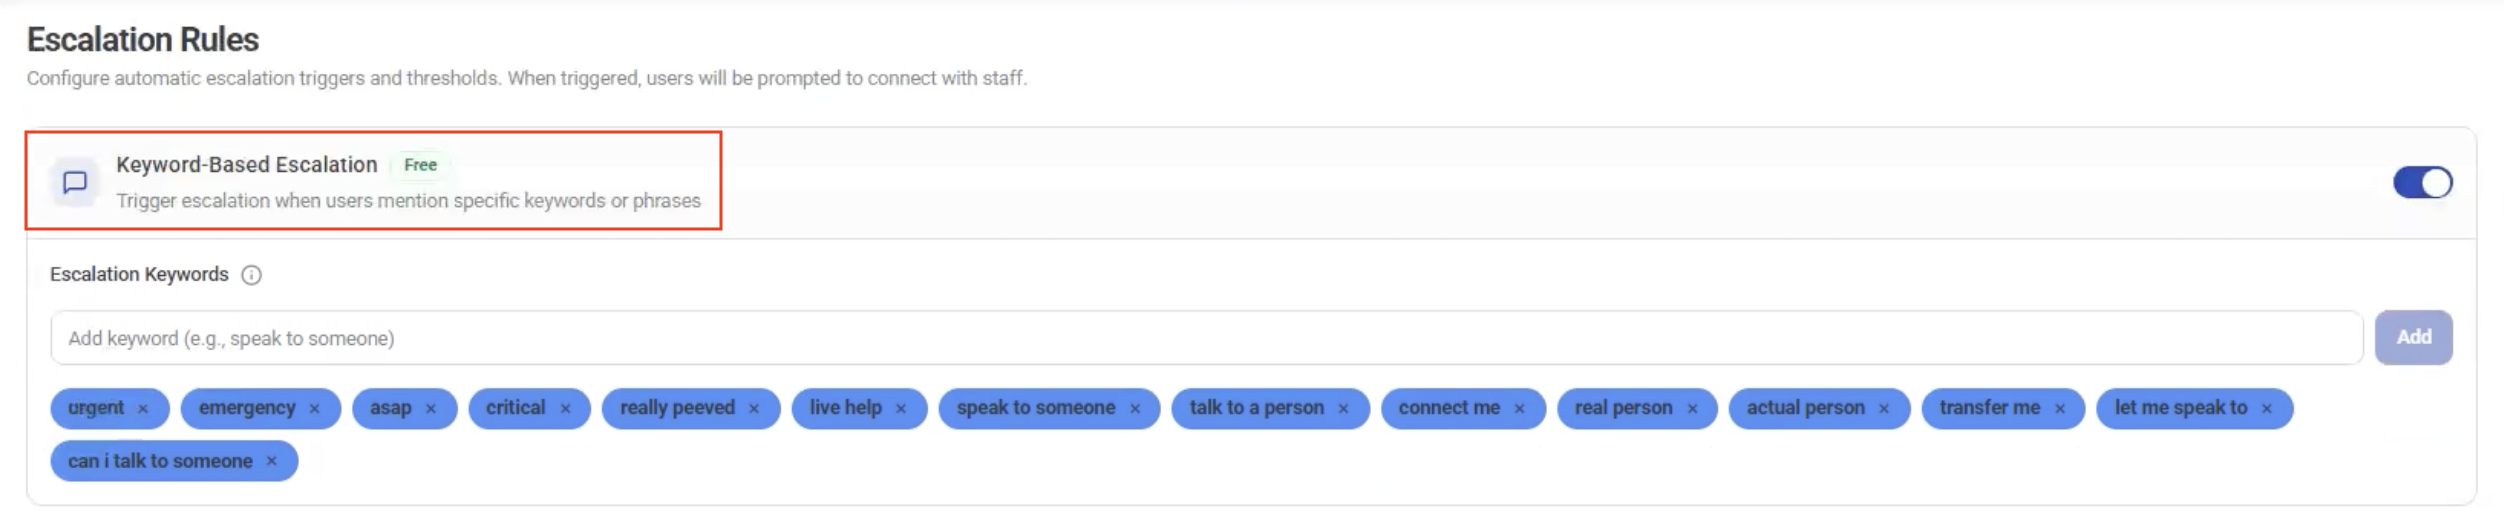
Keyword-Based Escalation
Set trigger phrases like:
- “Urgent”
- “Talk to a human”
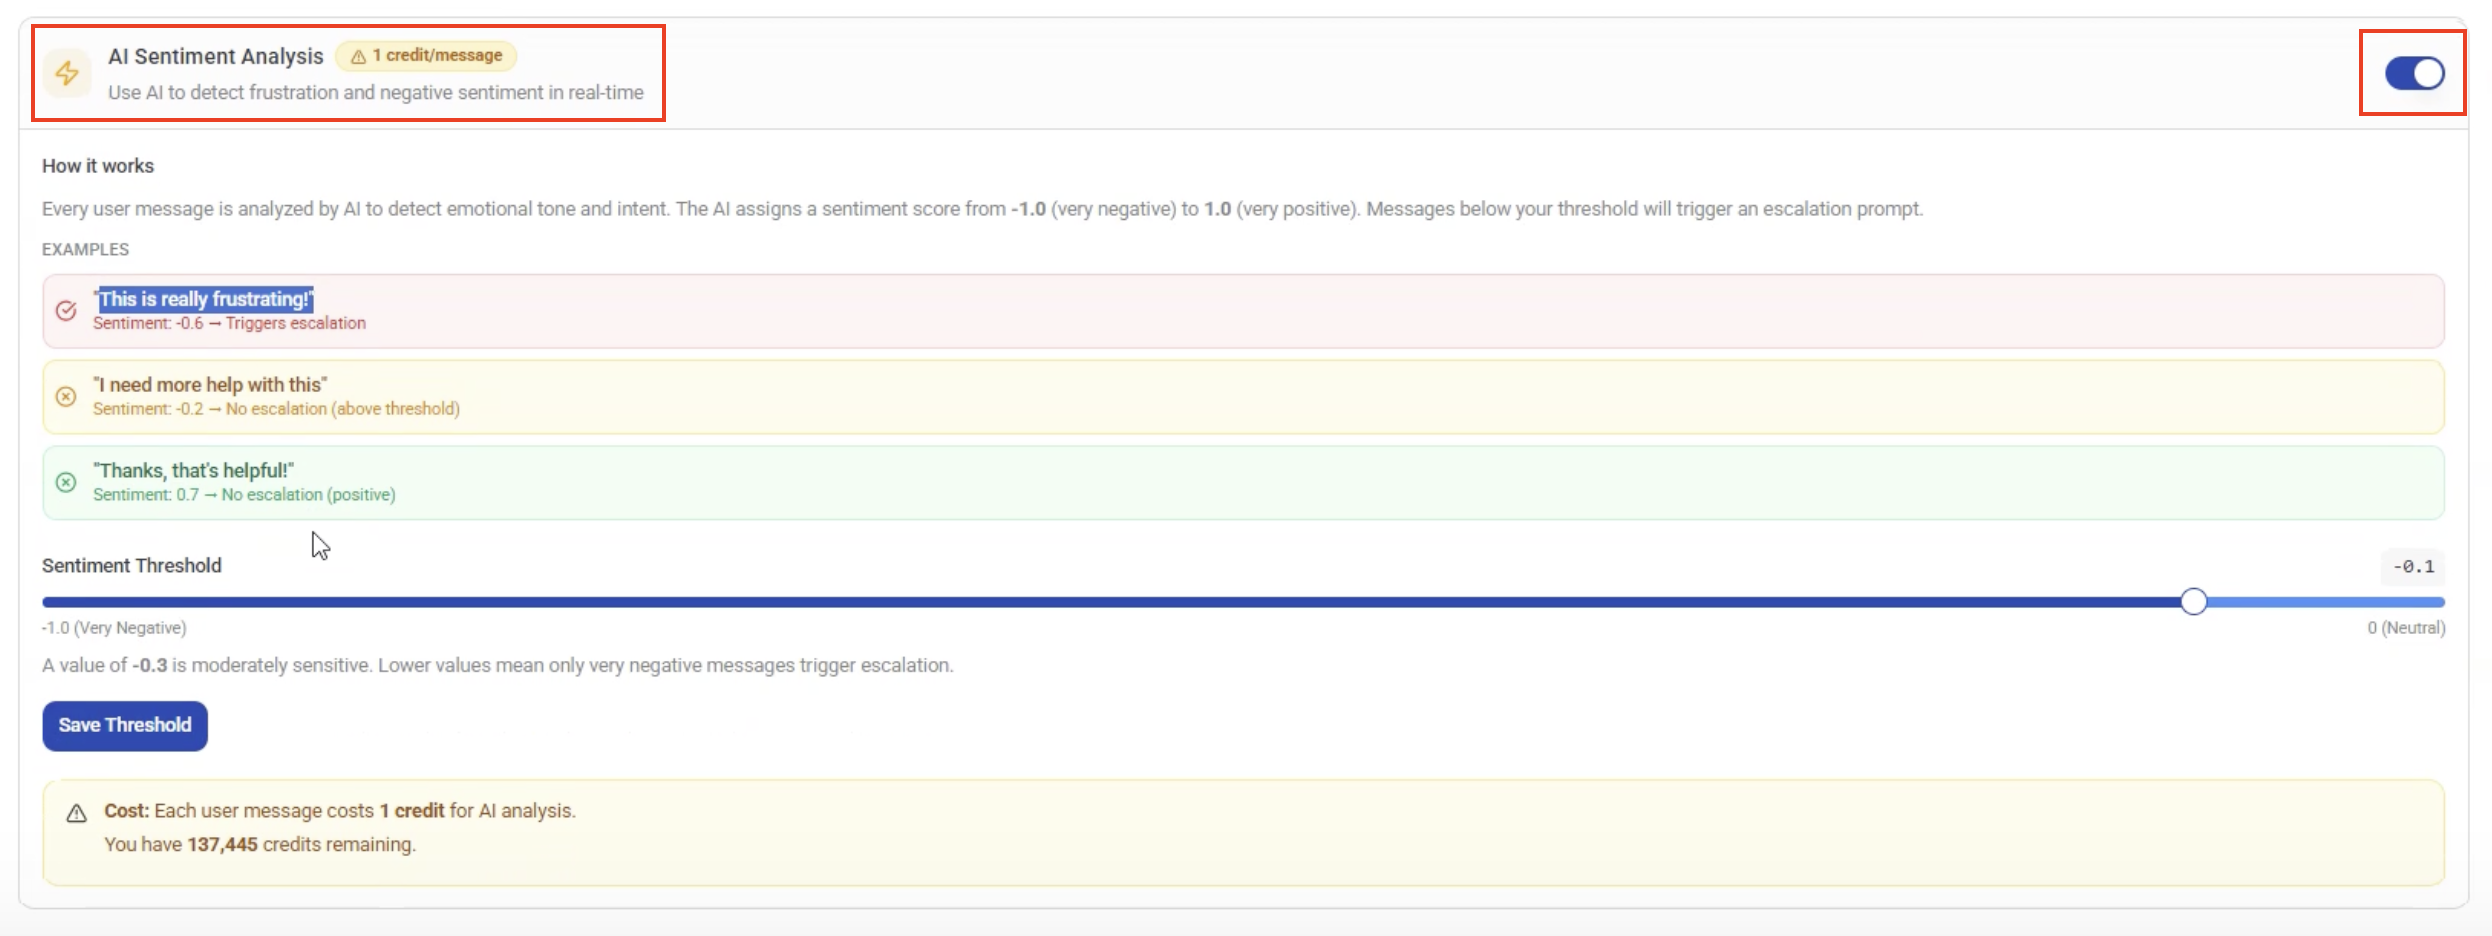
Sentiment Analysis
- This may increase usage cost if you turn on Sentiment Analysis toggle
- Automatically escalate in real-time based on negative sentiment using AI
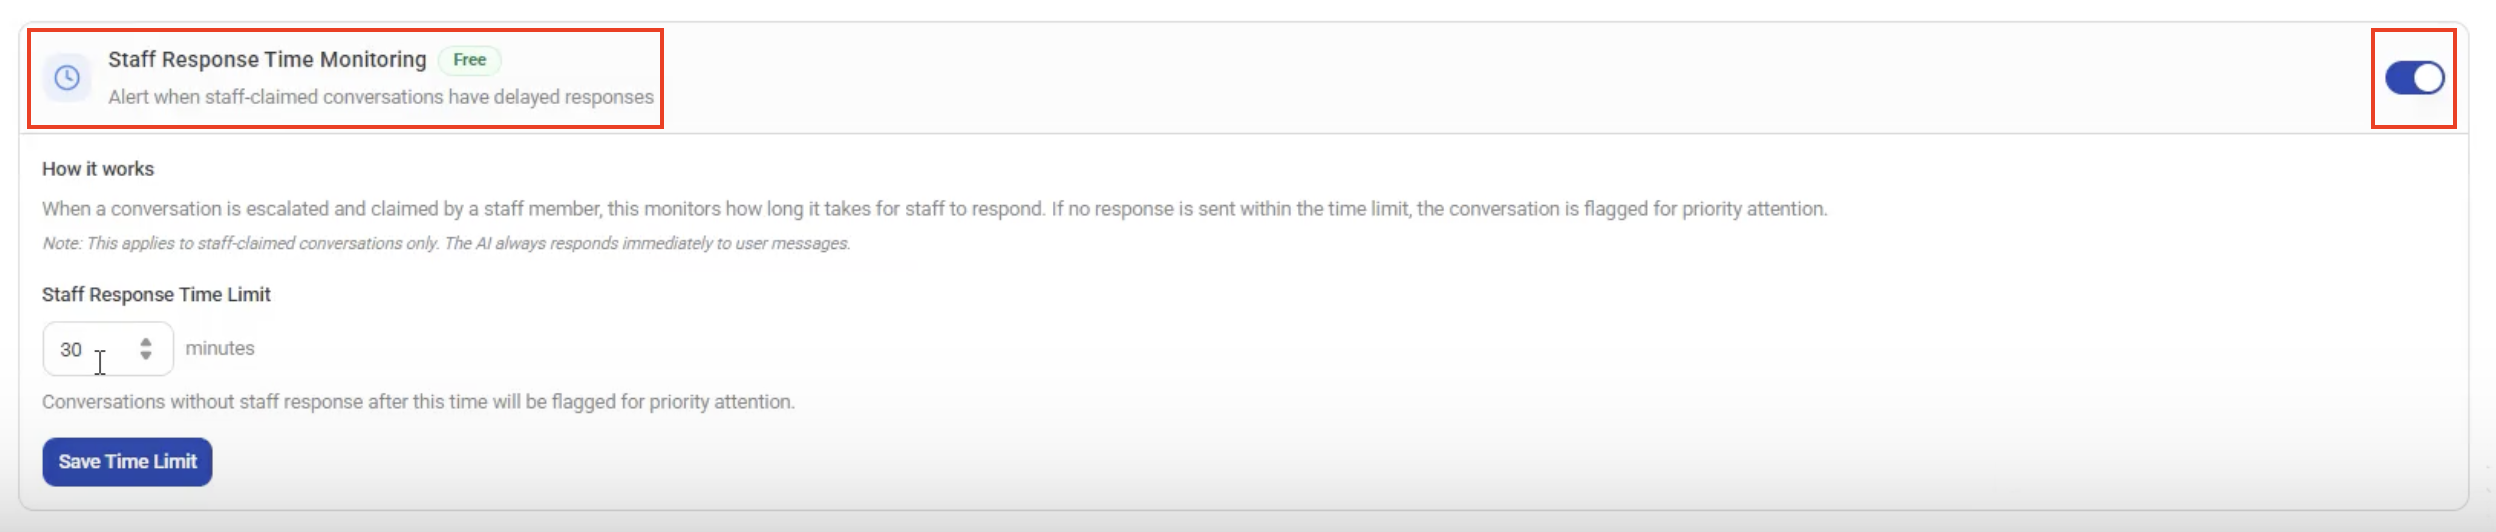
Staff Response Monitoring
- Set response time limits (e.g., 30 minutes)
- Escalate if staff does not respond in time
Recommendations Tab
Enhance responses with suggested resources.
- Enable/disable Recommendations
- Control:
- Number of recommendations shown
- Types of resources displayed
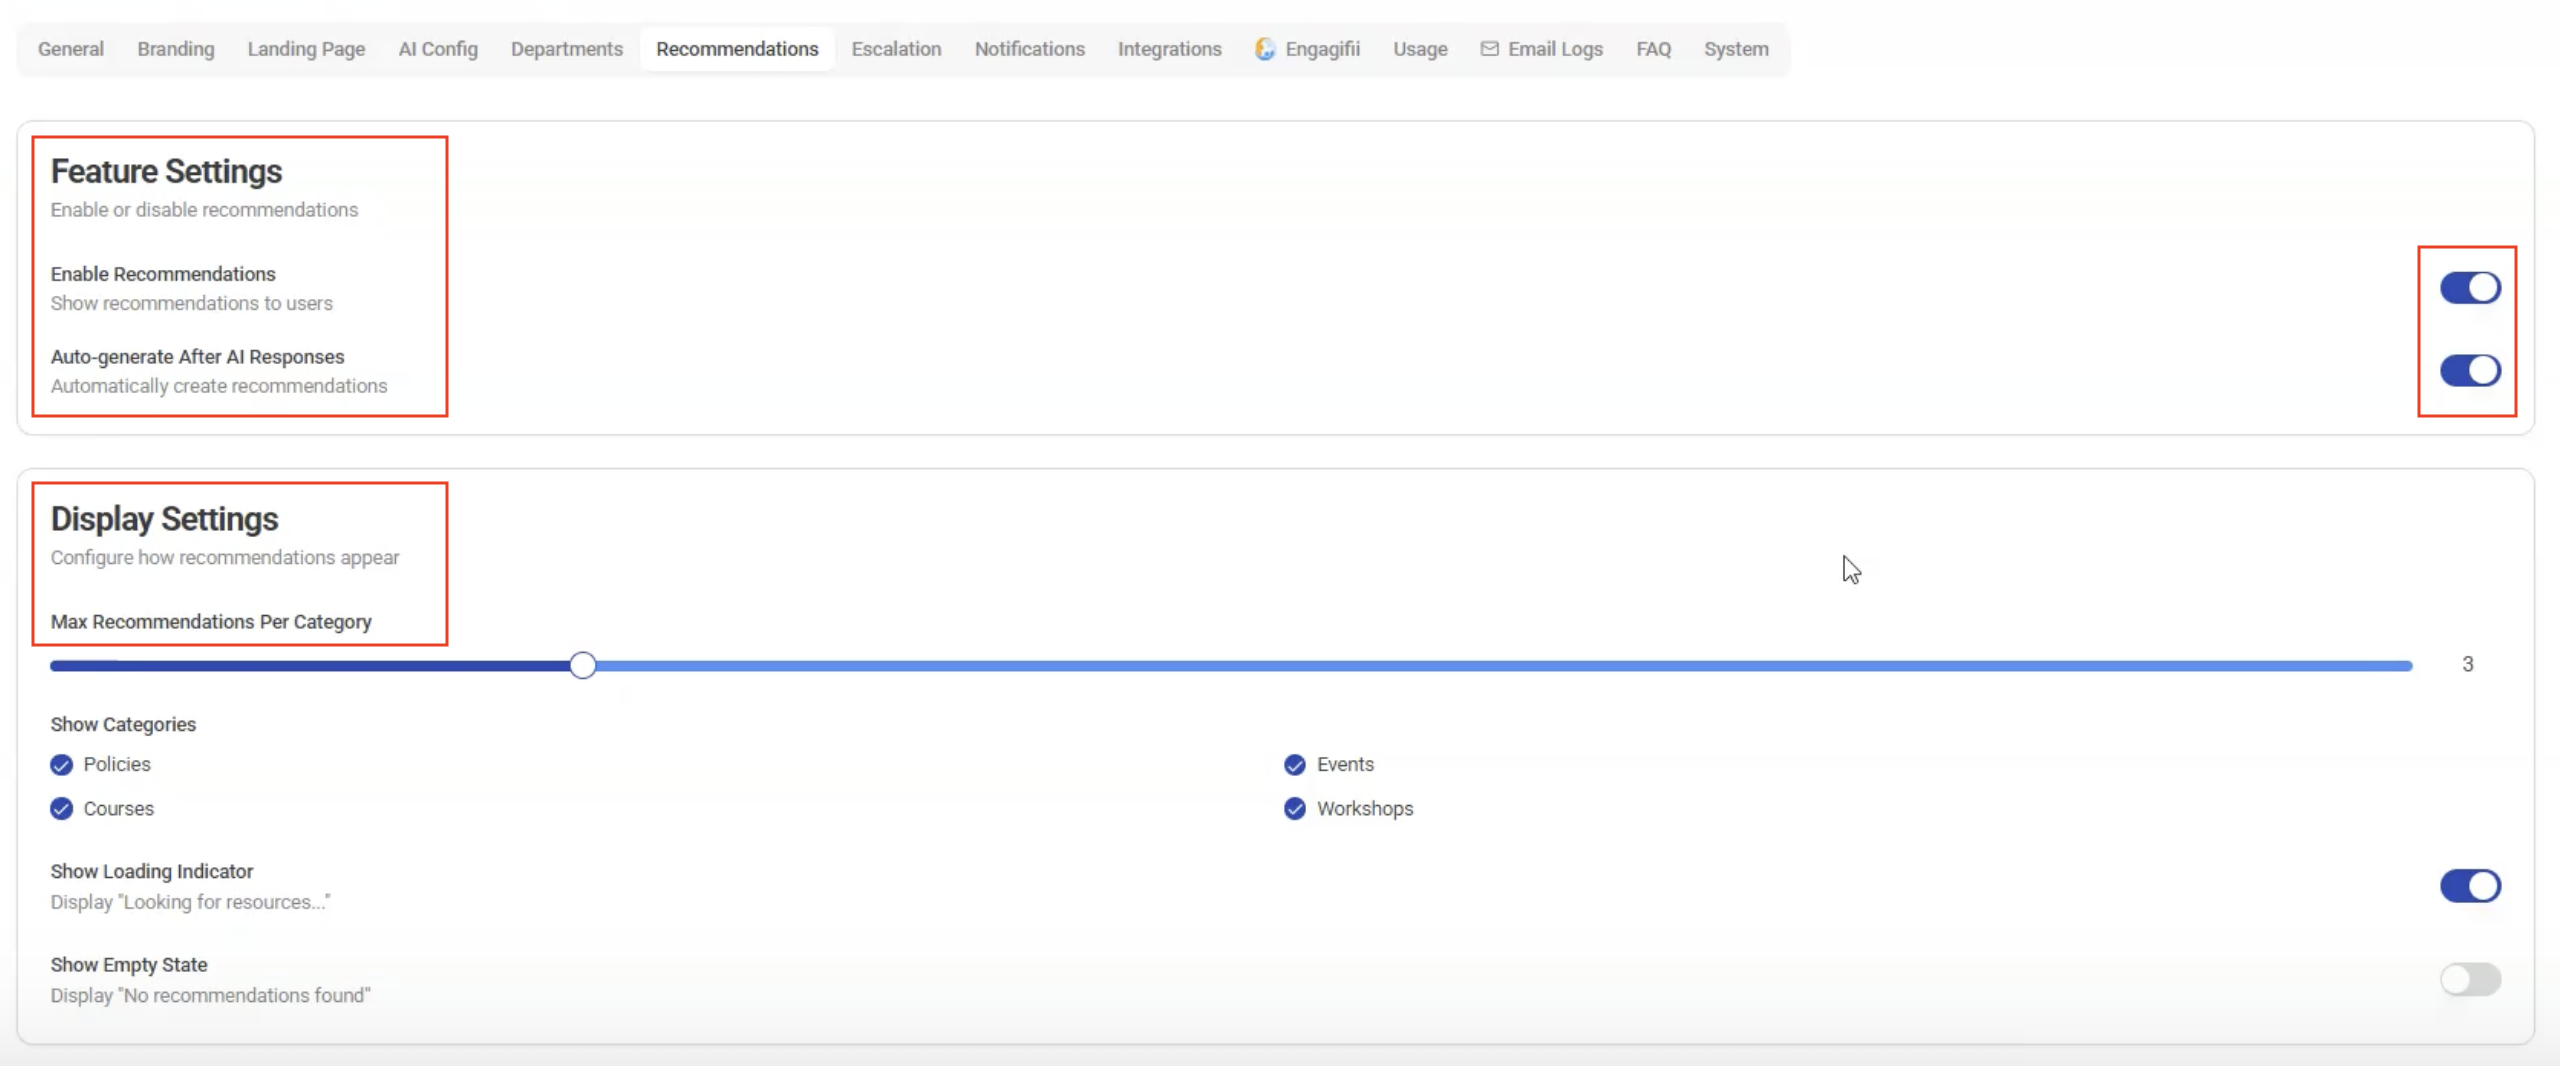
- Select Resource Library for recommendations
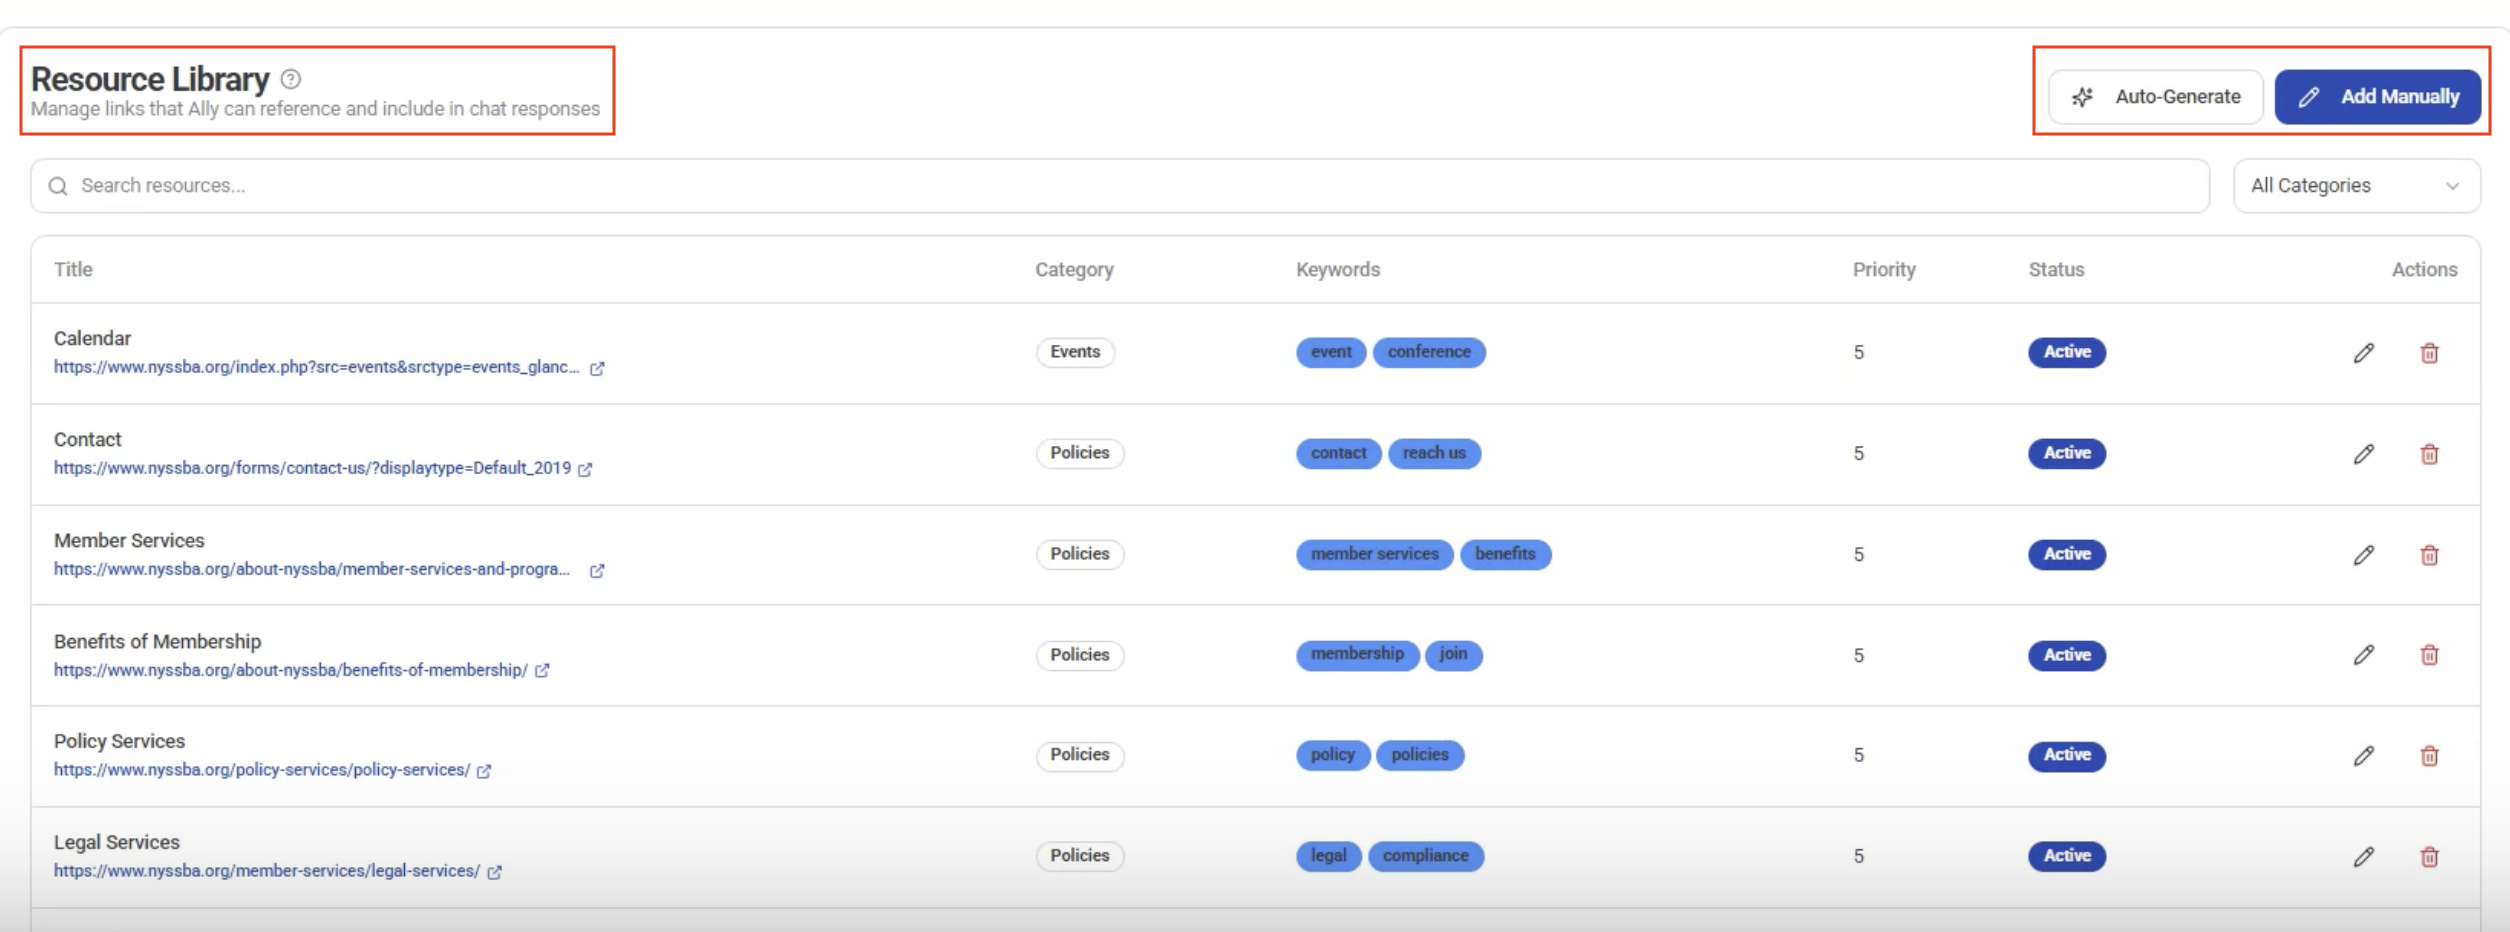
Helps guide members to relevant resources alongside chatbot answers.
Notifications Tab
- Enable or disable Email Notifications
- Control alerts for workspace activity

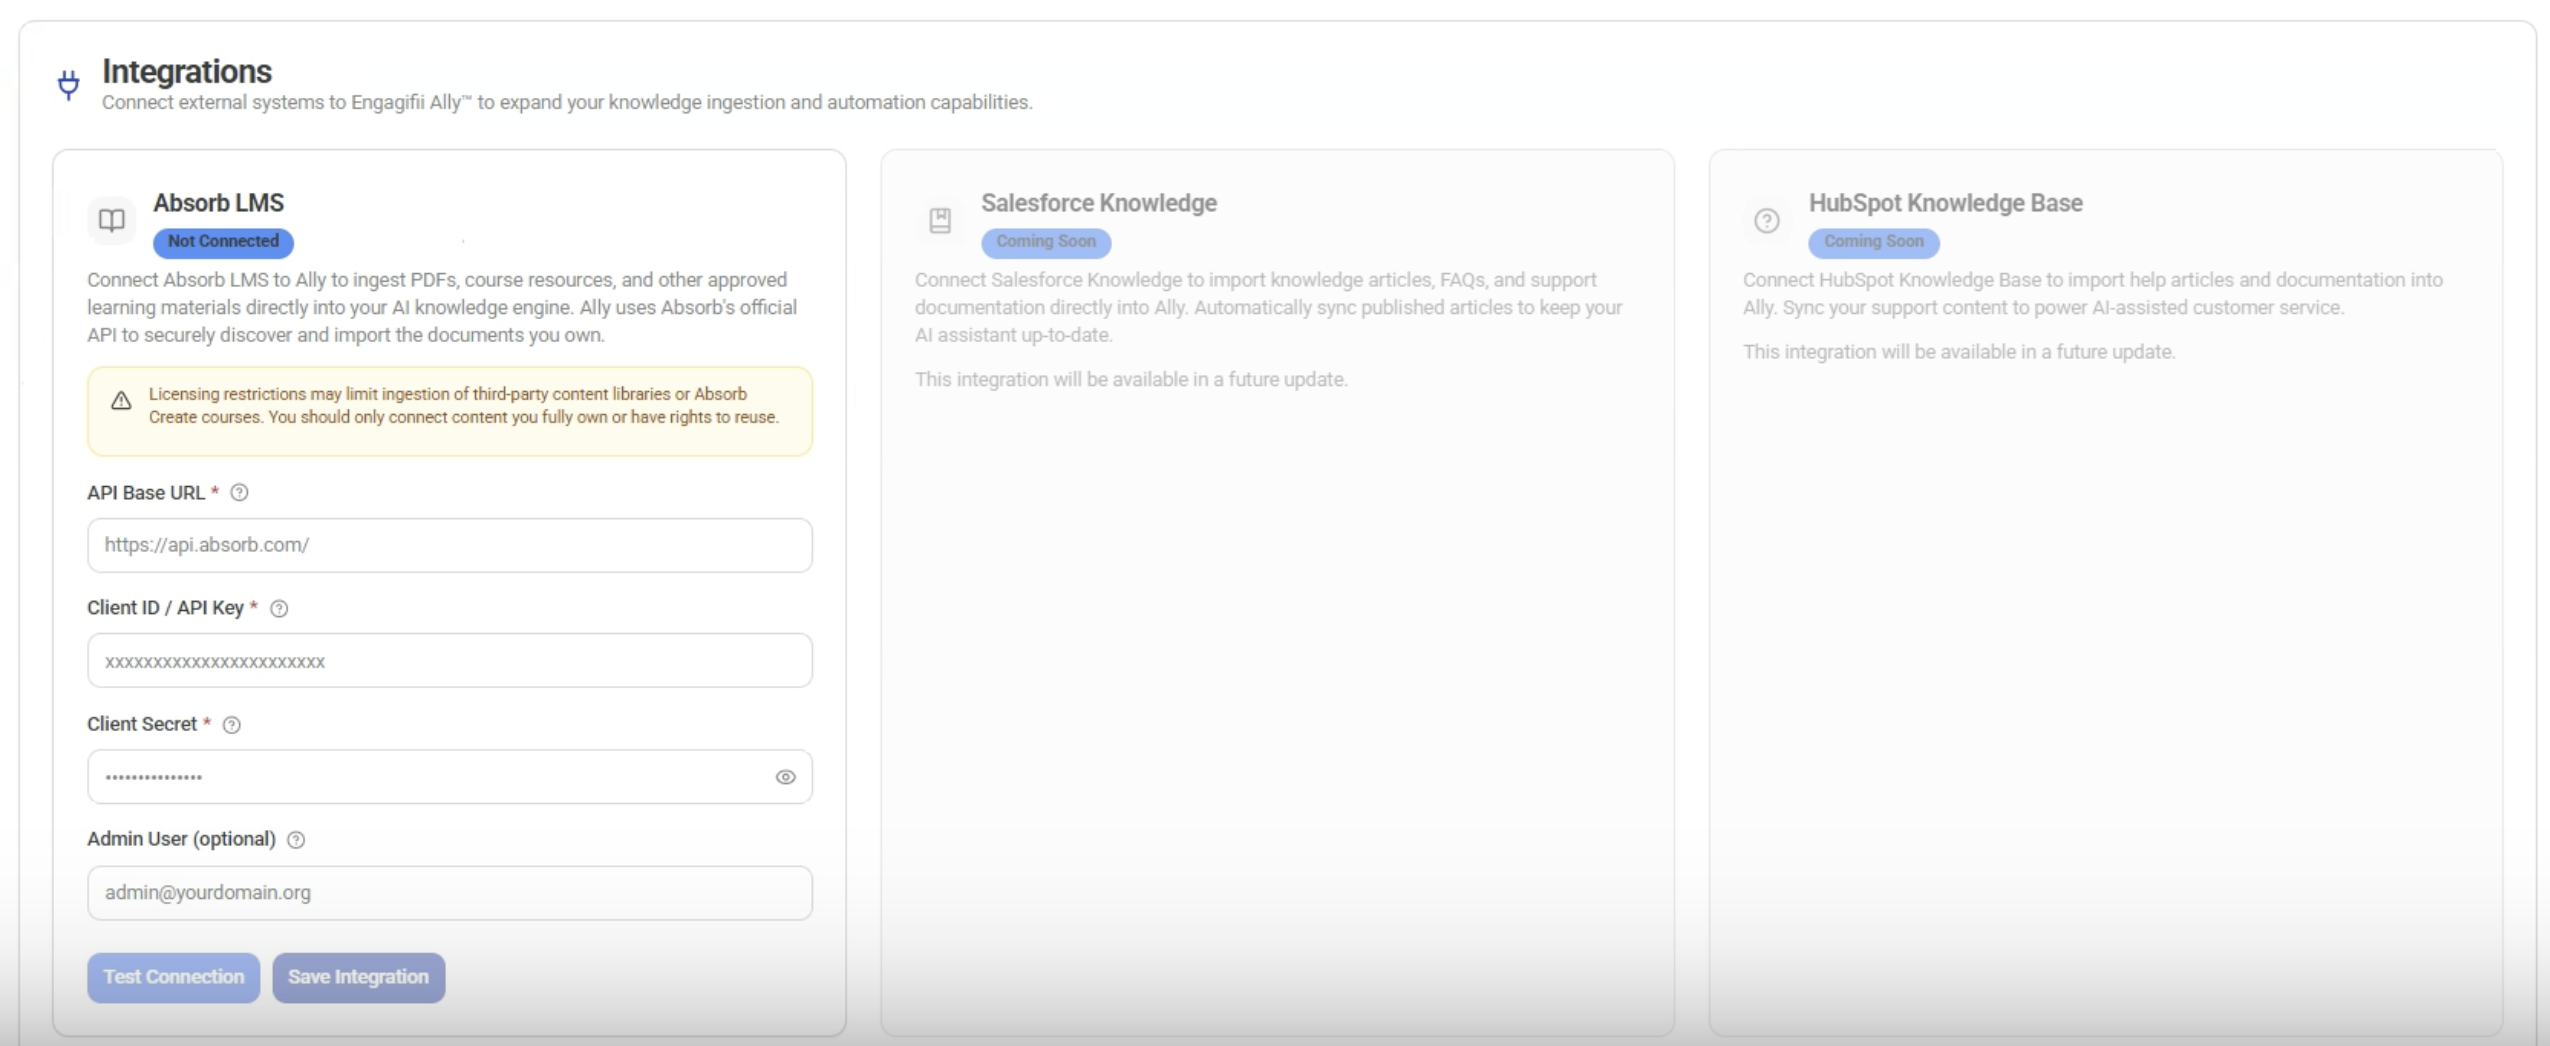
Integrations Tab
Connect Engagifii ALLY with external systems.
- Integrate with LMS platforms using API credentials
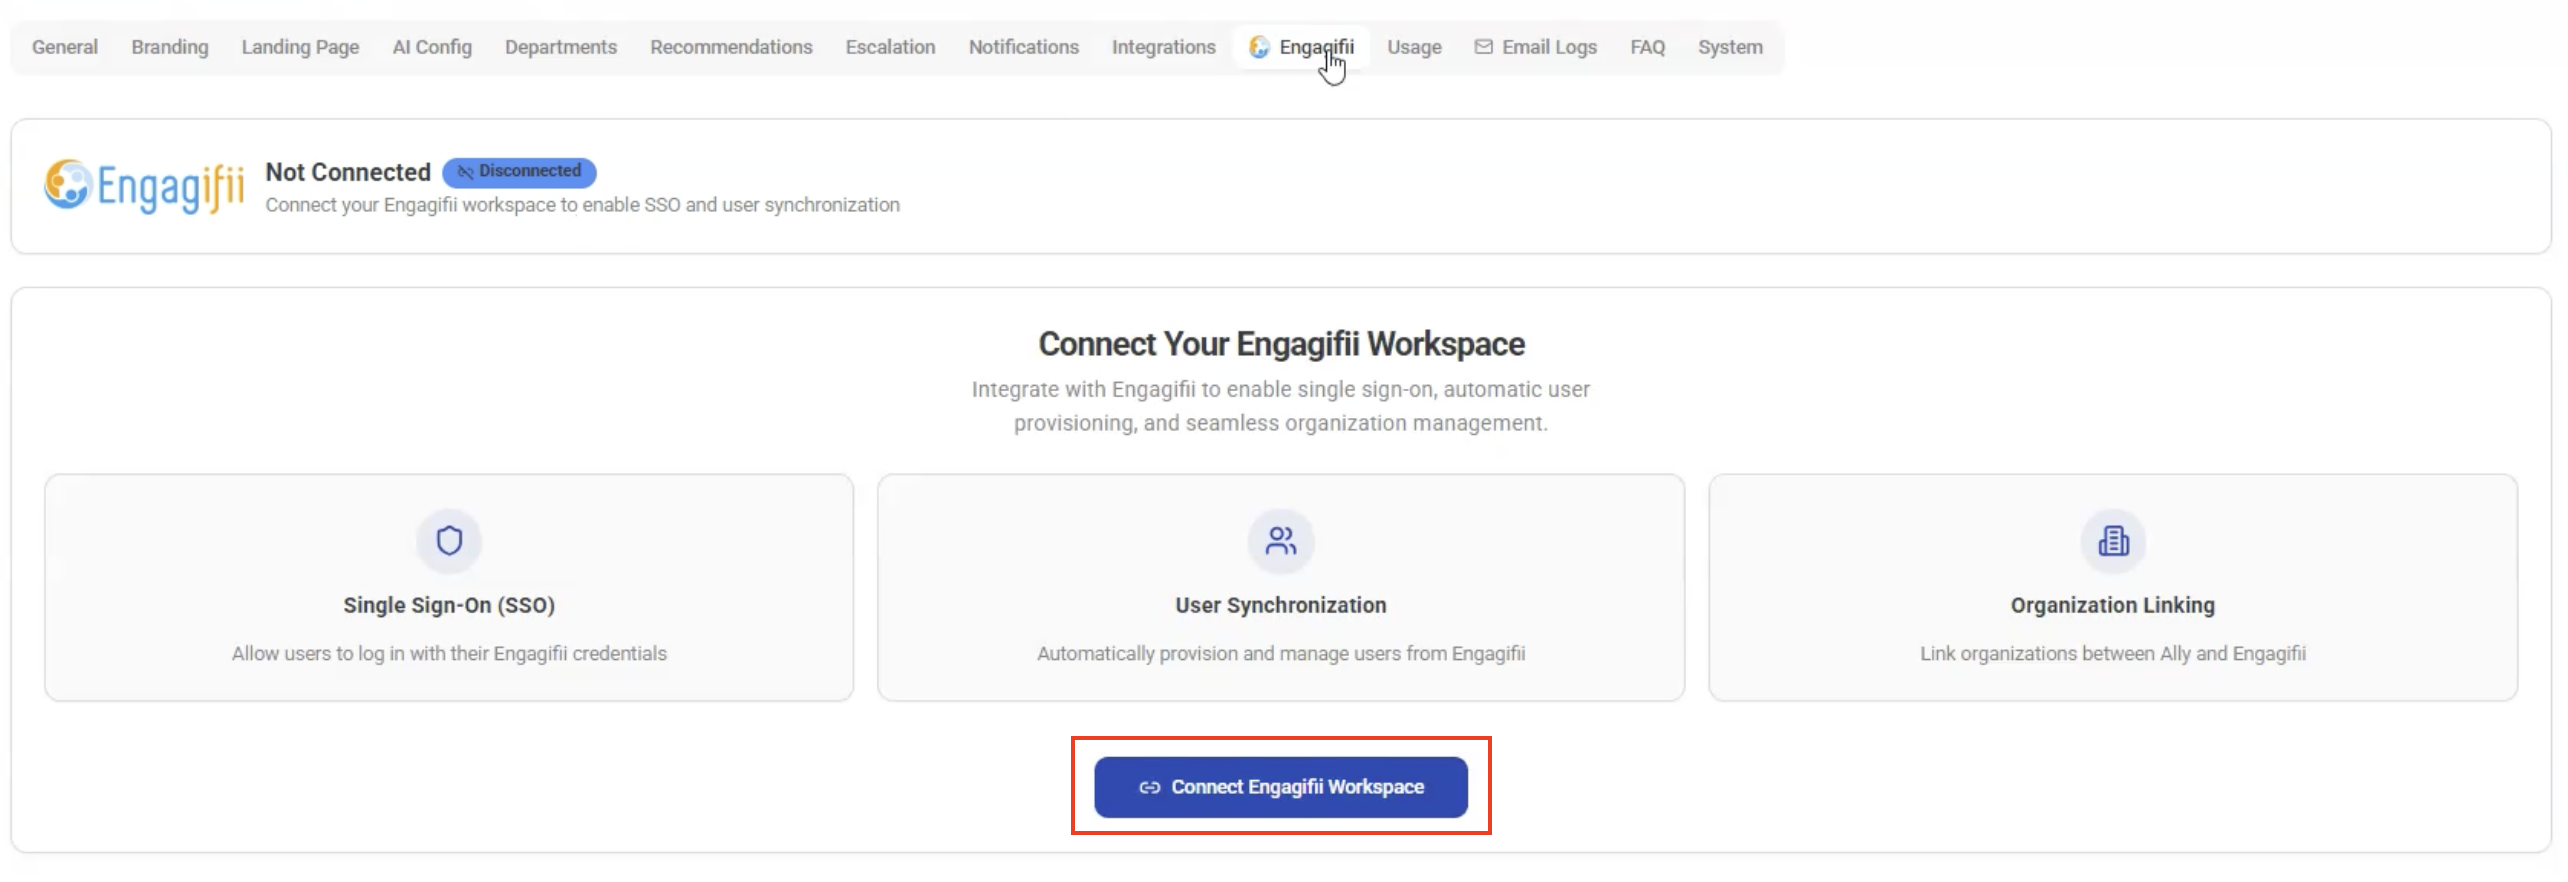
Engagifii Platform Integration
- Connect Engagifii ALLY with your Engagifii platform
- Sync data using login credentials
This enables better tracking and unified system behavior.
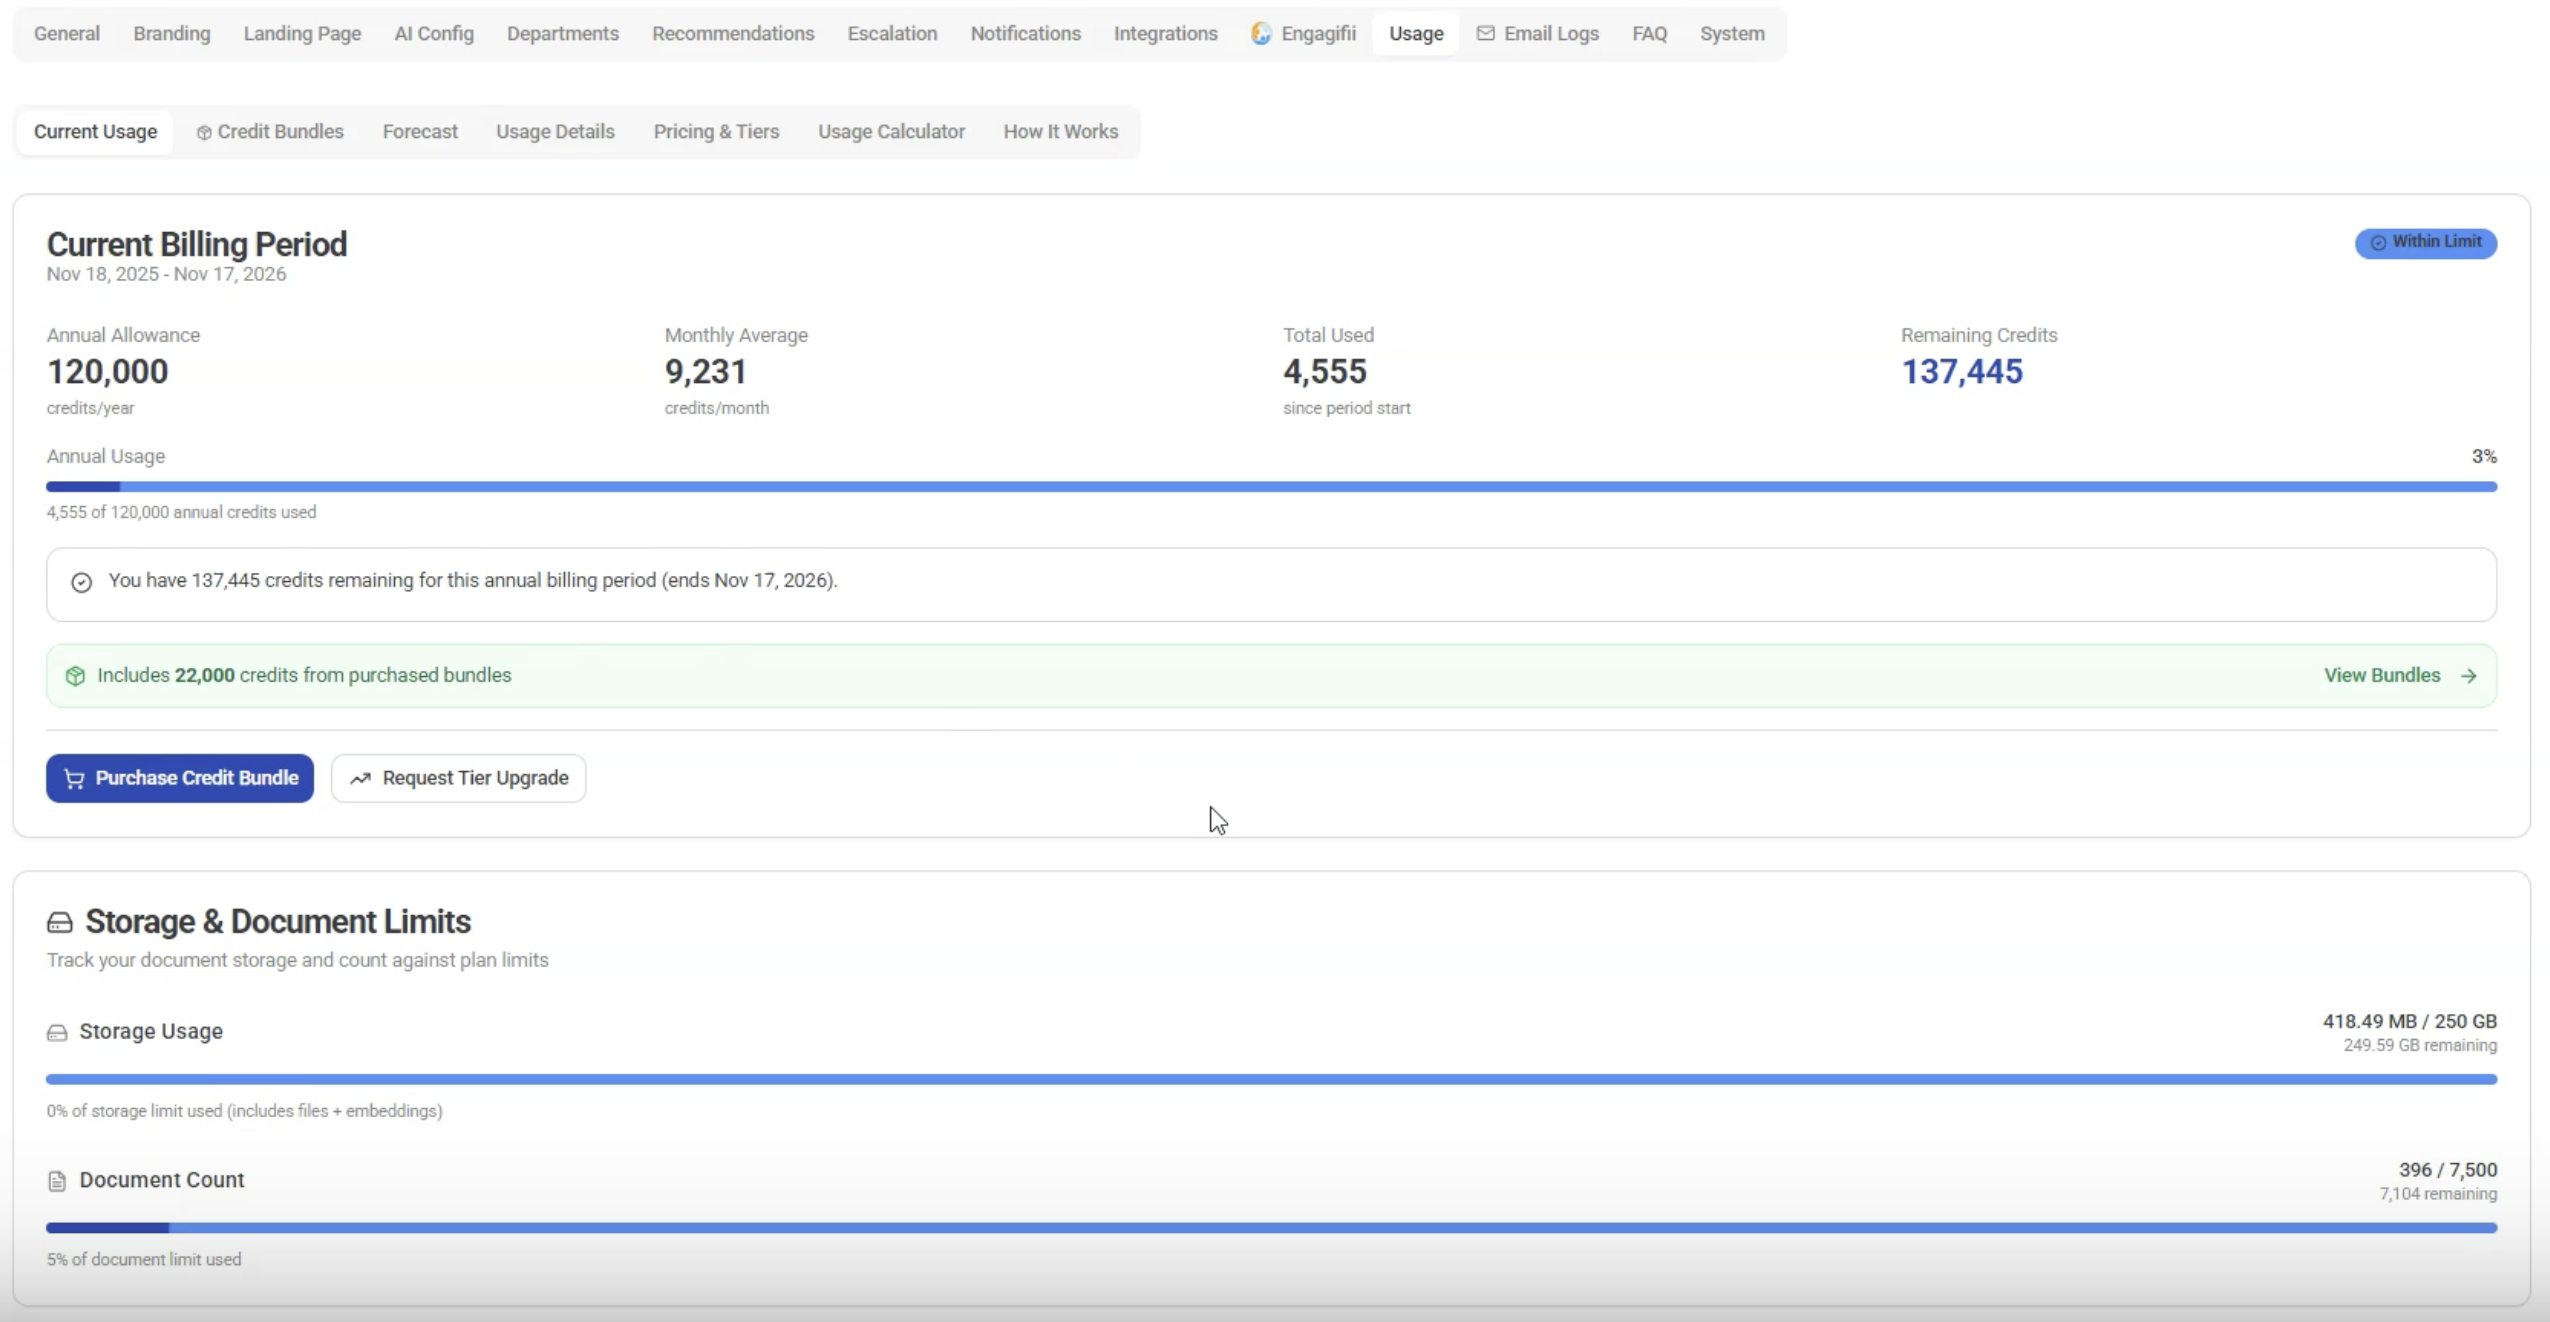
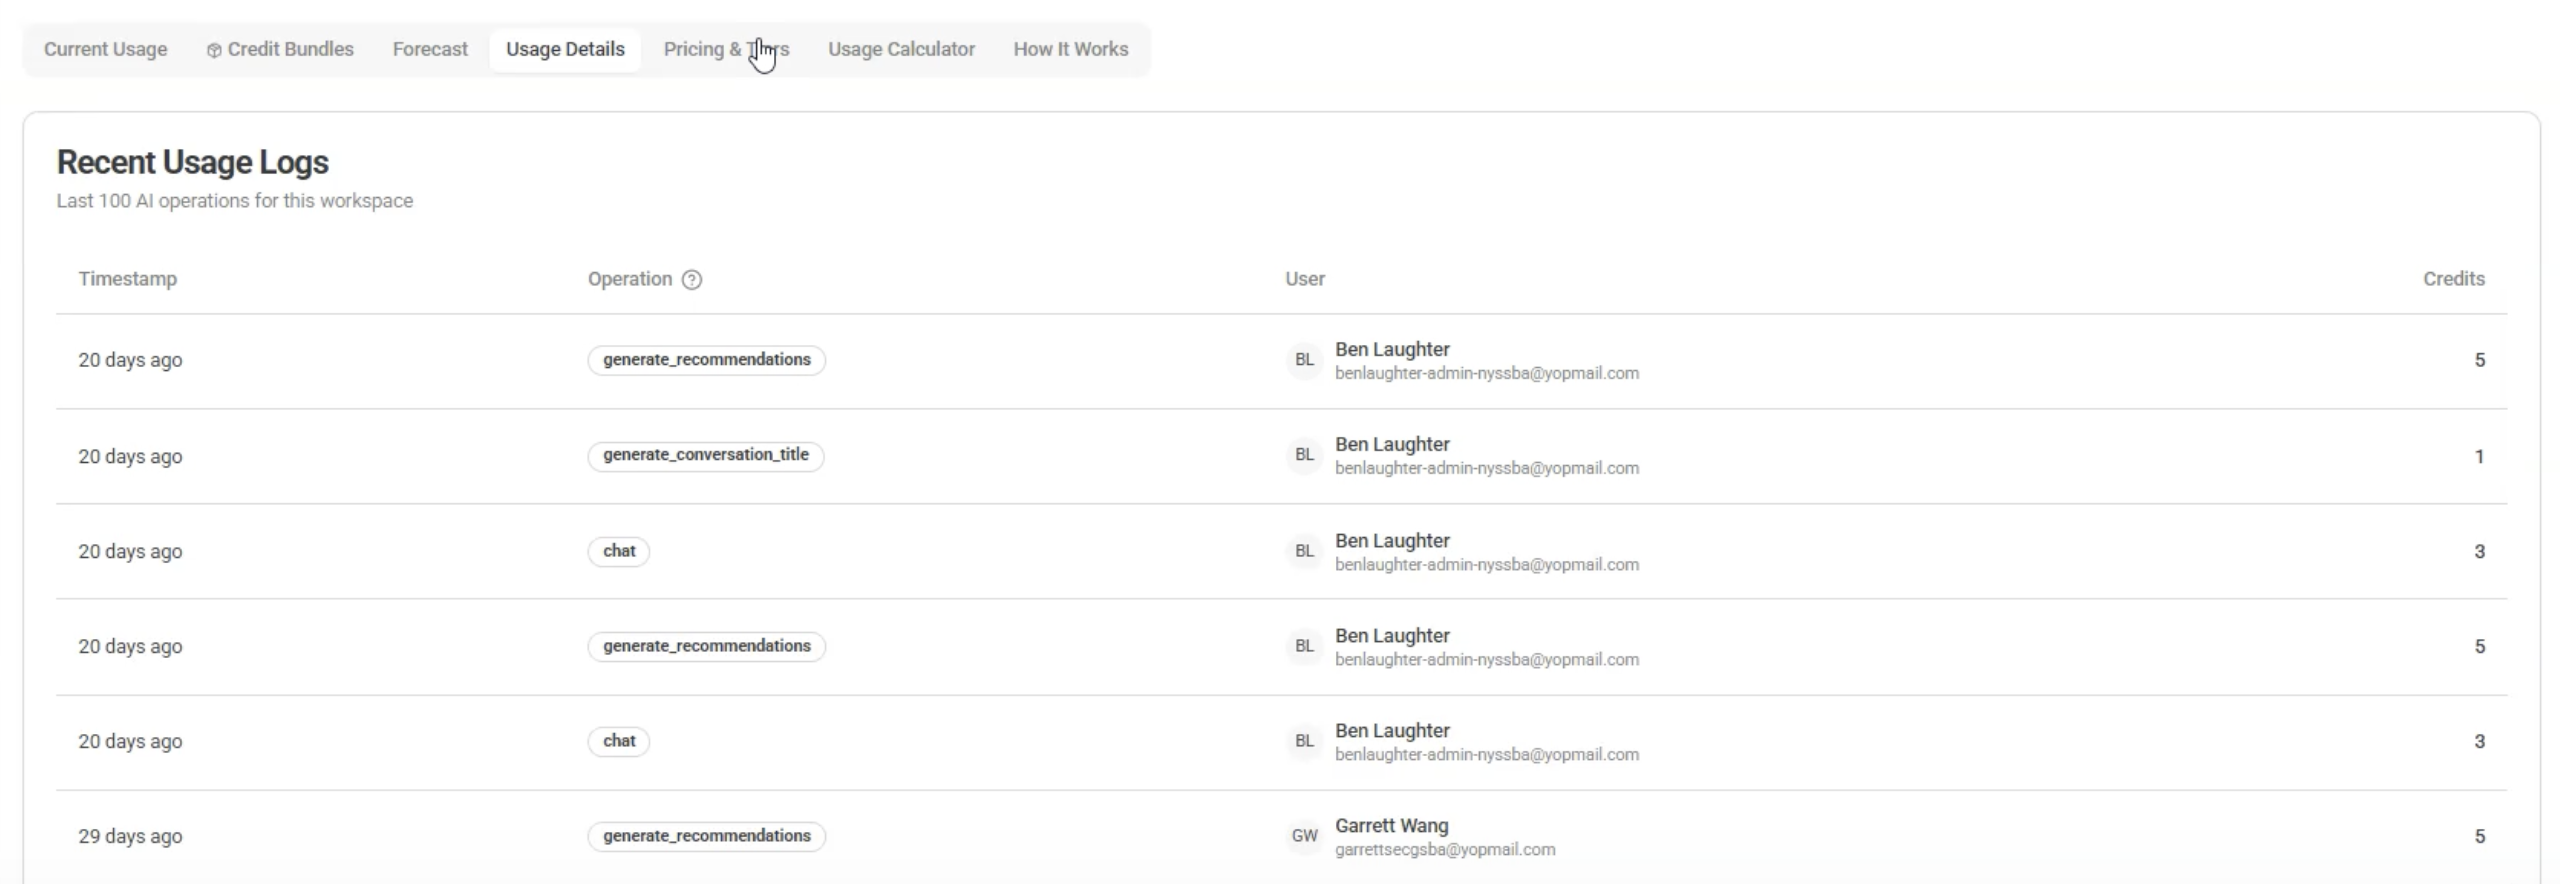
Usage Tab
Monitor and manage credit usage.
Key Insights
- Current usage and billing period
- Monthly consumption trends
- Credit usage per user
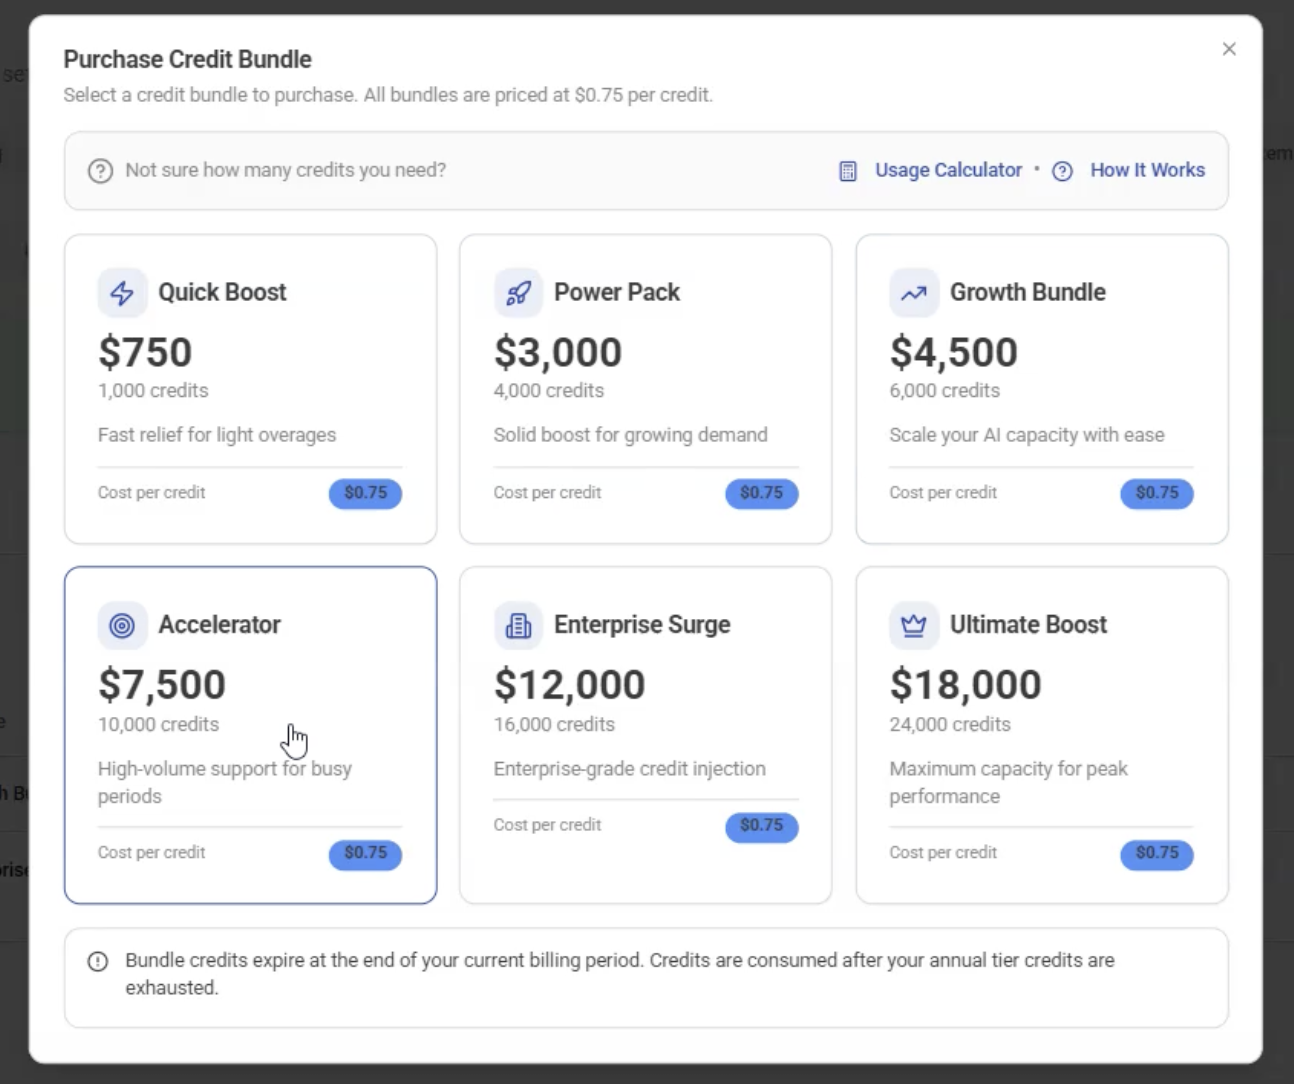
- View Purchase History
Forecasting
- View projected annual usage

- Get recommended plan upgrades
Note: Pricing subject to change.
Controls
- Limit:
- Conversations per member
- Messages per conversation
Pricing & Tiers
- View current plan
- Upgrade to higher tiers if needed

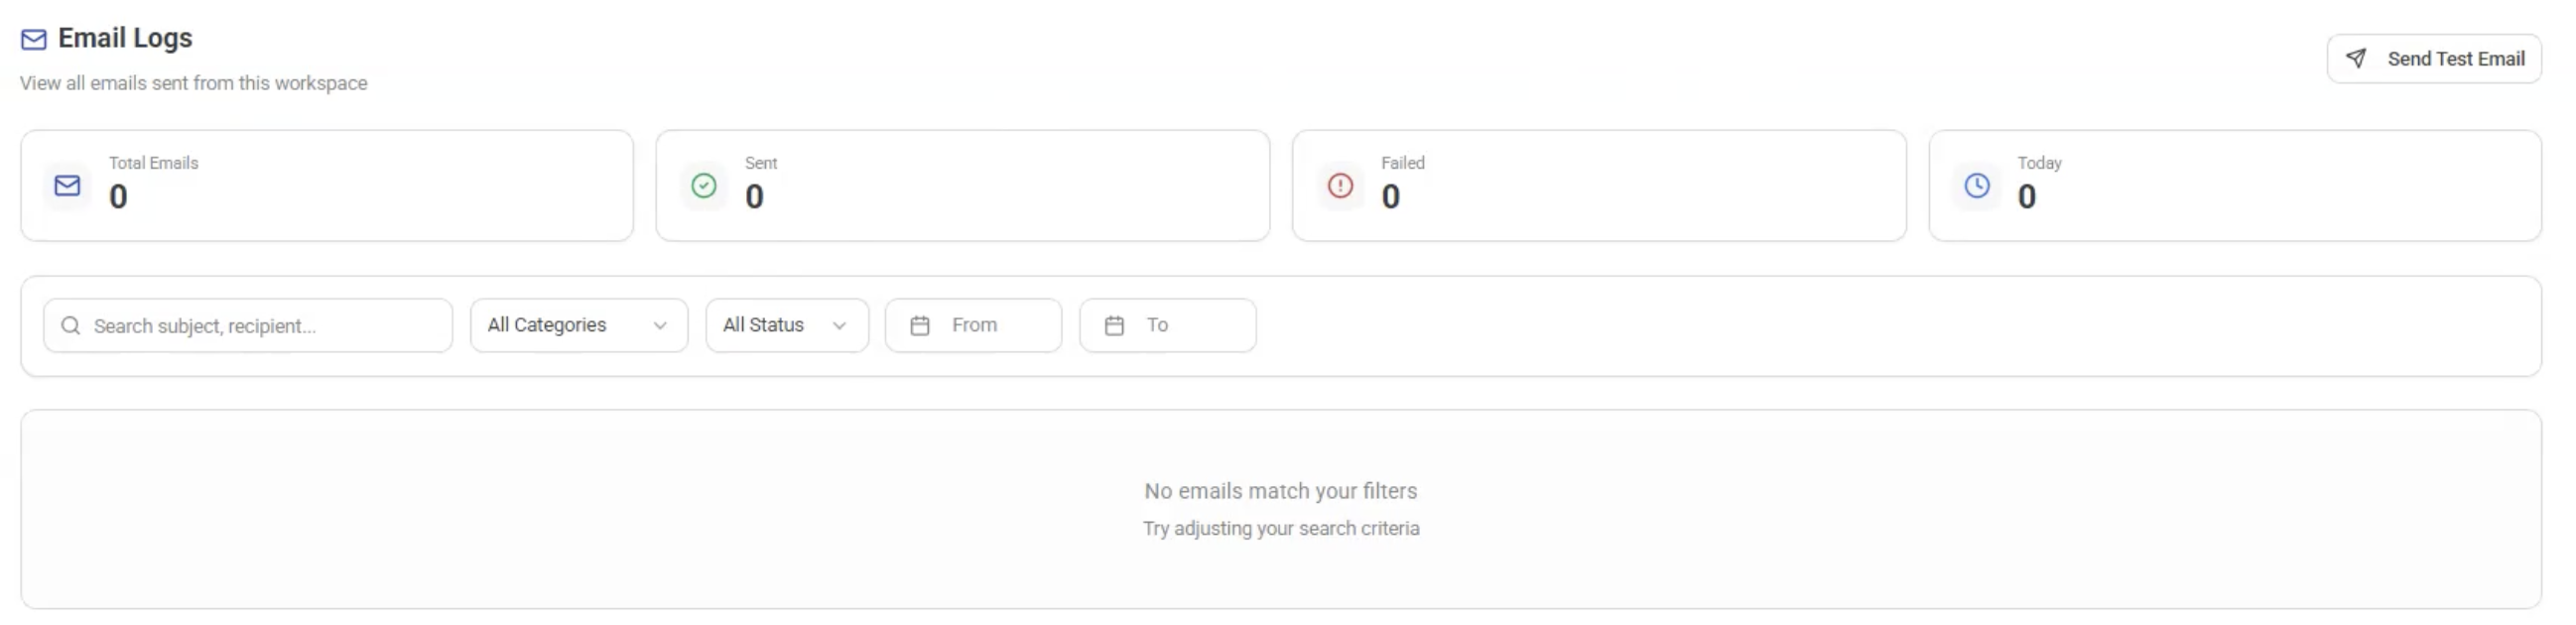
Email Logs Tab
- View all emails sent from the workspace
- Track communication history
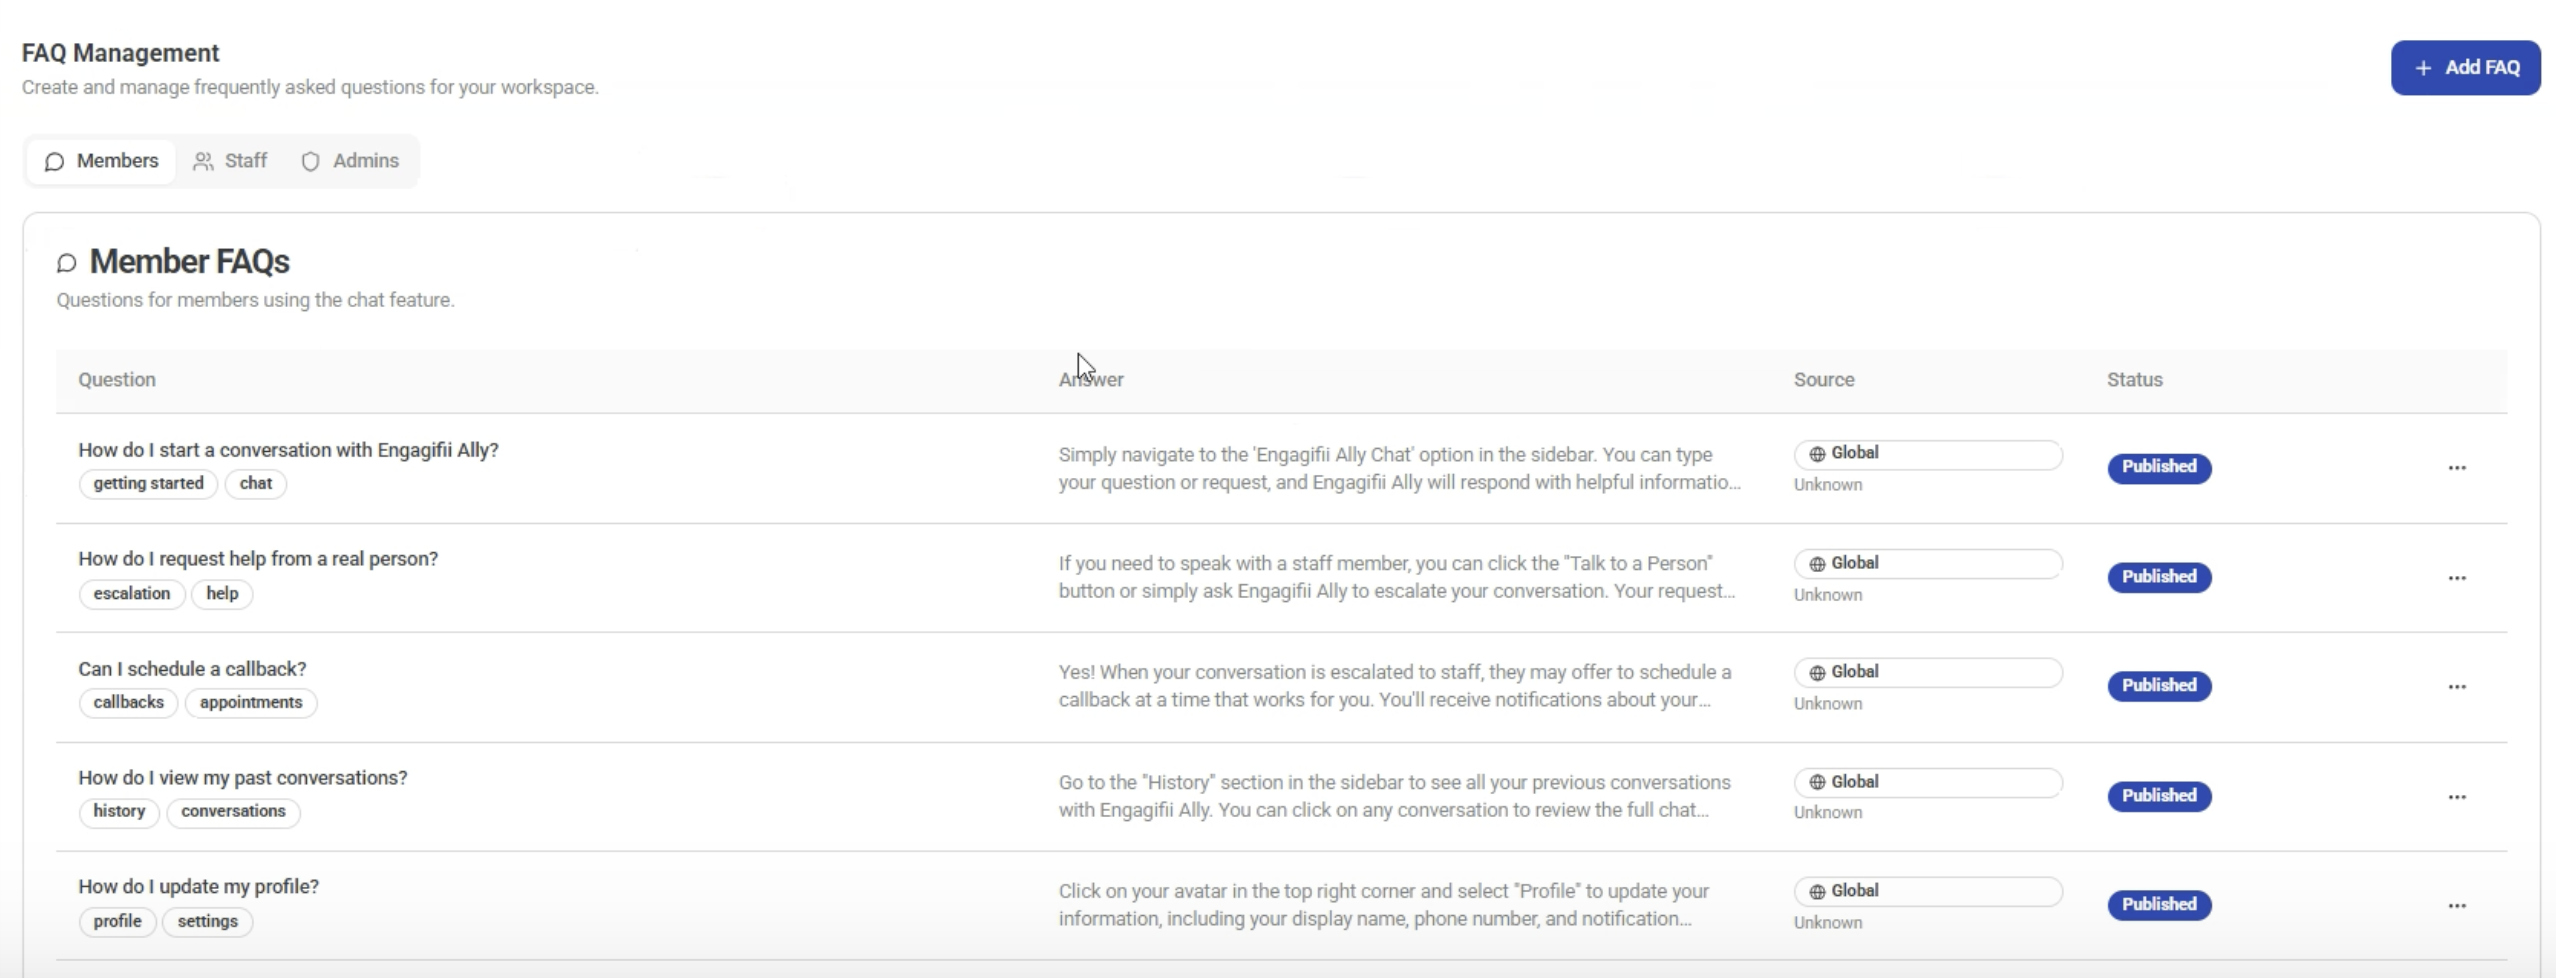
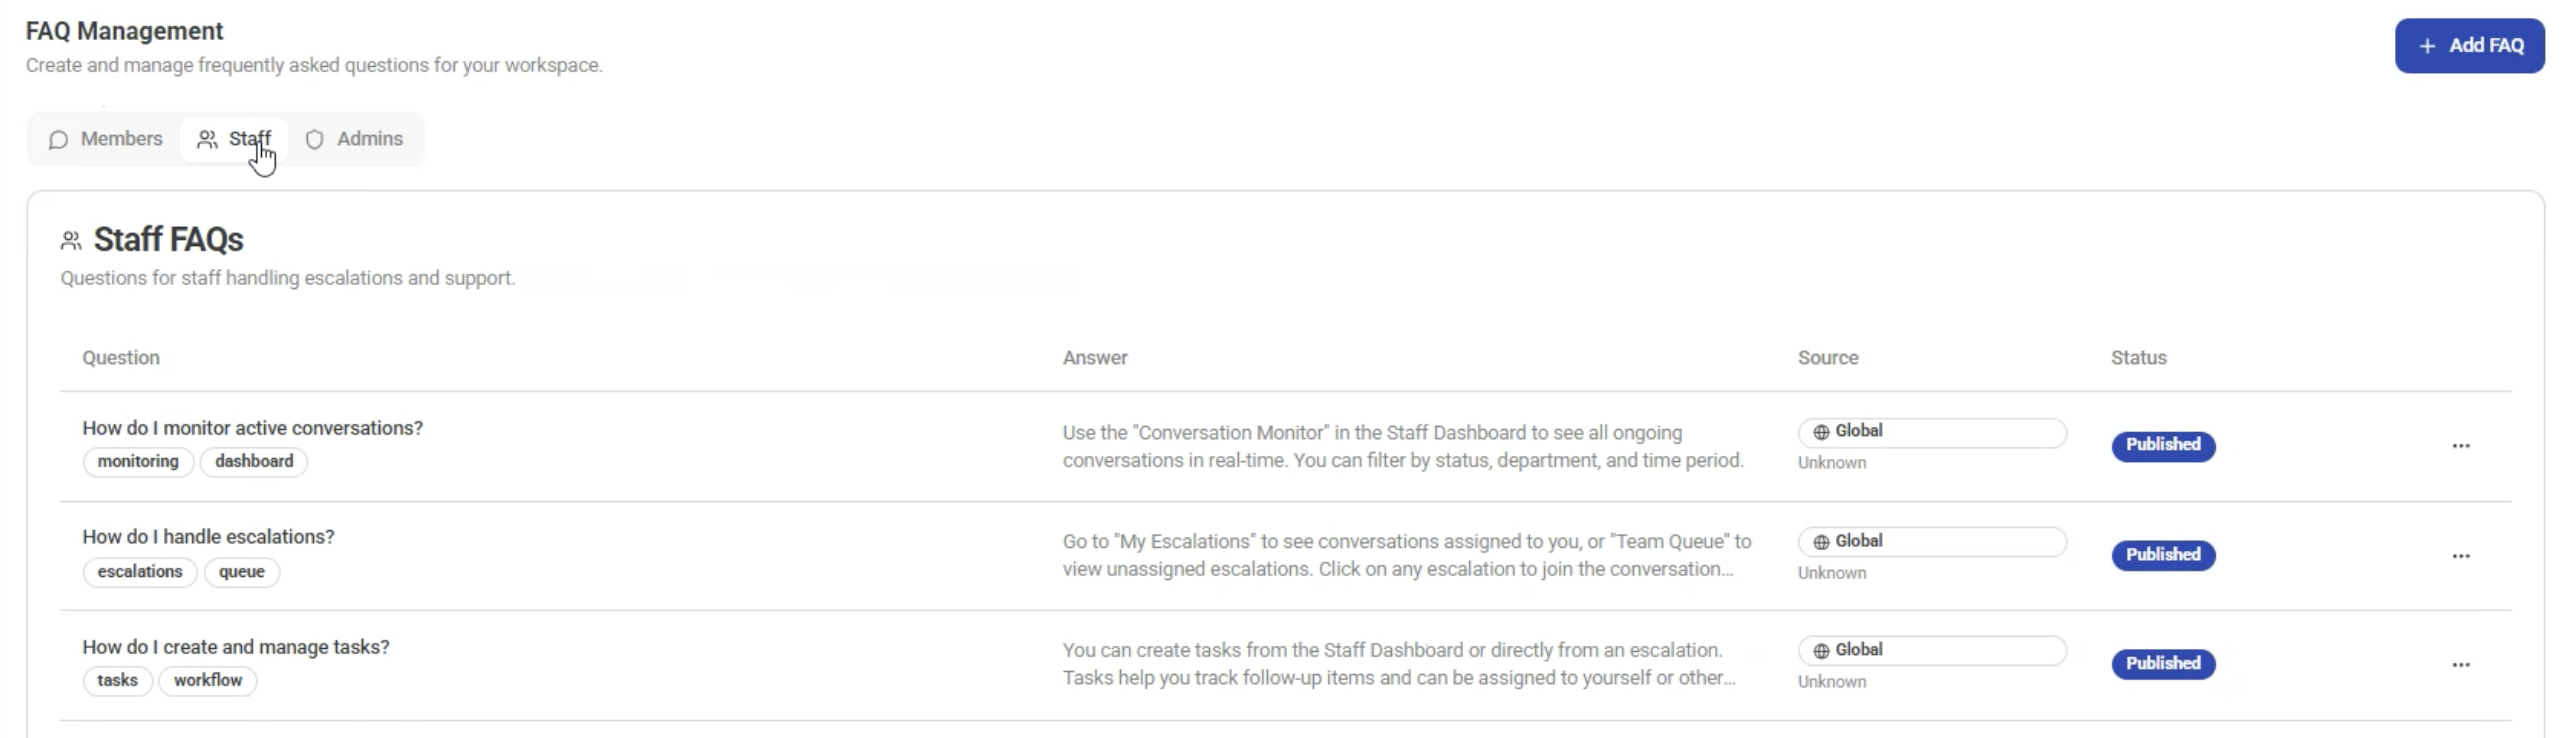
FAQ Tab
Customize FAQs for different personas:
- Members
- Staff
- Admins
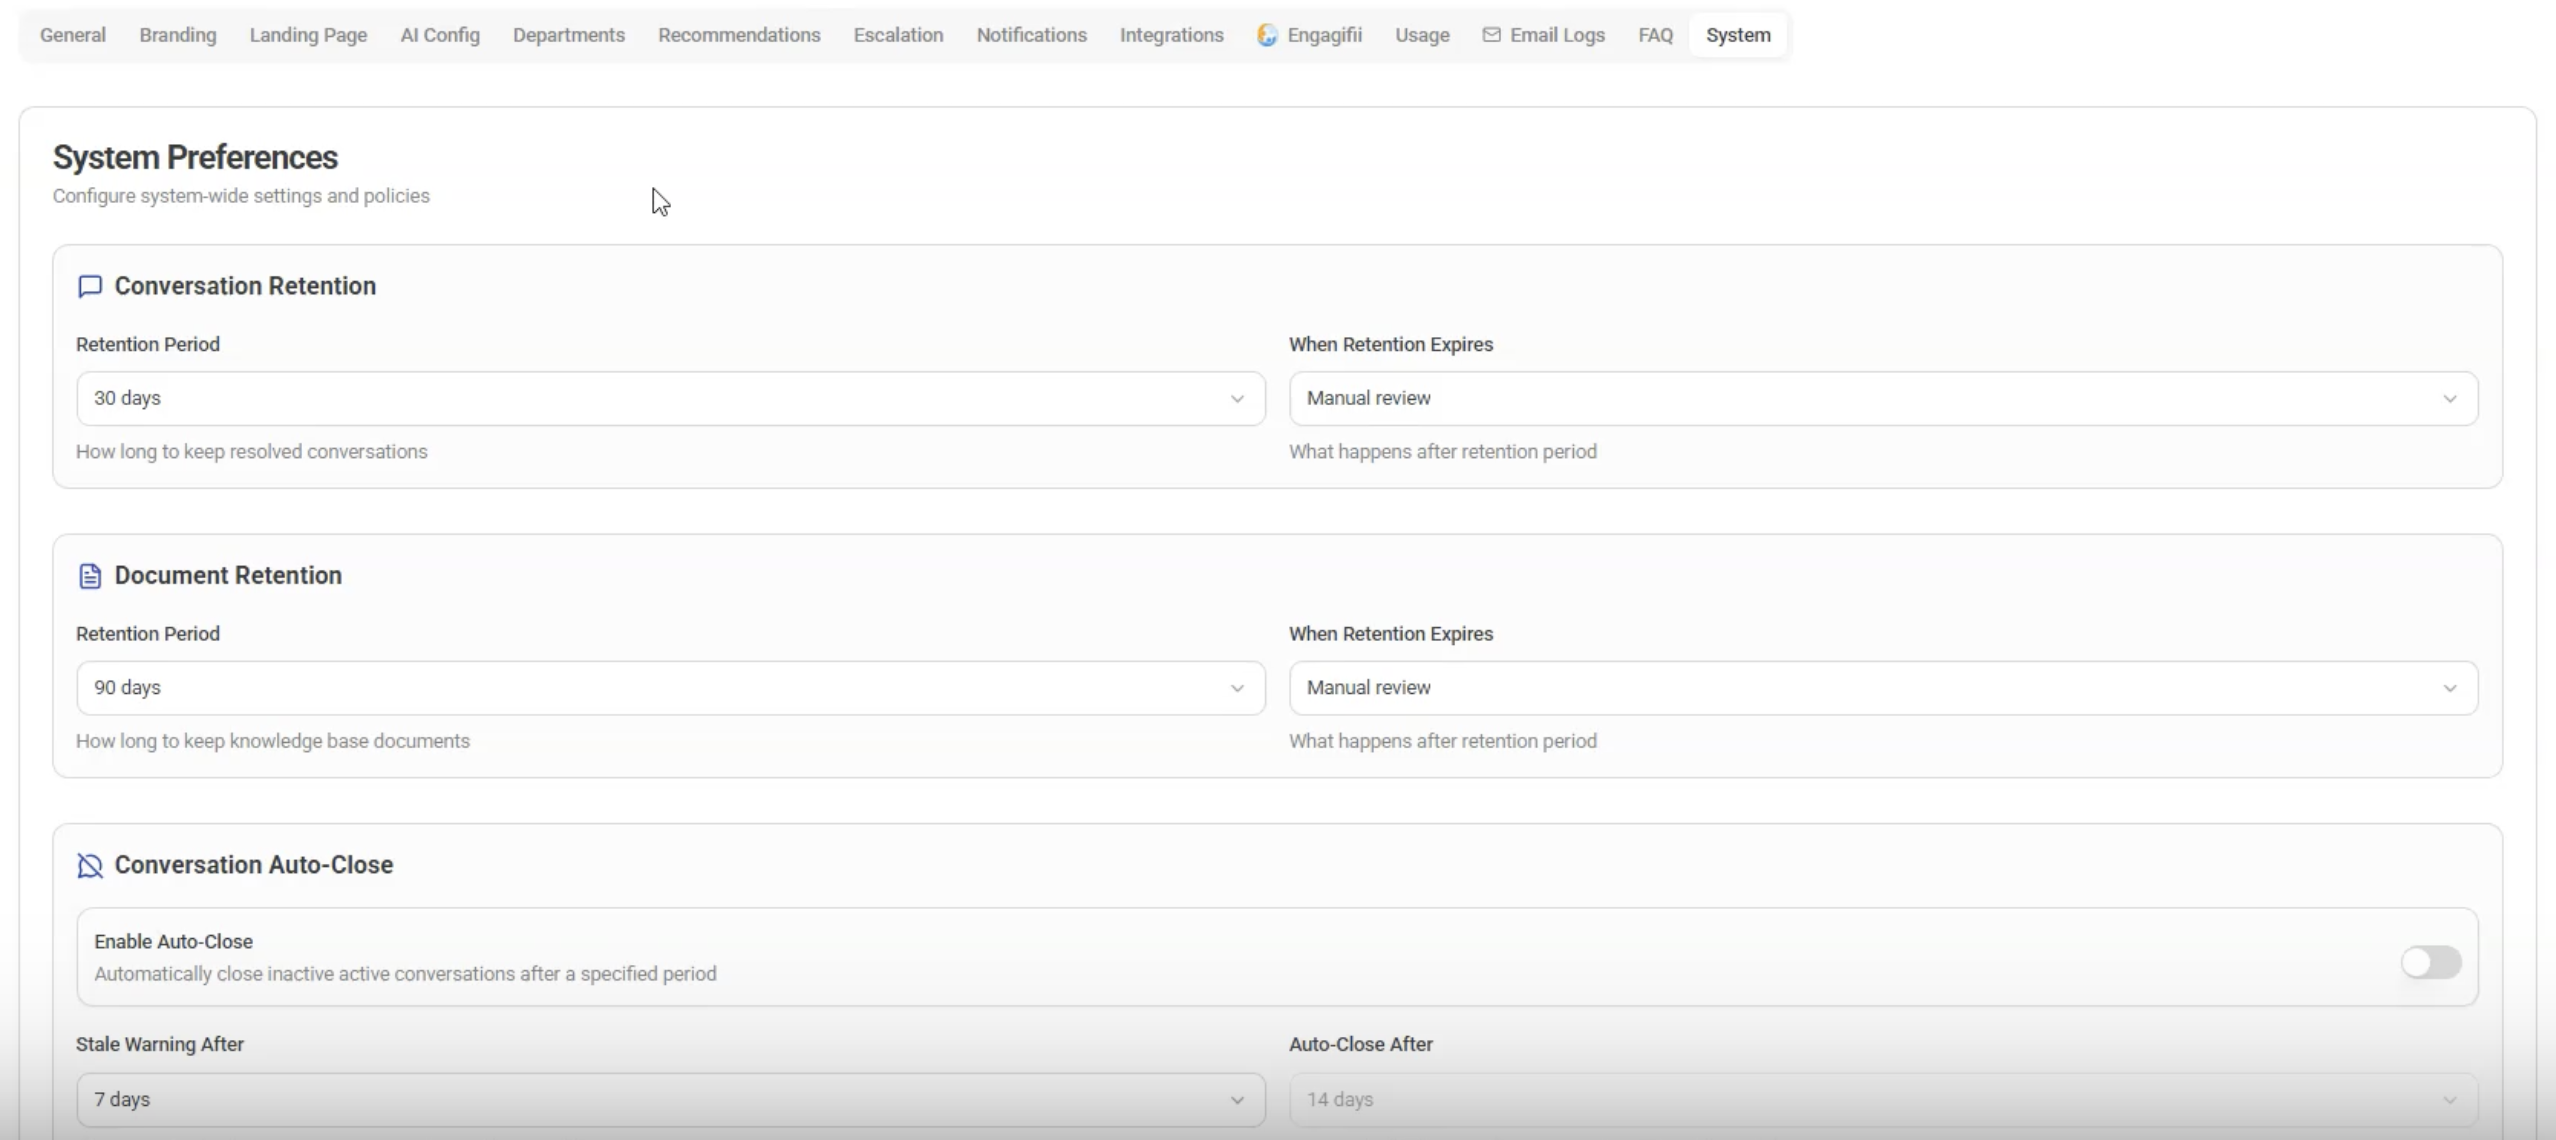
System Settings Tab
Control system-level behavior:
- Chat retention duration
- Document retention duration
- Auto-close conversation timing
Final Thoughts
Setting up your Engagifii ALLY workspace ensures your organization delivers accurate, branded, and efficient member support. By configuring each tab carefully, you can control how your chatbot behaves, when staff gets involved, and how members experience support.
We hope this guide helps you successfully set up Engagifii ALLY for your organization.
Have questions or feedback? Please write to our support team at support@engagifii.com