Summary
Creating an event in Engagifii involves setting up core event details, enabling registration, and configuring key components like sessions, bundles, pricing, and questions. Each section of the event allows you to control different aspects of the attendee experience. By completing each step, you ensure your event is structured, accessible, and ready for participants.
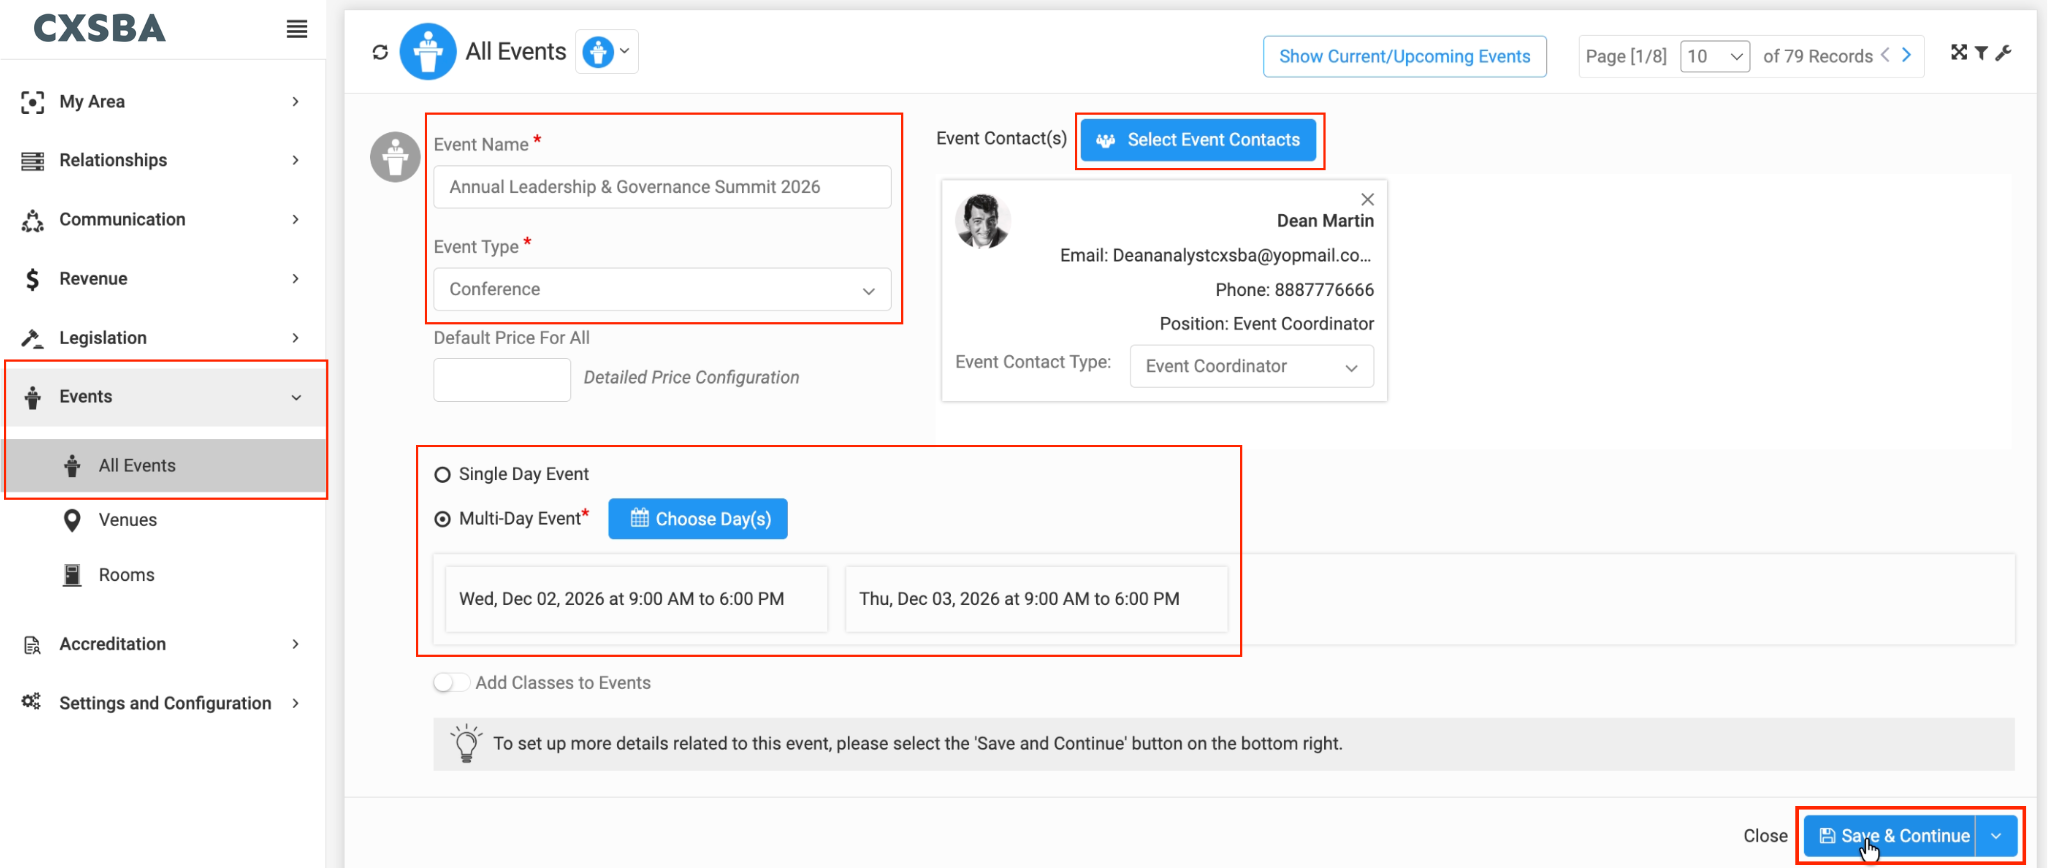
Step 1: Create a New Event
- Navigate to Events → All Events
- Click Add Event
- Enter the Event Name
- Select an Event Type (e.g., Conference, Workshop, Exhibitor Event)
- Choose whether it is a Single-Day or Multi-Day Event
- Add event dates and times
- Add a default price
- Assign an Event Contact
- Click Save & Continue
Your event is now created and ready for further configuration.
General Tab
To edit an event, click on "Edit". You will now see the "General" tab where you configure the core details and registration settings of your event.

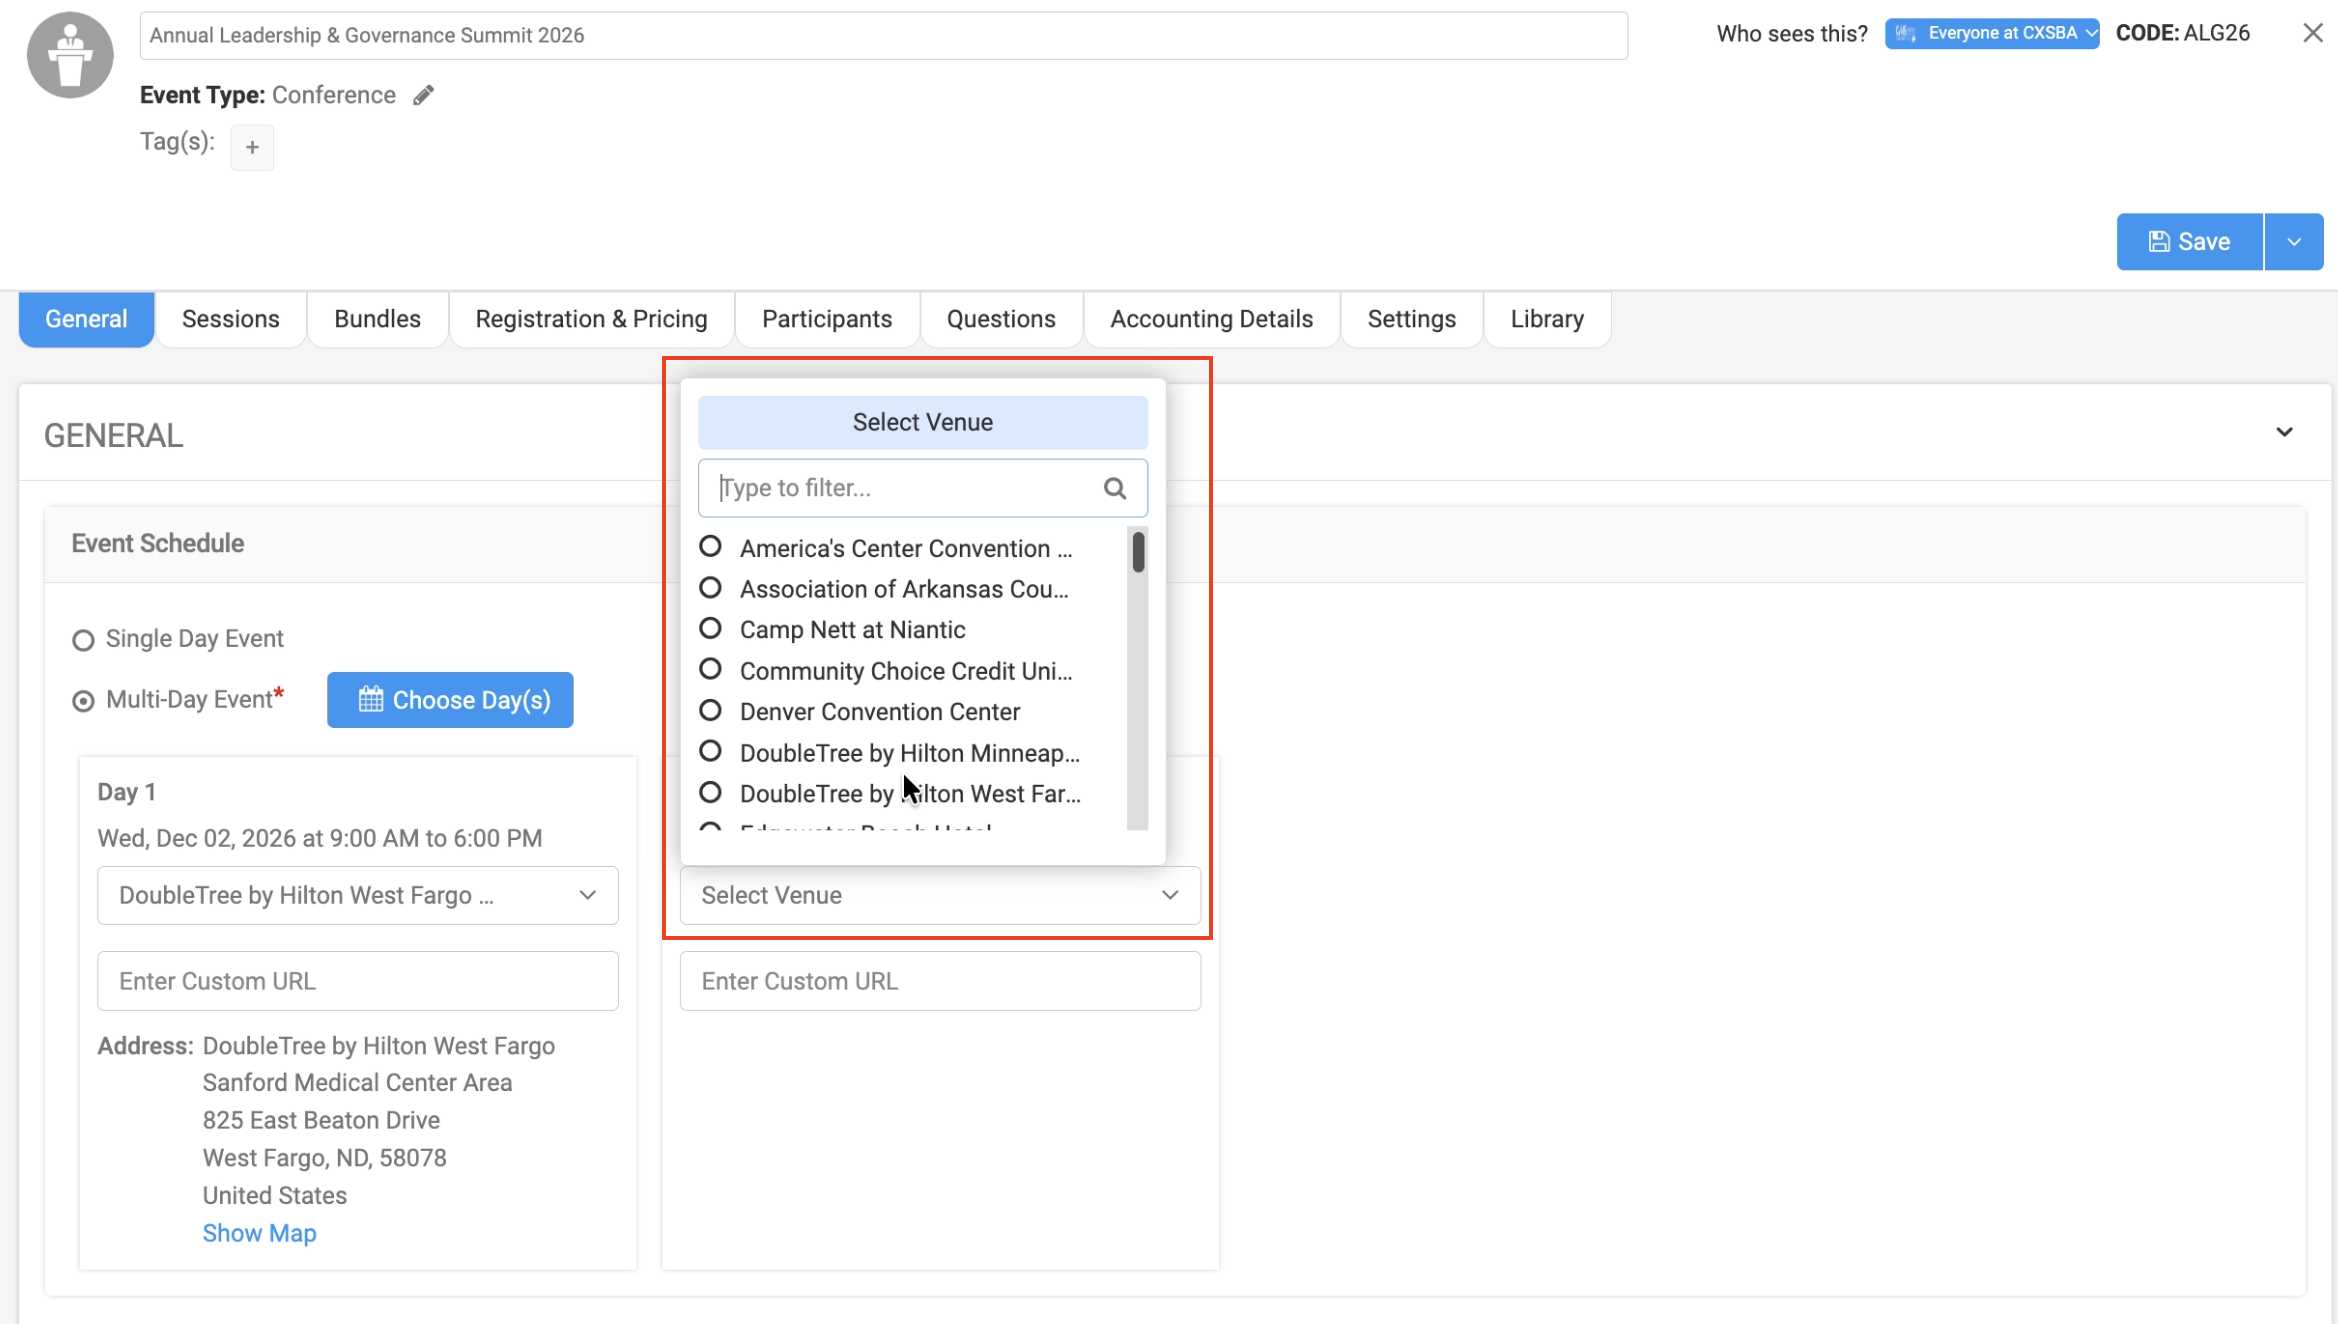
Event Setup
- Review or update the event schedule
- Assign a venue for each event day
- Upload an event logo
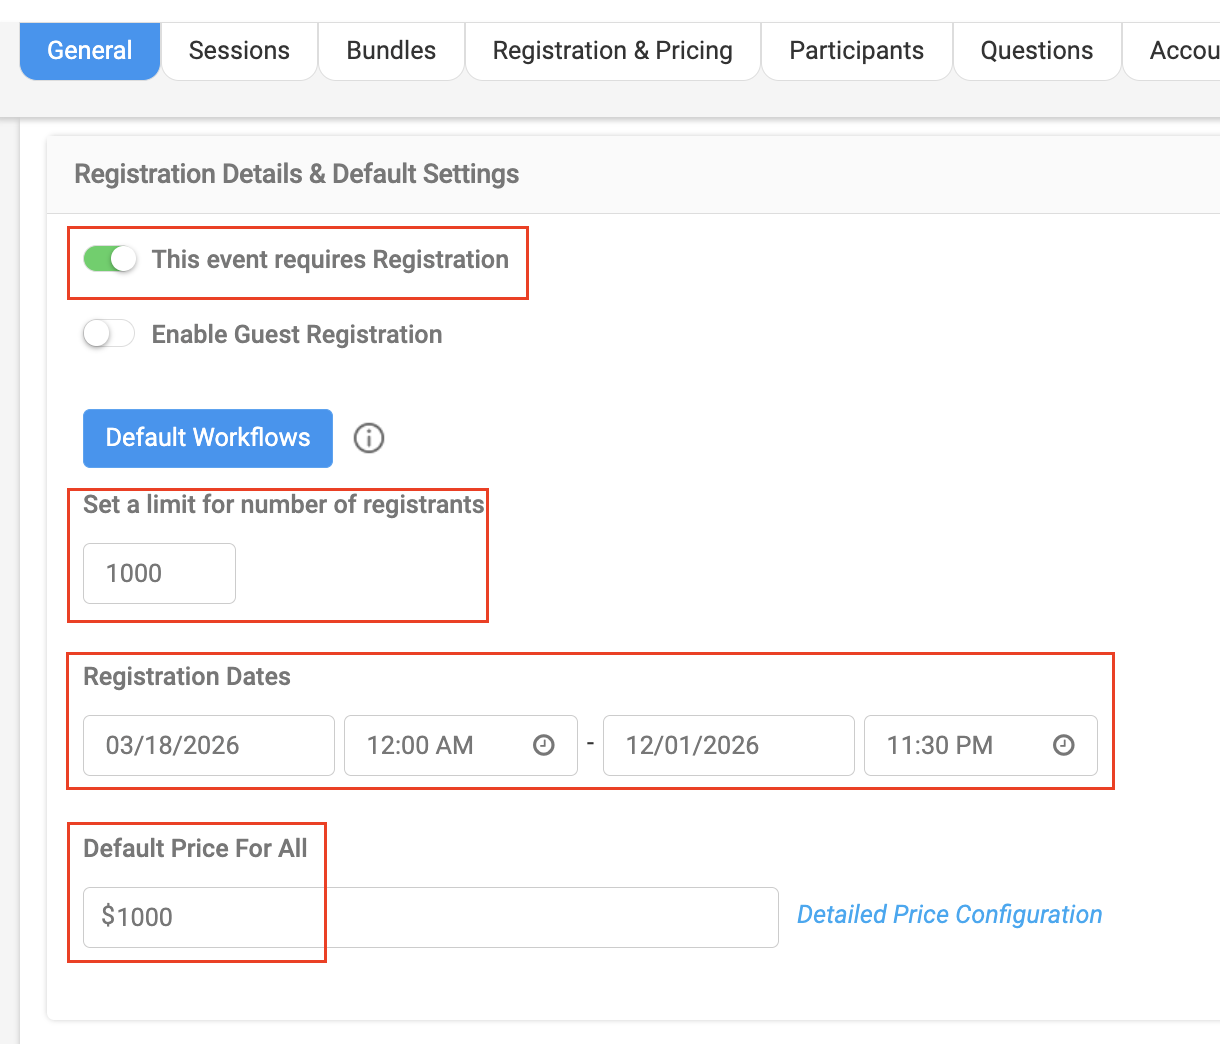
Registration Settings
To allow attendees to register:
- (Required) Enable “This event requires registration”
- (Optional) Enable guest registration
Once enabled, additional fields appear:
- Set a registration limit (e.g., capacity based on venue)
- Define registration start and end dates
- Set a default price (or leave blank for advanced pricing)
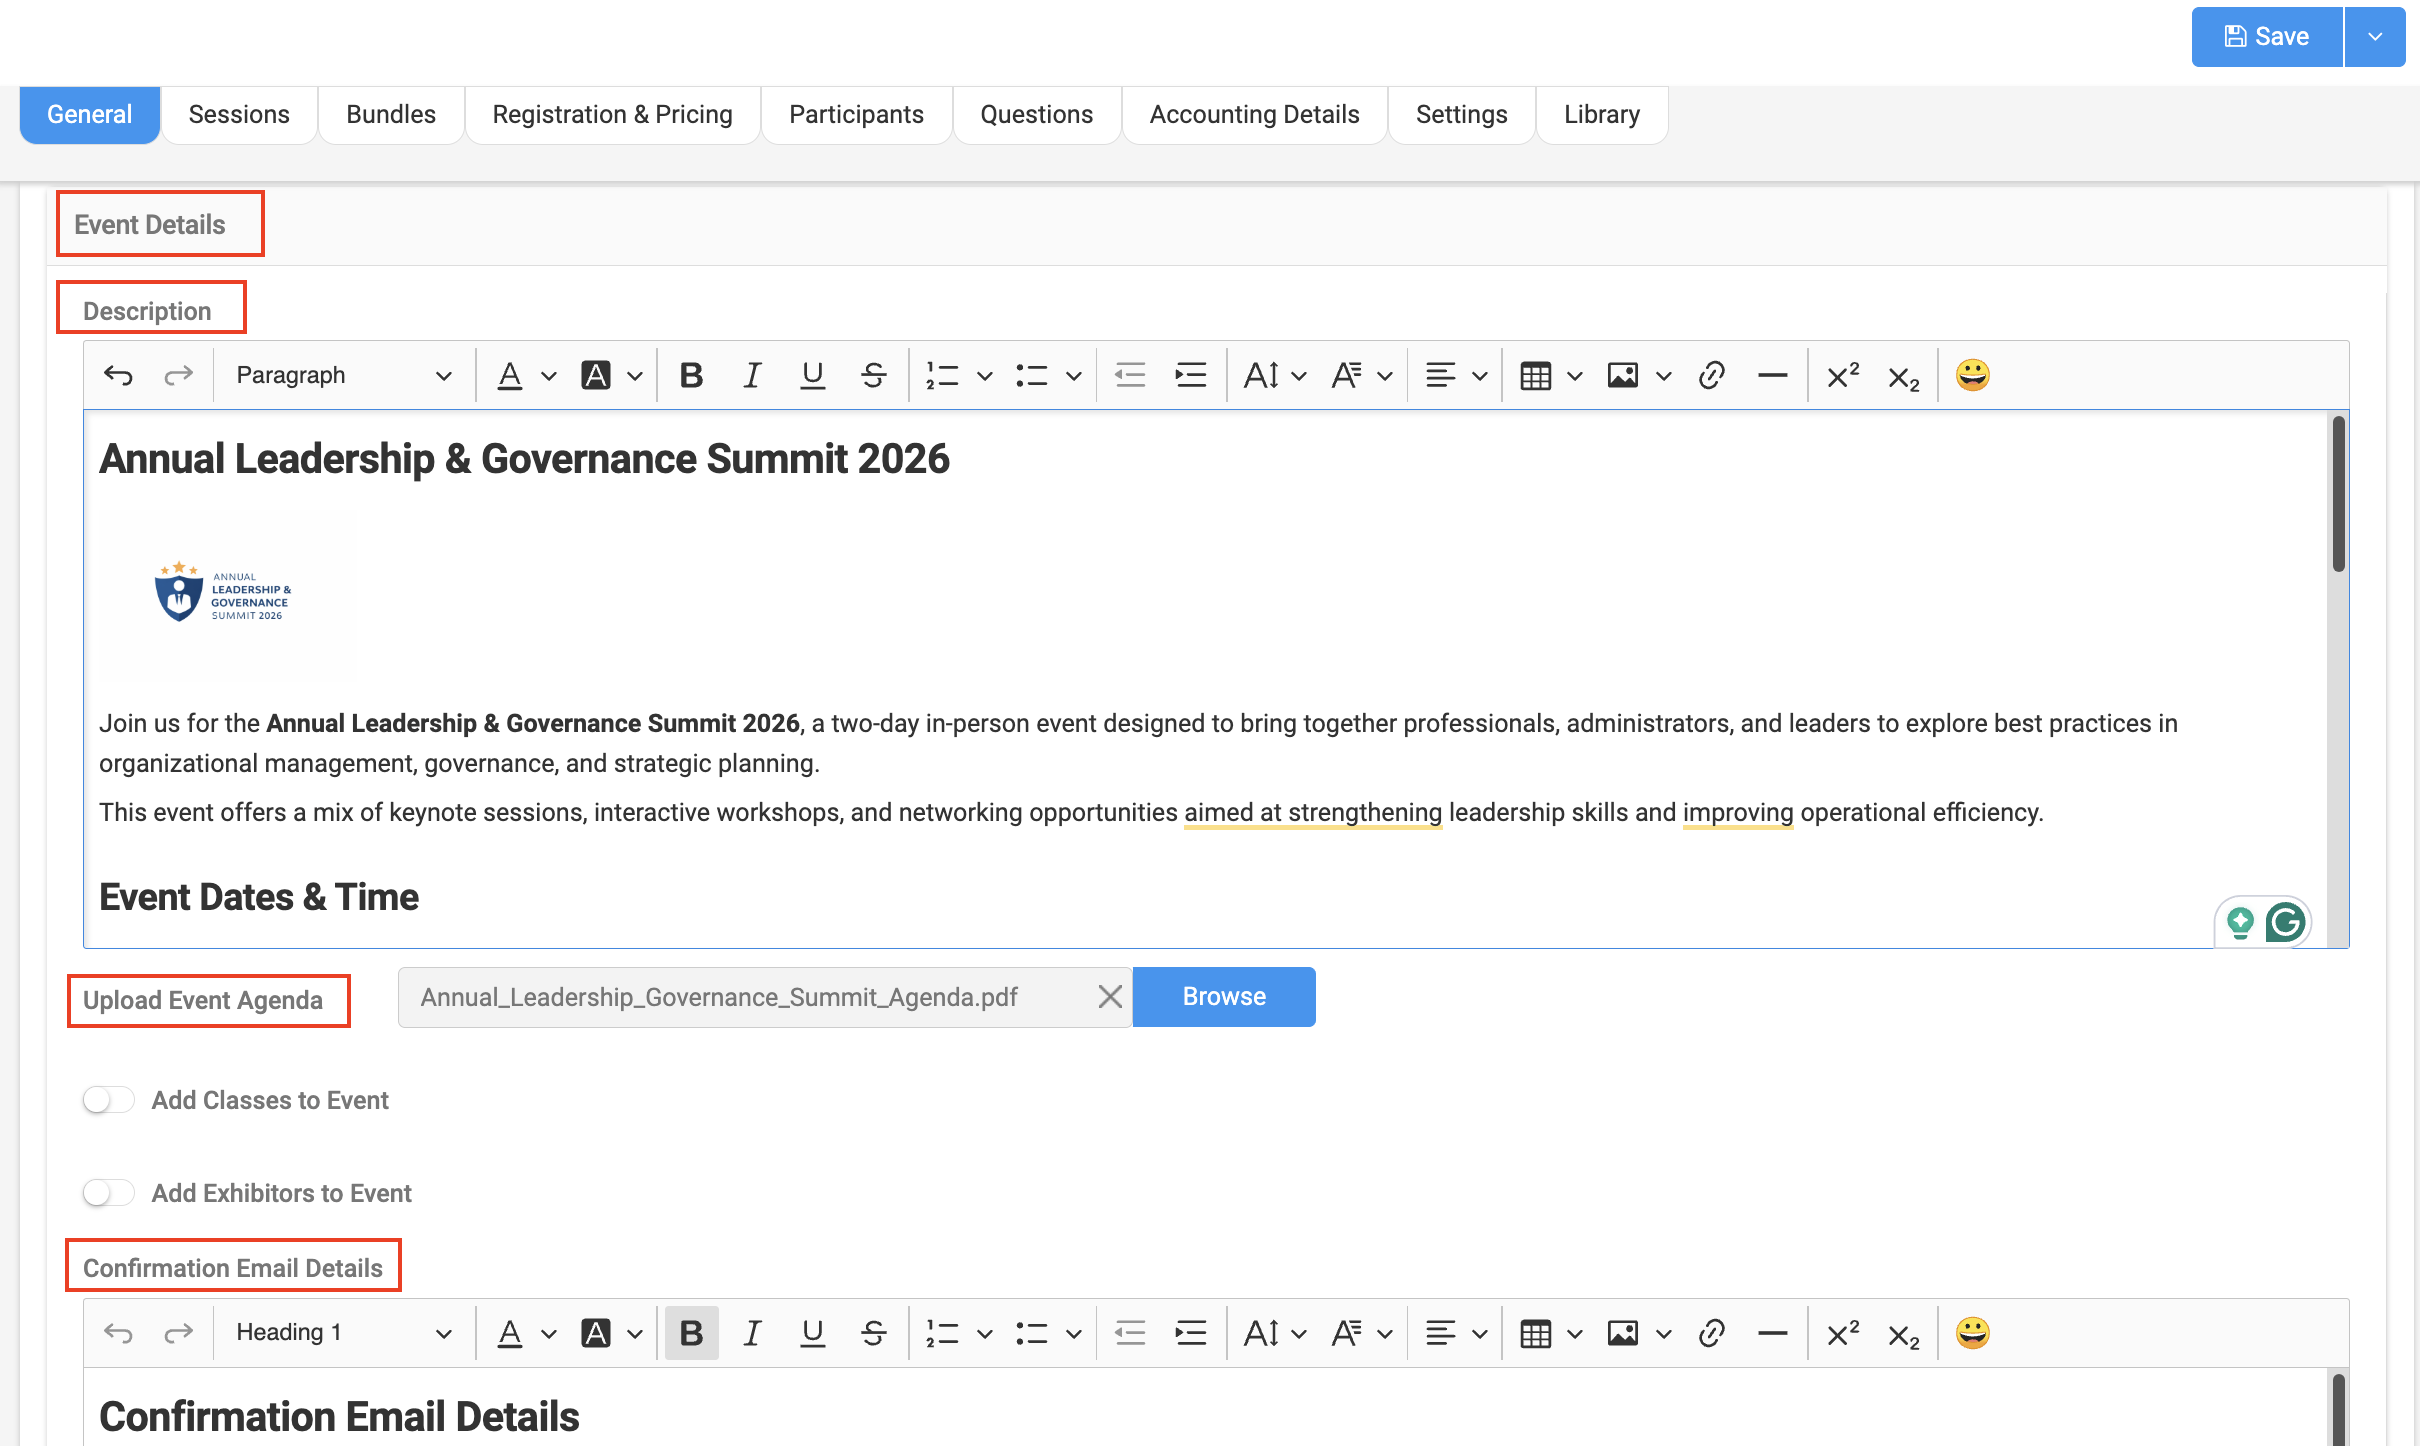
Event Details
- Add an event description
- Upload an agenda (PDF)
- Customize the confirmation email sent to registrants
Additional Options
- Enable public registration link (if needed)
- Add finance contact details
Note: Make sure to click Save after each step to ensure your information is not lost.
General tab is critical, without enabling registration, attendees will not be able to sign up for your event.
Sessions Tab
Sessions represent the individual components of your event, such as keynote speeches, meals, or breakout sessions.
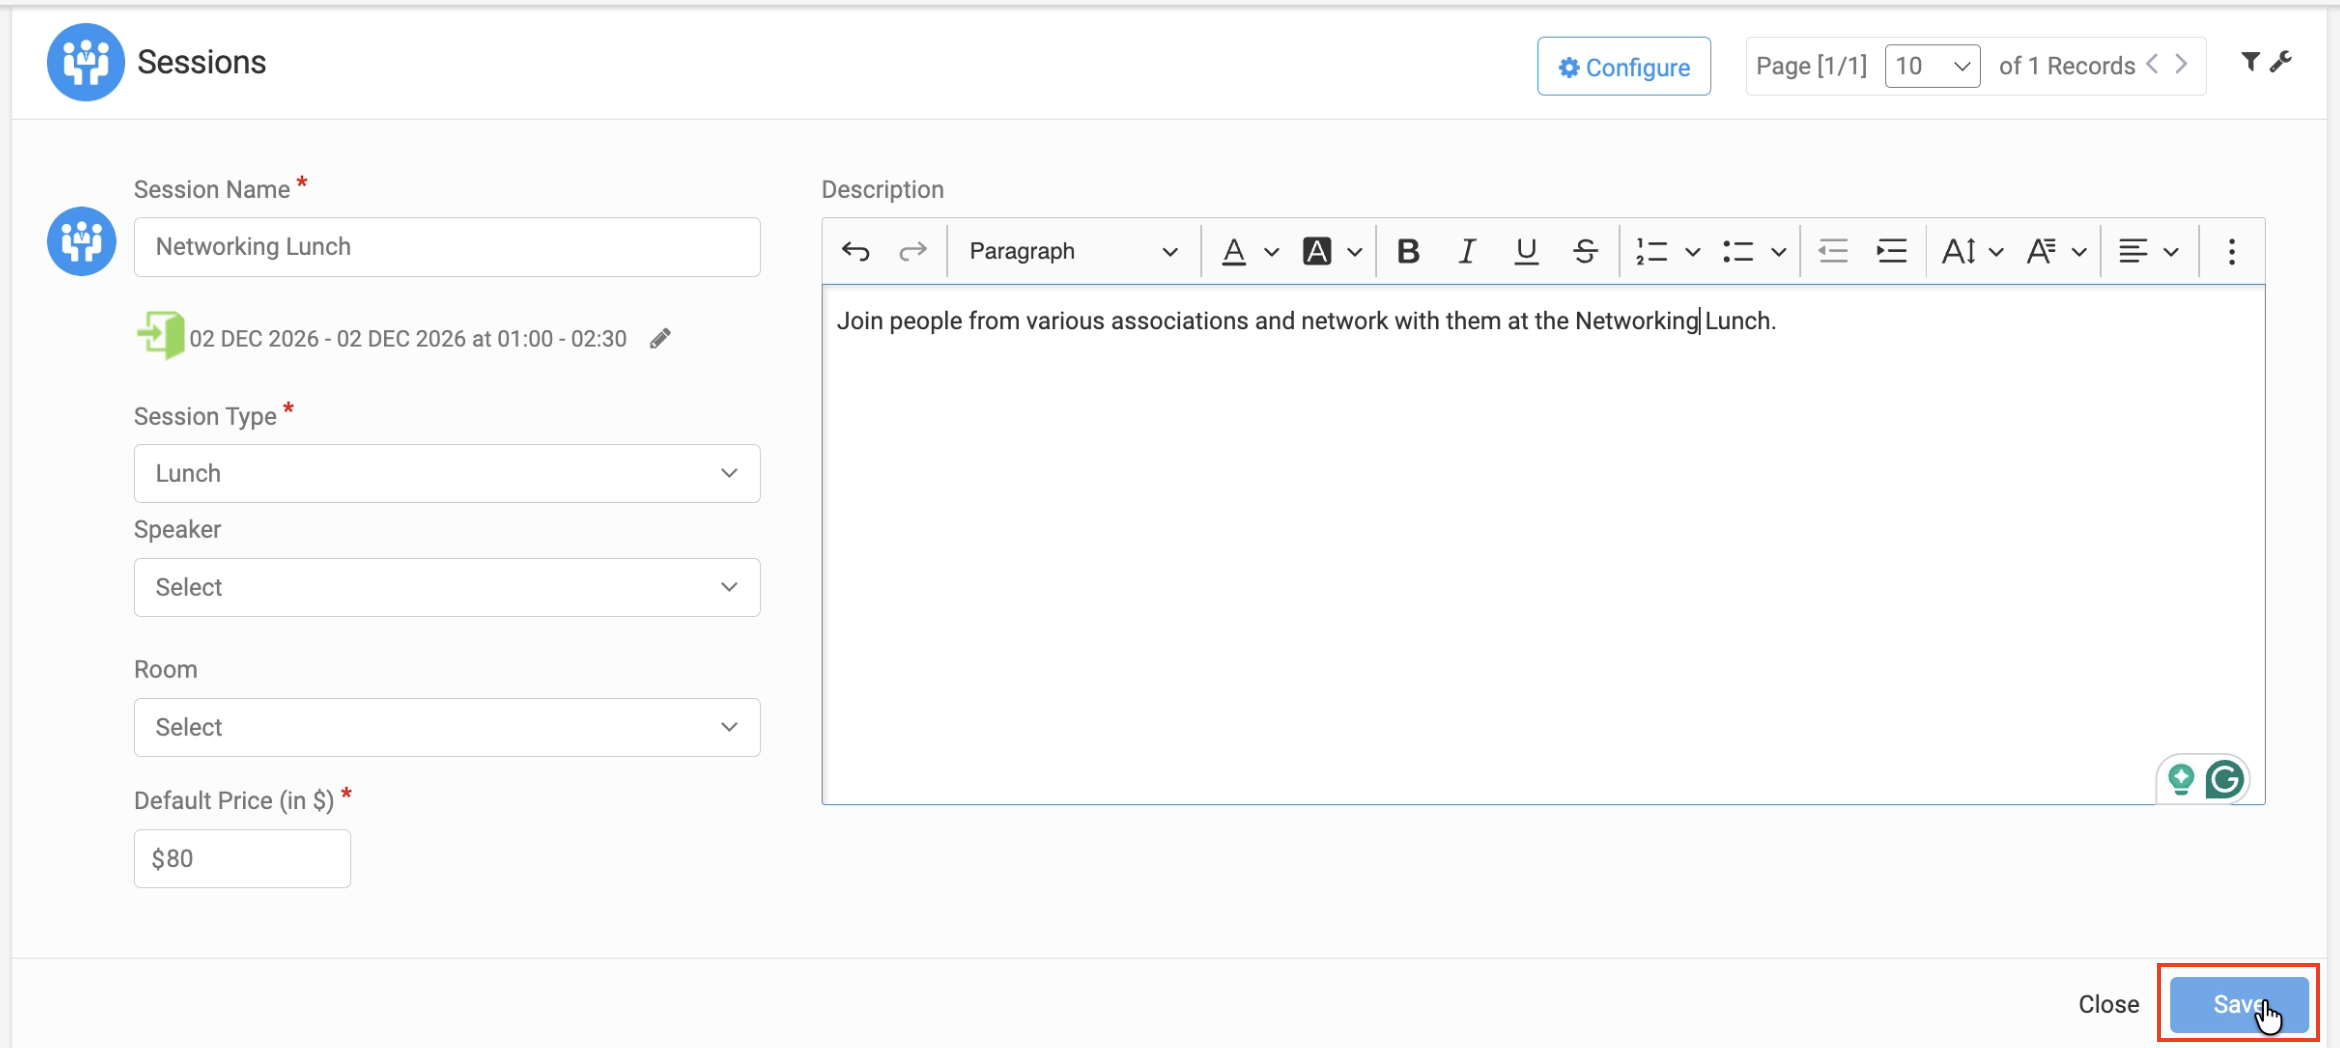
Add a Session
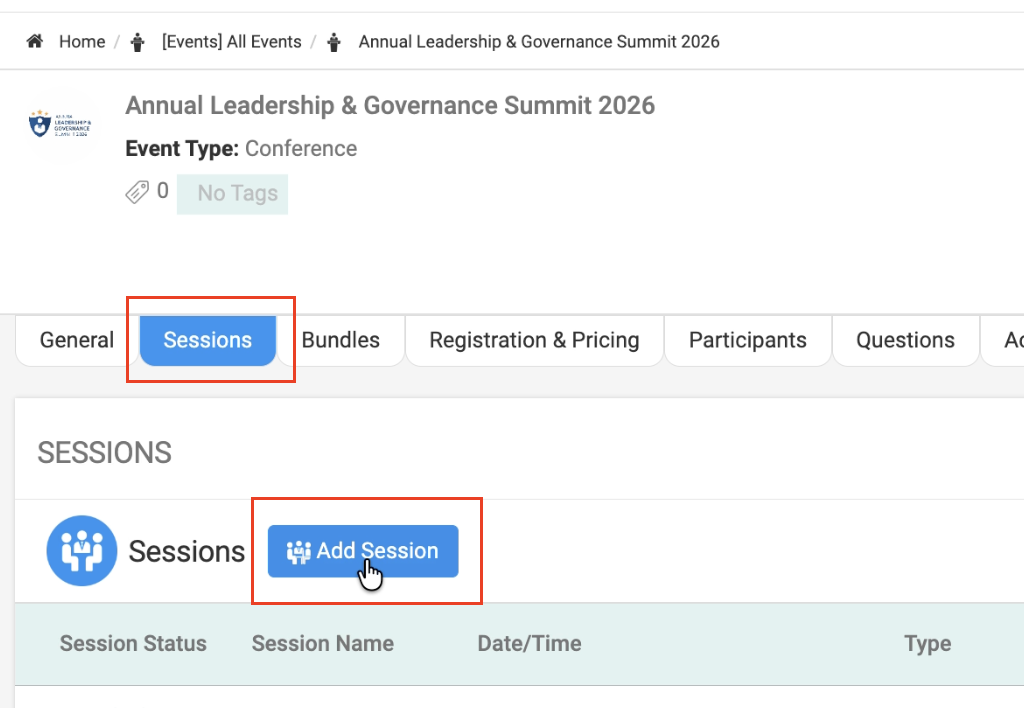
- Click Add Session
- Enter the Session Name
- Select:
- Date
- Start & End Time
- Session Type (e.g., Lunch, Workshop, Networking)
- Date
- (Optional) Assign:
- Speaker
- Room
- Add a default price (if applicable)
- Add a description
- Click Save
You can:
- Add multiple sessions
- Edit, Delete or Disable sessions
Sessions allow attendees to customize their event experience.
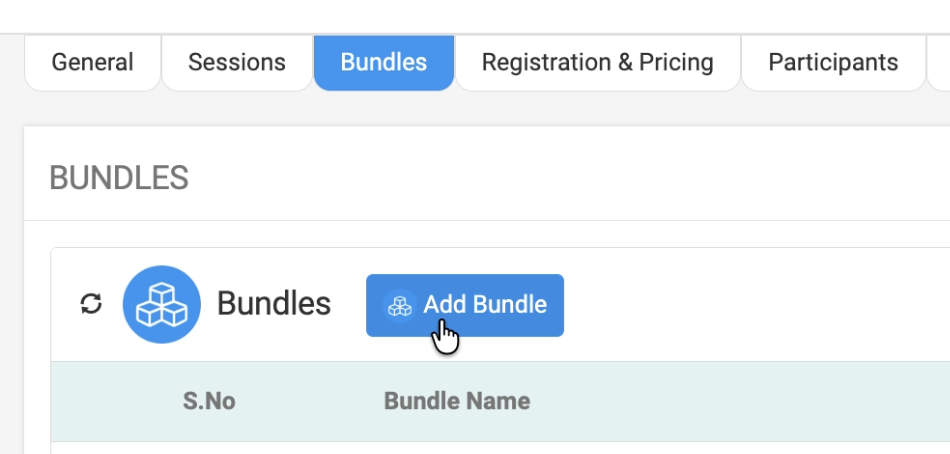
Bundles Tab
Bundles allow you to group sessions or event days together into packages for easier selection and pricing.
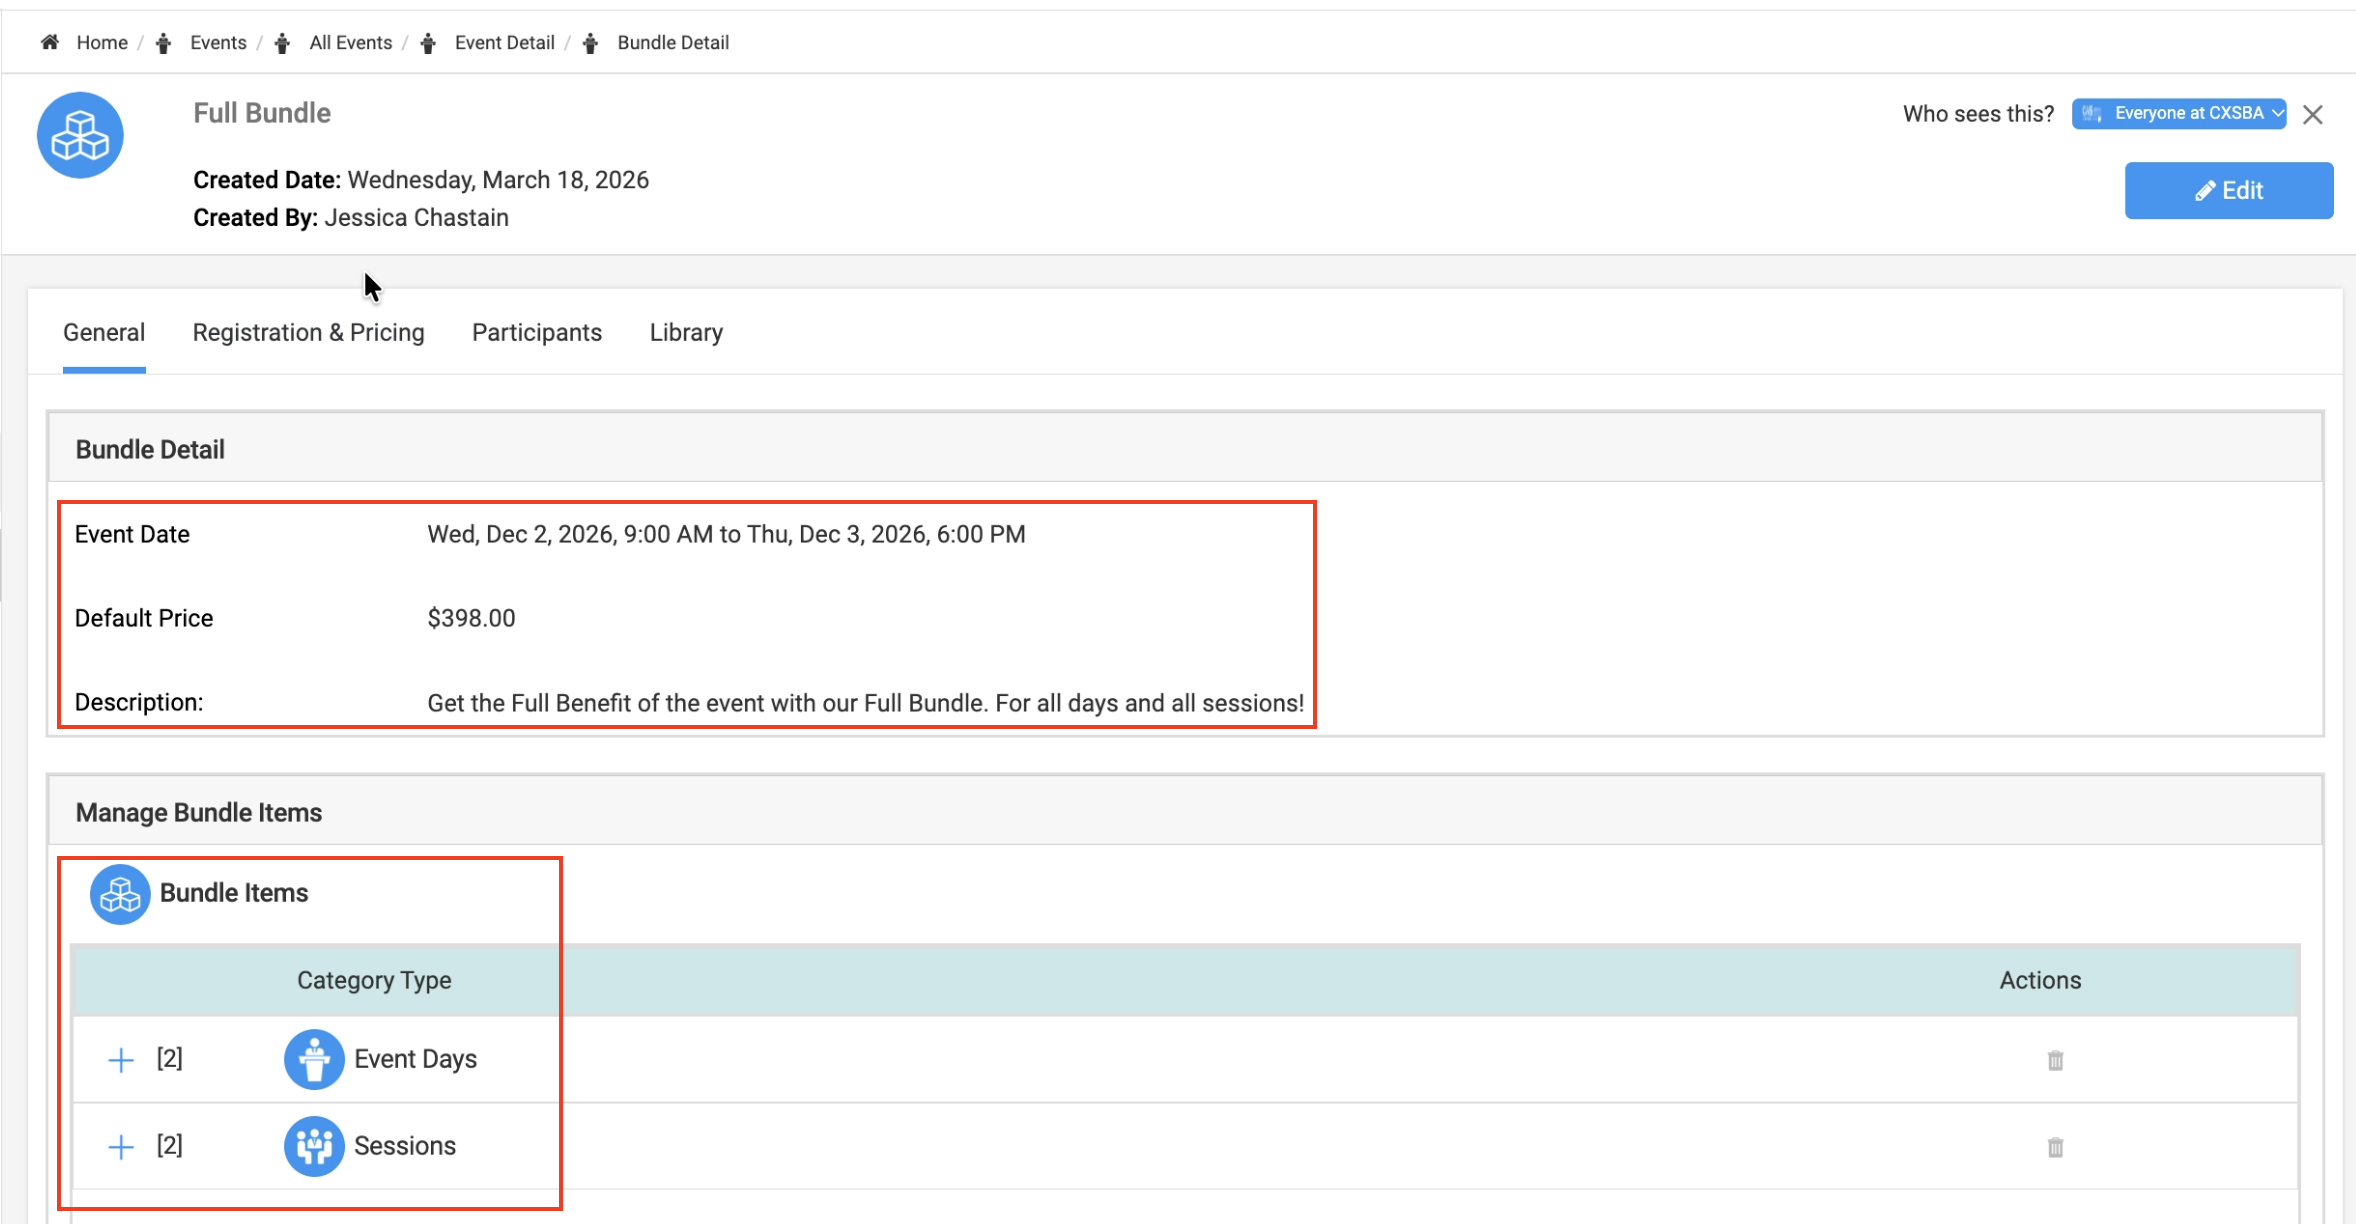
Create a Bundle
- Click Add Bundle
- Enter a Bundle Name (e.g., Full Event Bundle, Gold Sponsorship)
- Set a default price
- Add a description
Configure Bundle Content
- Select:
- Event Days
-
- Sessions
- Save the bundle
You can:
- Create multiple bundles (e.g., Full Bundle, Gold Package)
- Enable or disable bundles
- Customize pricing per bundle
Bundles simplify registration and offer packaged pricing options.
Registration & Participants Tab
Participants
- View registered attendees once registrations begin
- Track:
- Registrations
-
- Invoices
-
- Participation details
- Participation details
Questions Tab
Registration questions allow you to collect additional information during signup.
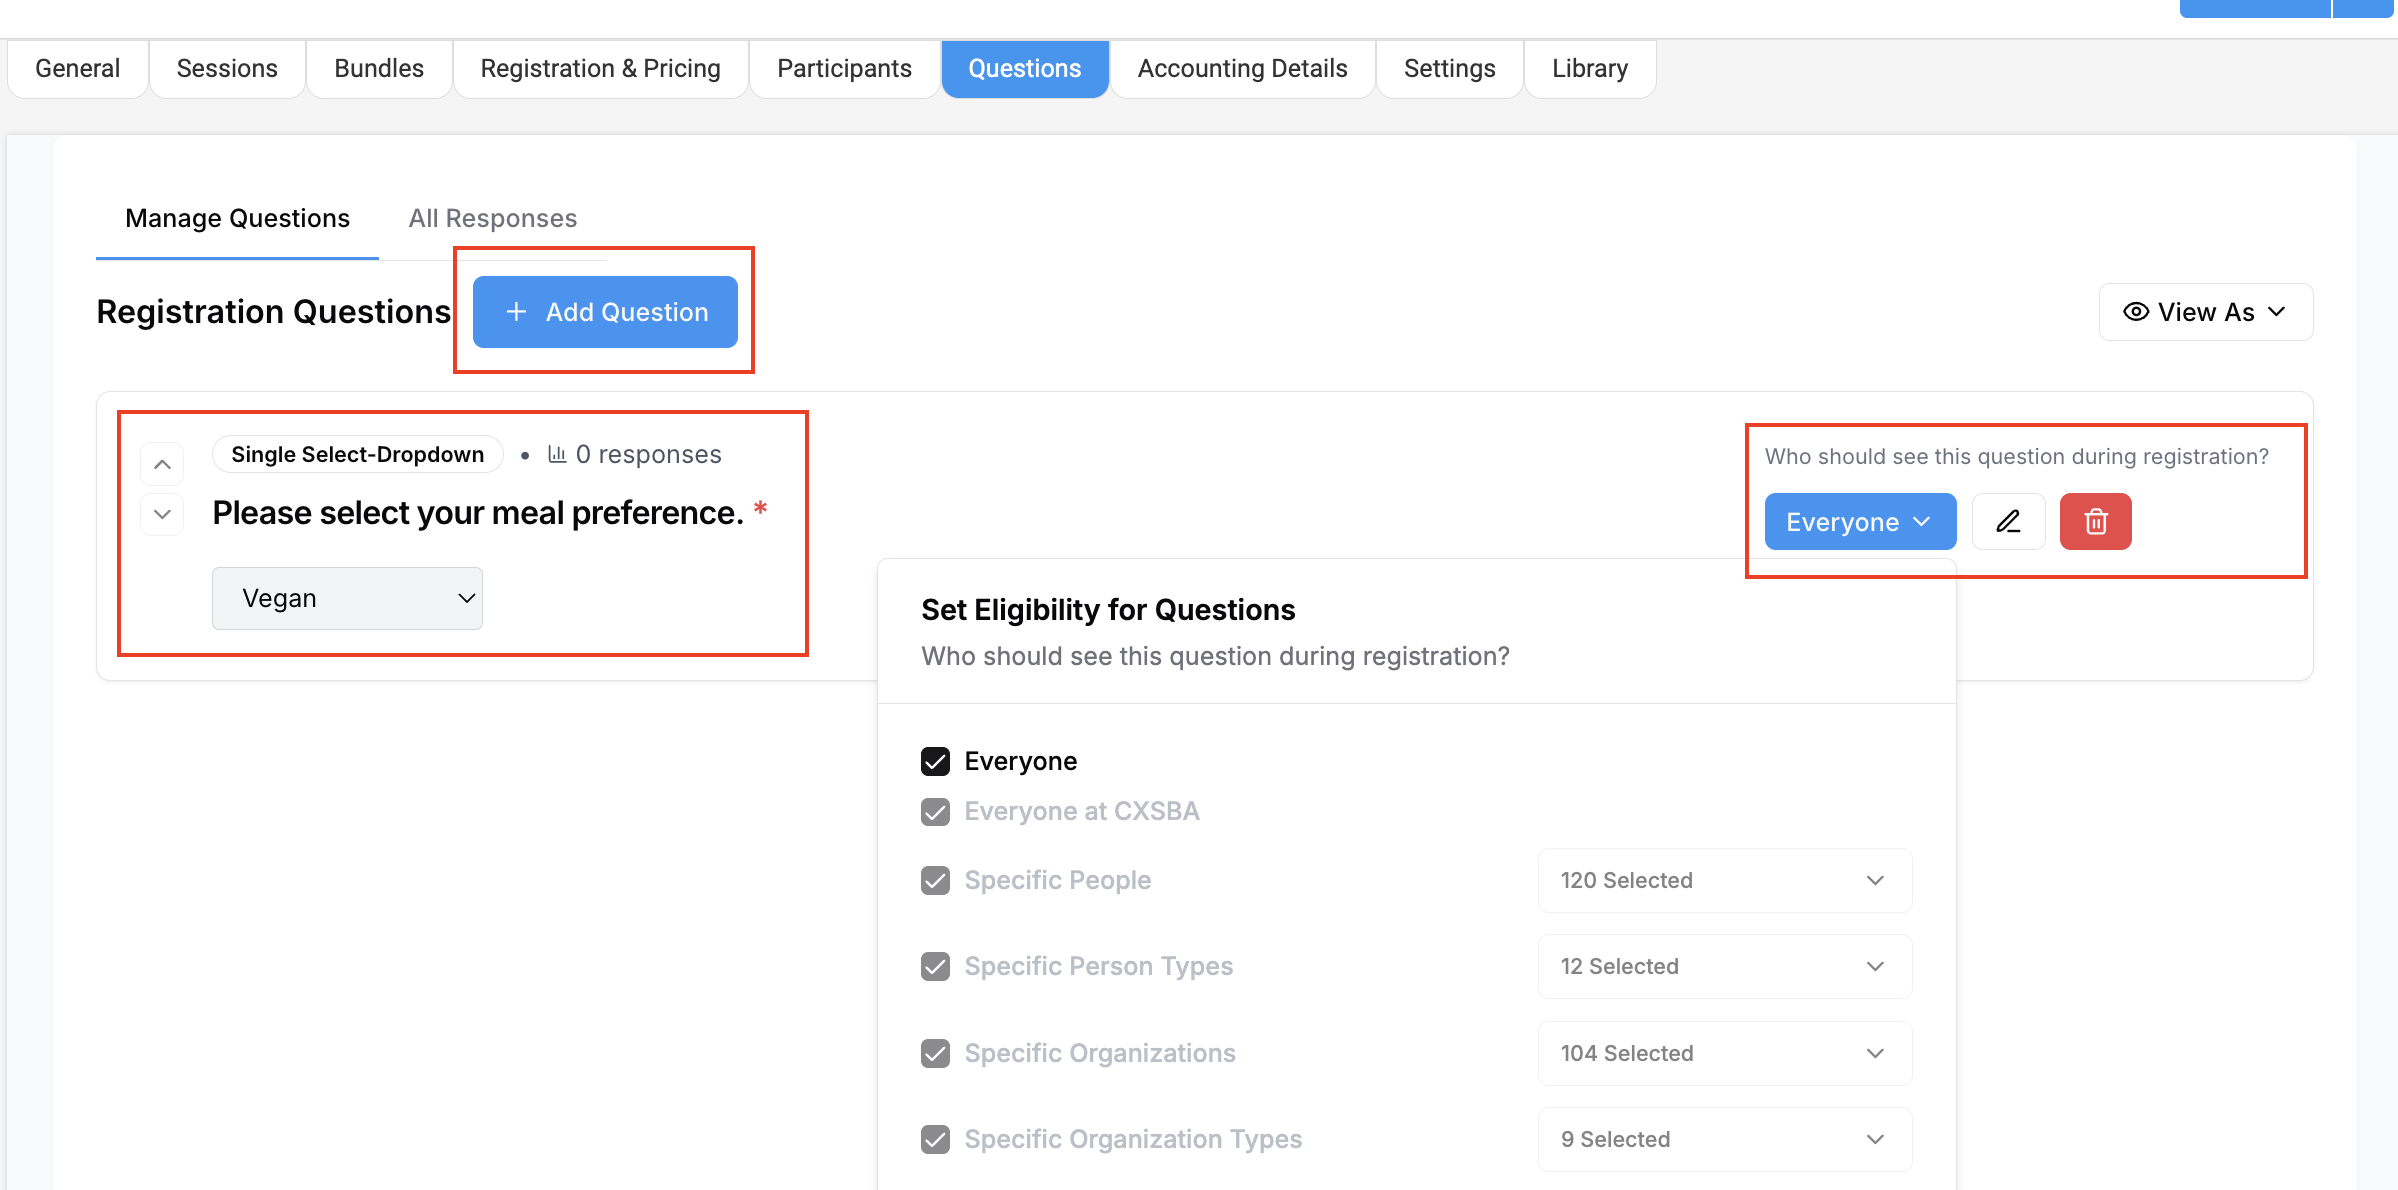
Add a Question
- Click Add Question
- Enter:
- Question text (e.g., meal preference)
-
- Description (optional)
- Select Question Type (e.g., single select, multi-select)
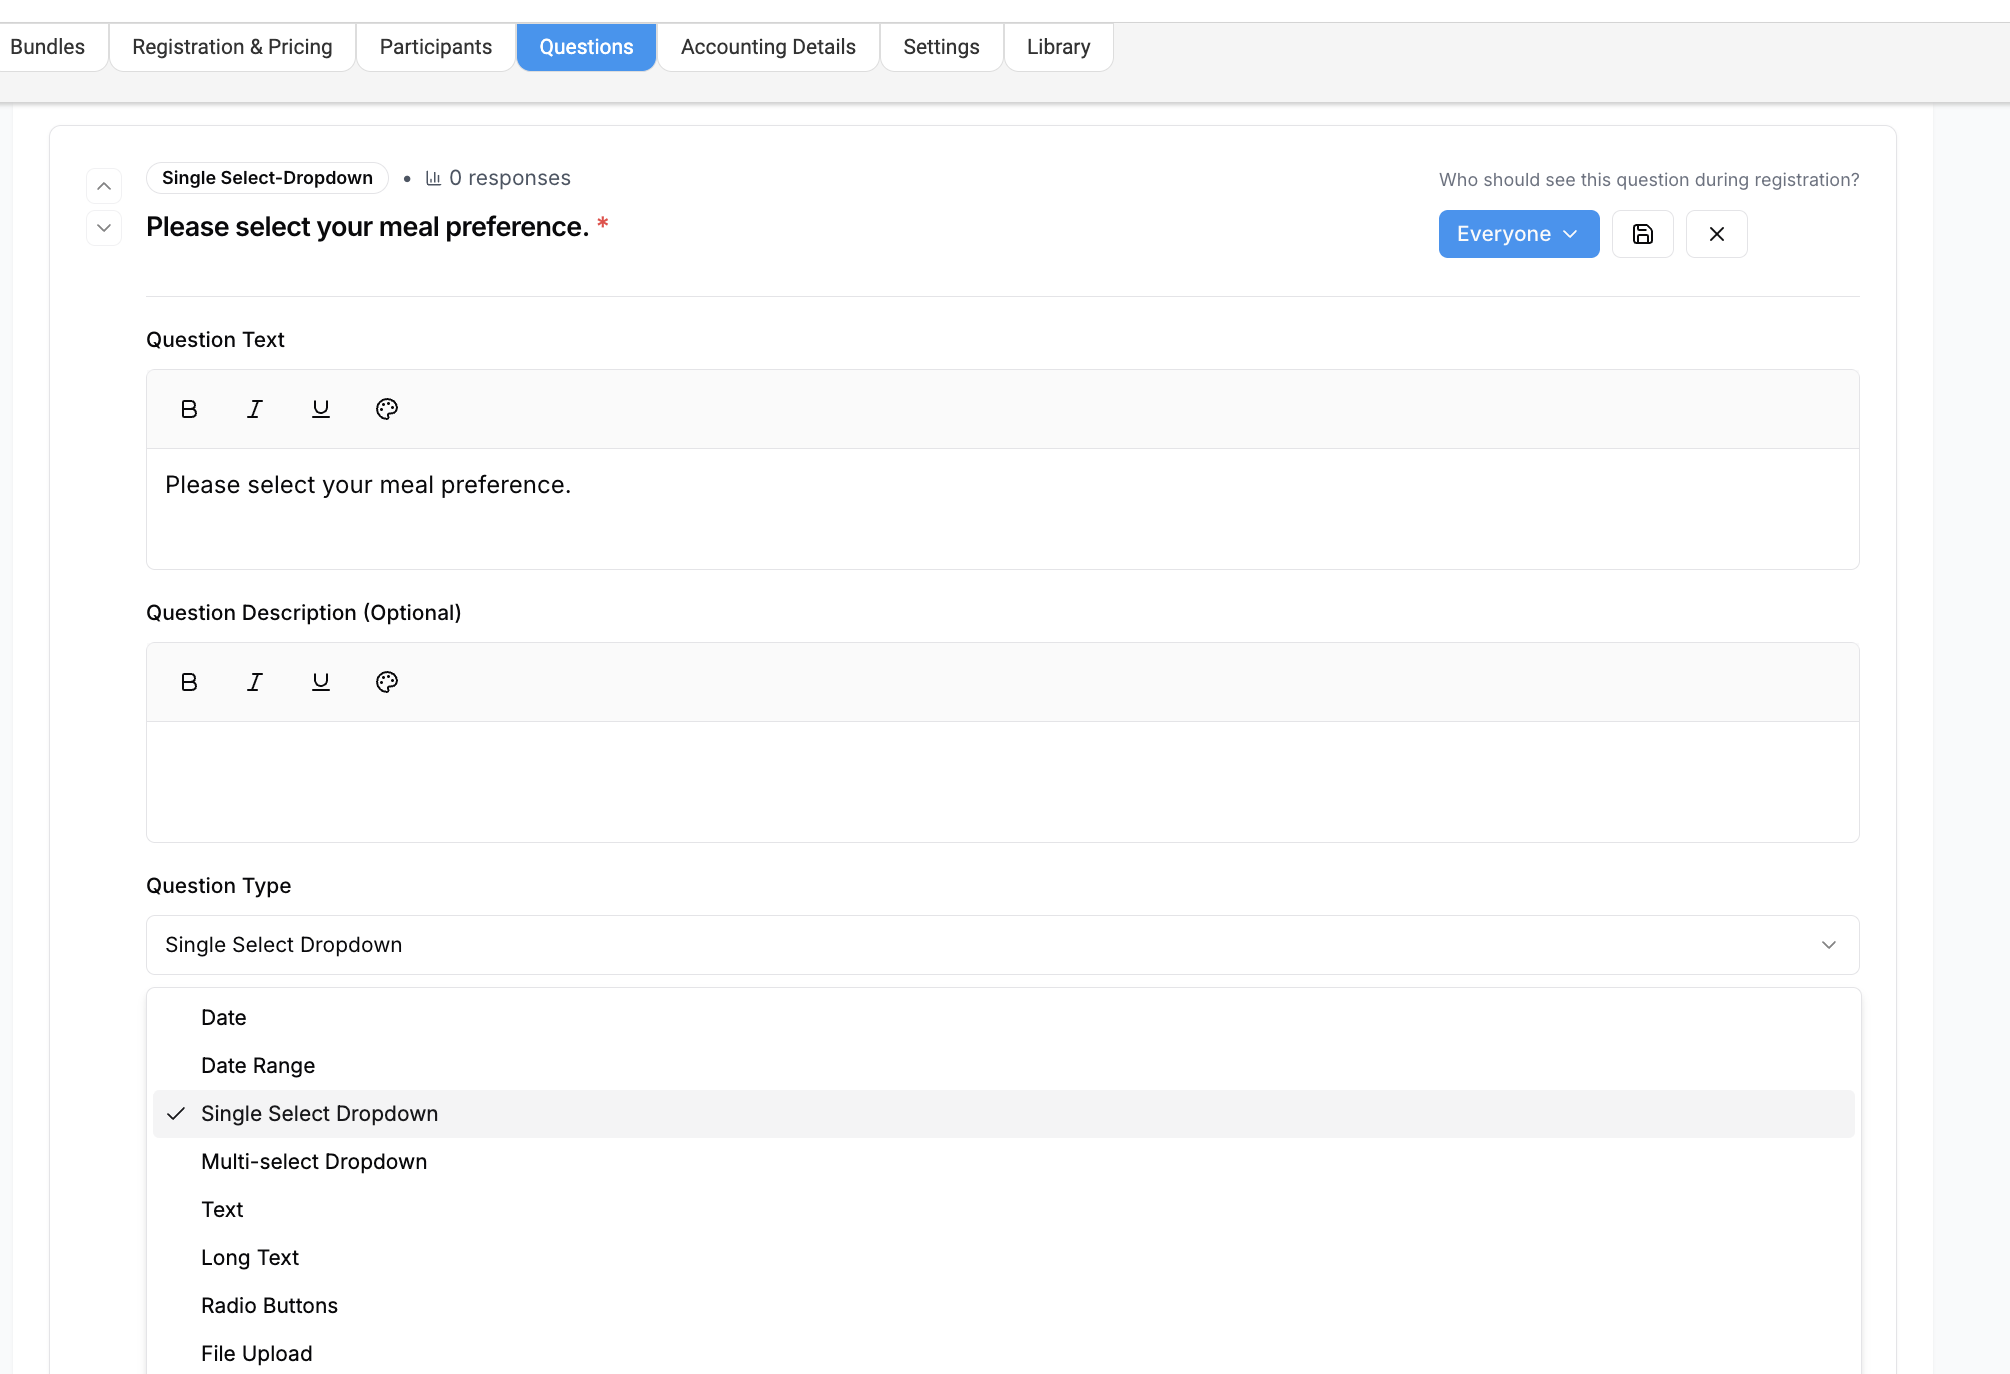
- Add options
- Mark as Required (if needed)
- Set visibility (who should see the question)
- Click Save
These questions help:
- Gather attendee preferences
- Reduce manual follow-ups
- Improve event planning and logistics
Tip: For detailed steps on configuring registration questions, see the Registration Questions article.
Accounting Tab
- Track all financial transactions related to the event
- View:
- Payments
-
- Invoices
-
- Revenue data
This section updates automatically as registrations occur.
Settings Tab
Control registration requirements and rules for your event.
Examples include:
- Require at least:
- One session
-
- One bundle
-
- One class
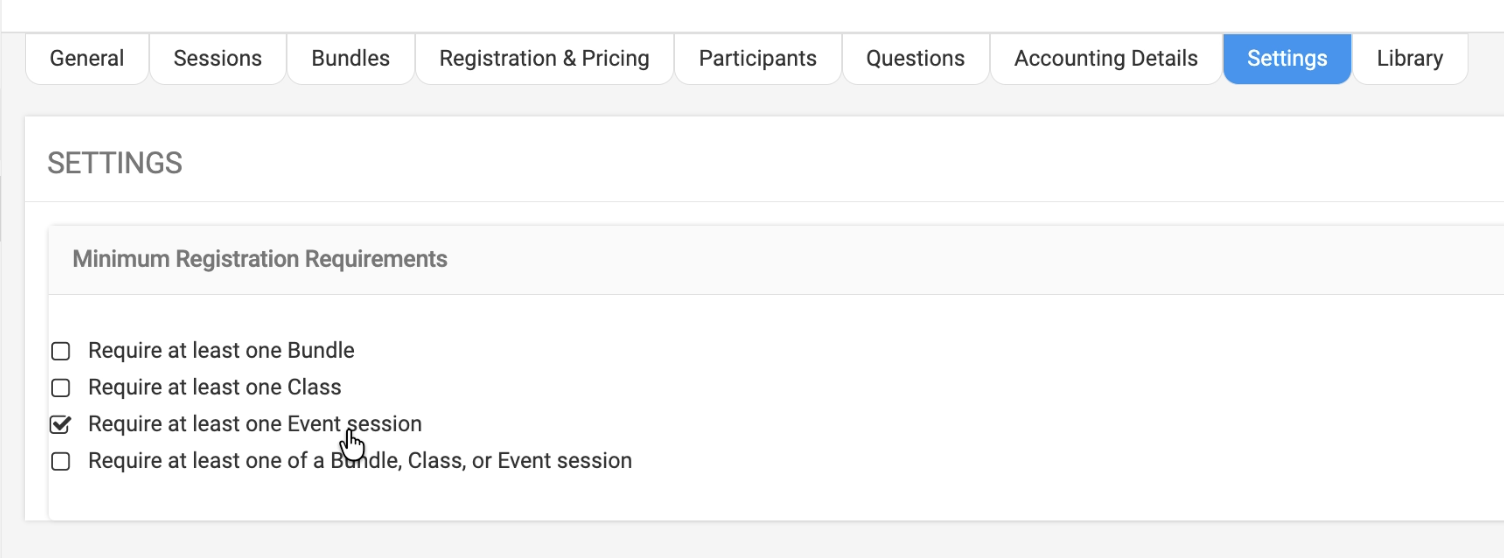
This ensures attendees complete required selections before registering.
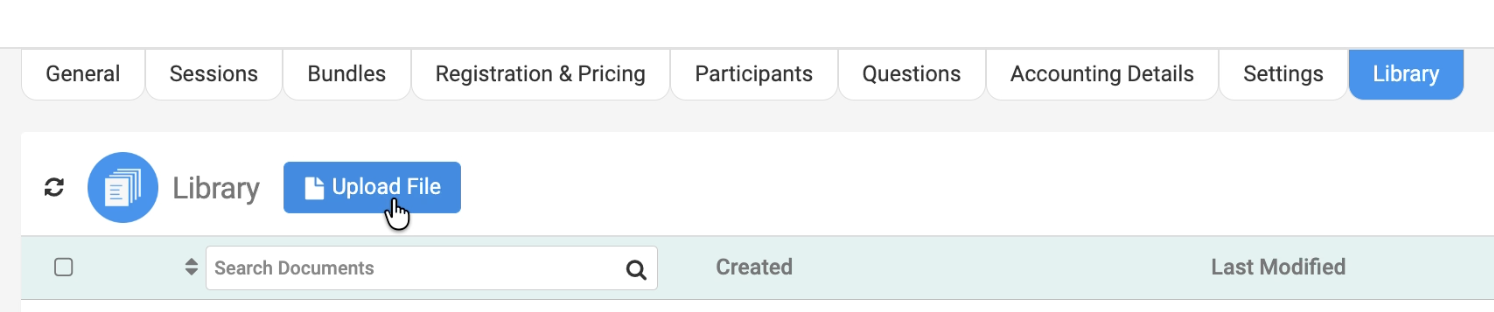
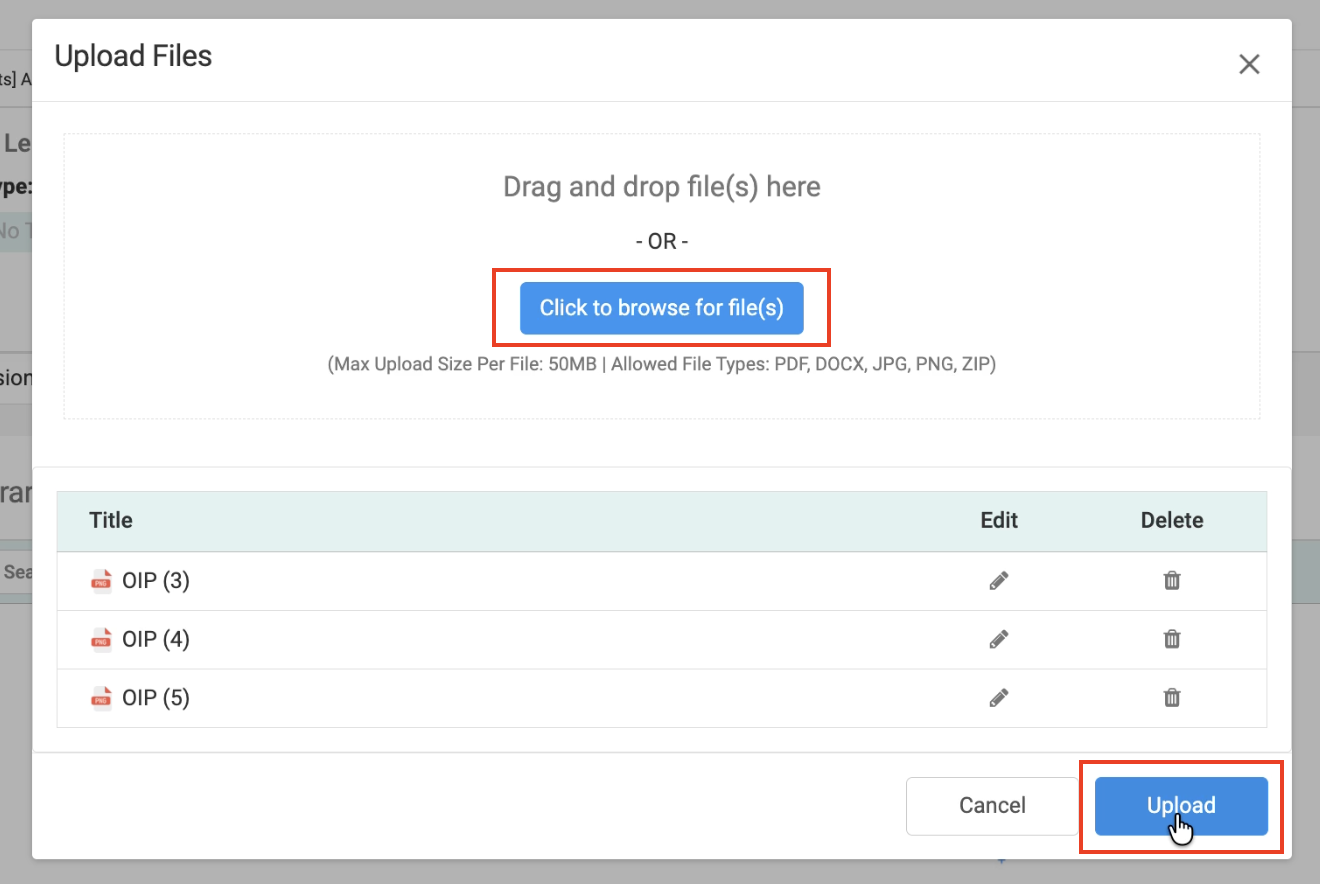
Library Tab
The Library allows you to upload and share event-related resources.
Upload Files
- Images (JPG, PNG)
- PDFs (e.g., agenda, speaker list, floor plans)
Examples:
- Venue photos
- Conference room layouts
- Speaker lists
- Event brochures
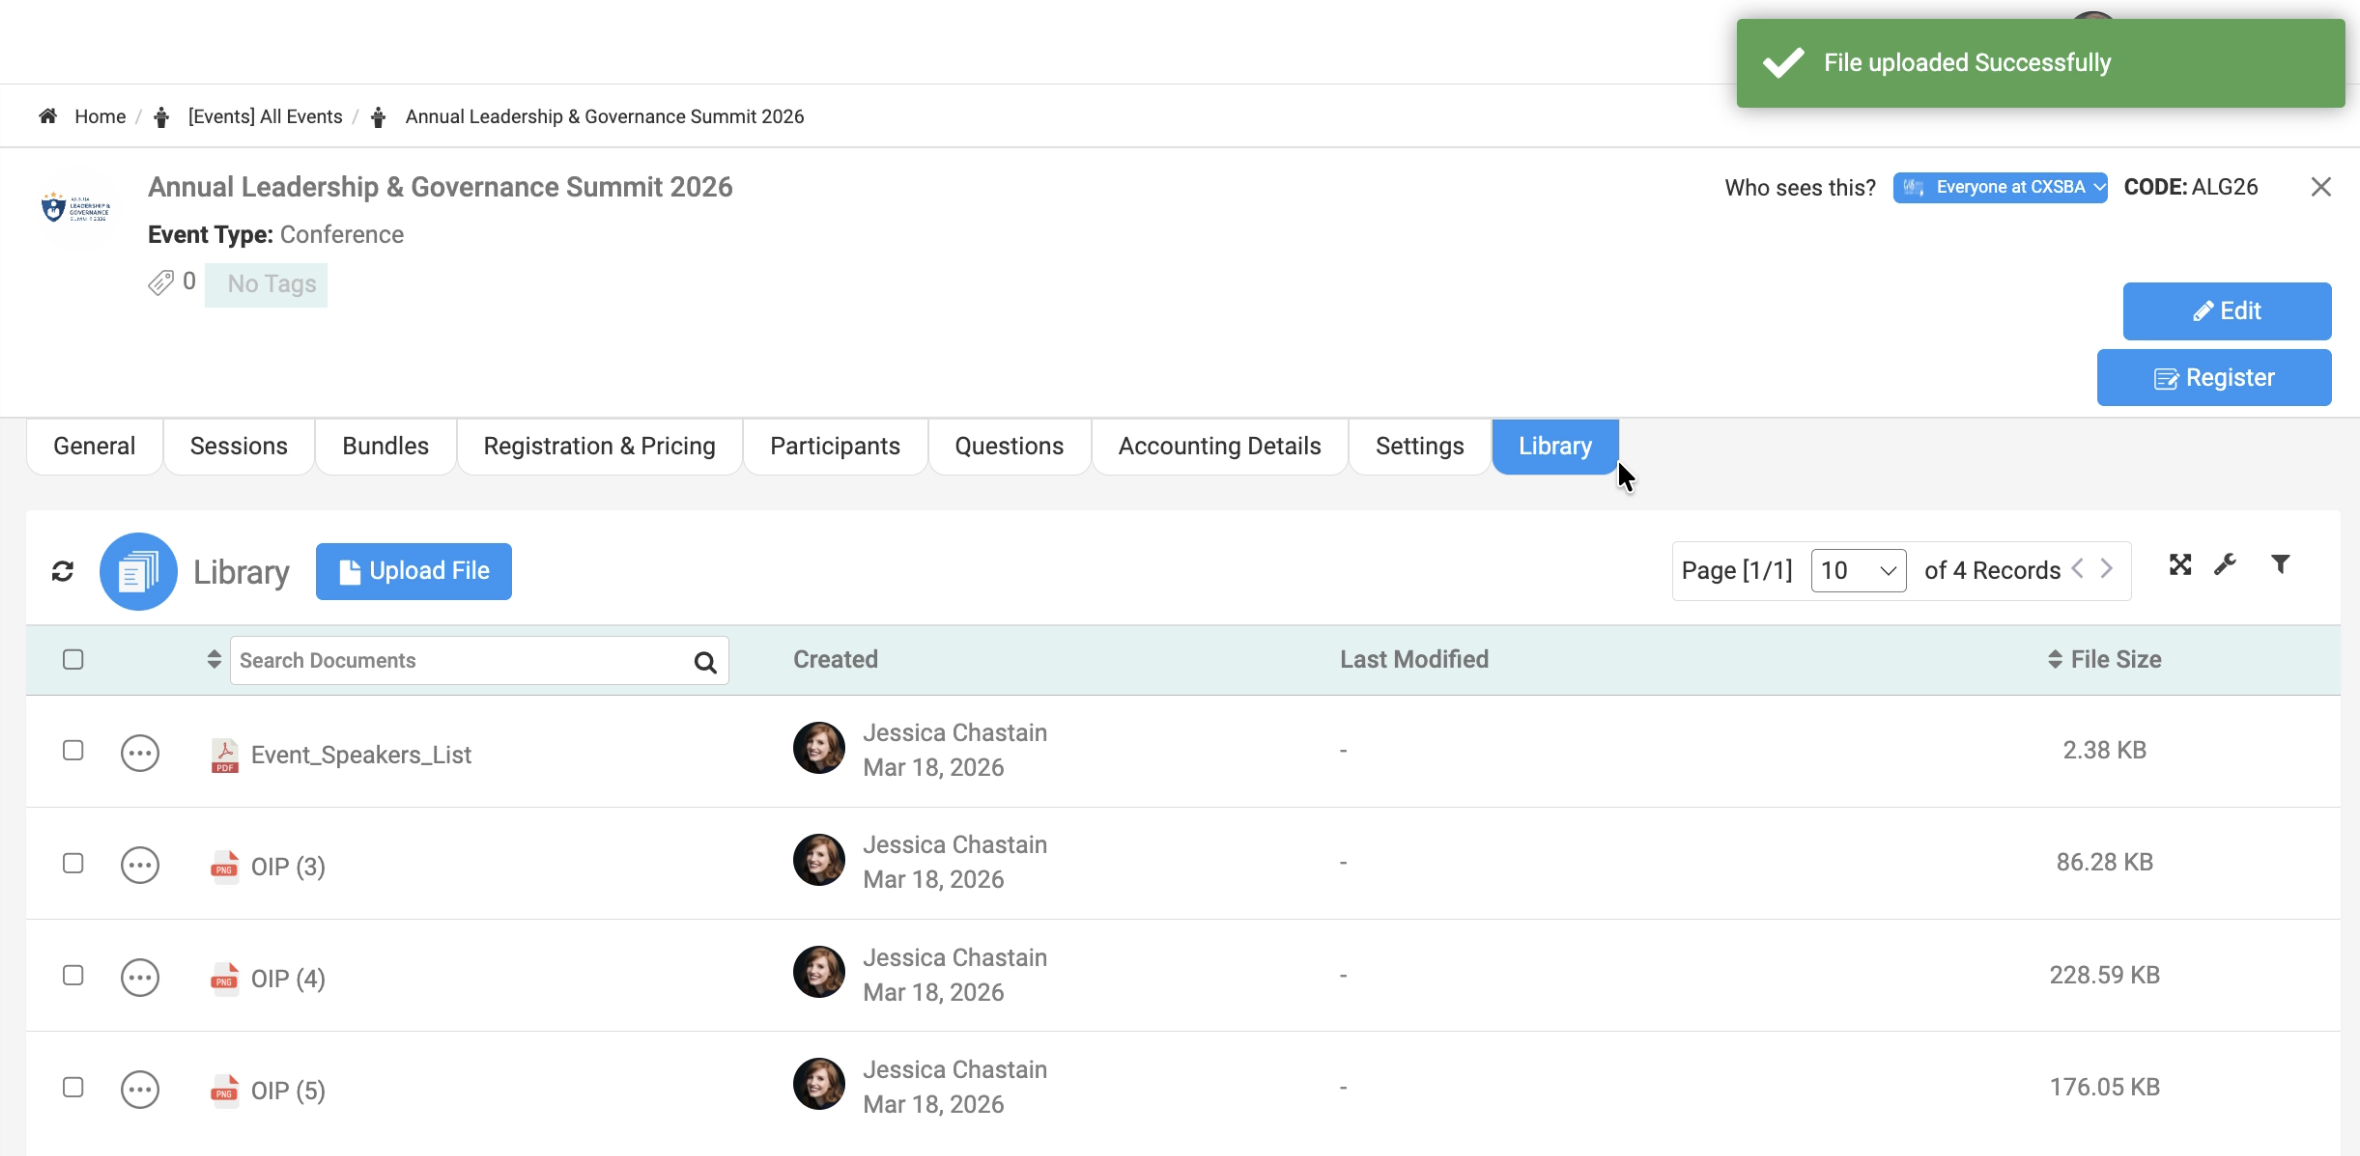
These files are accessible to attendees and enhance their event experience.
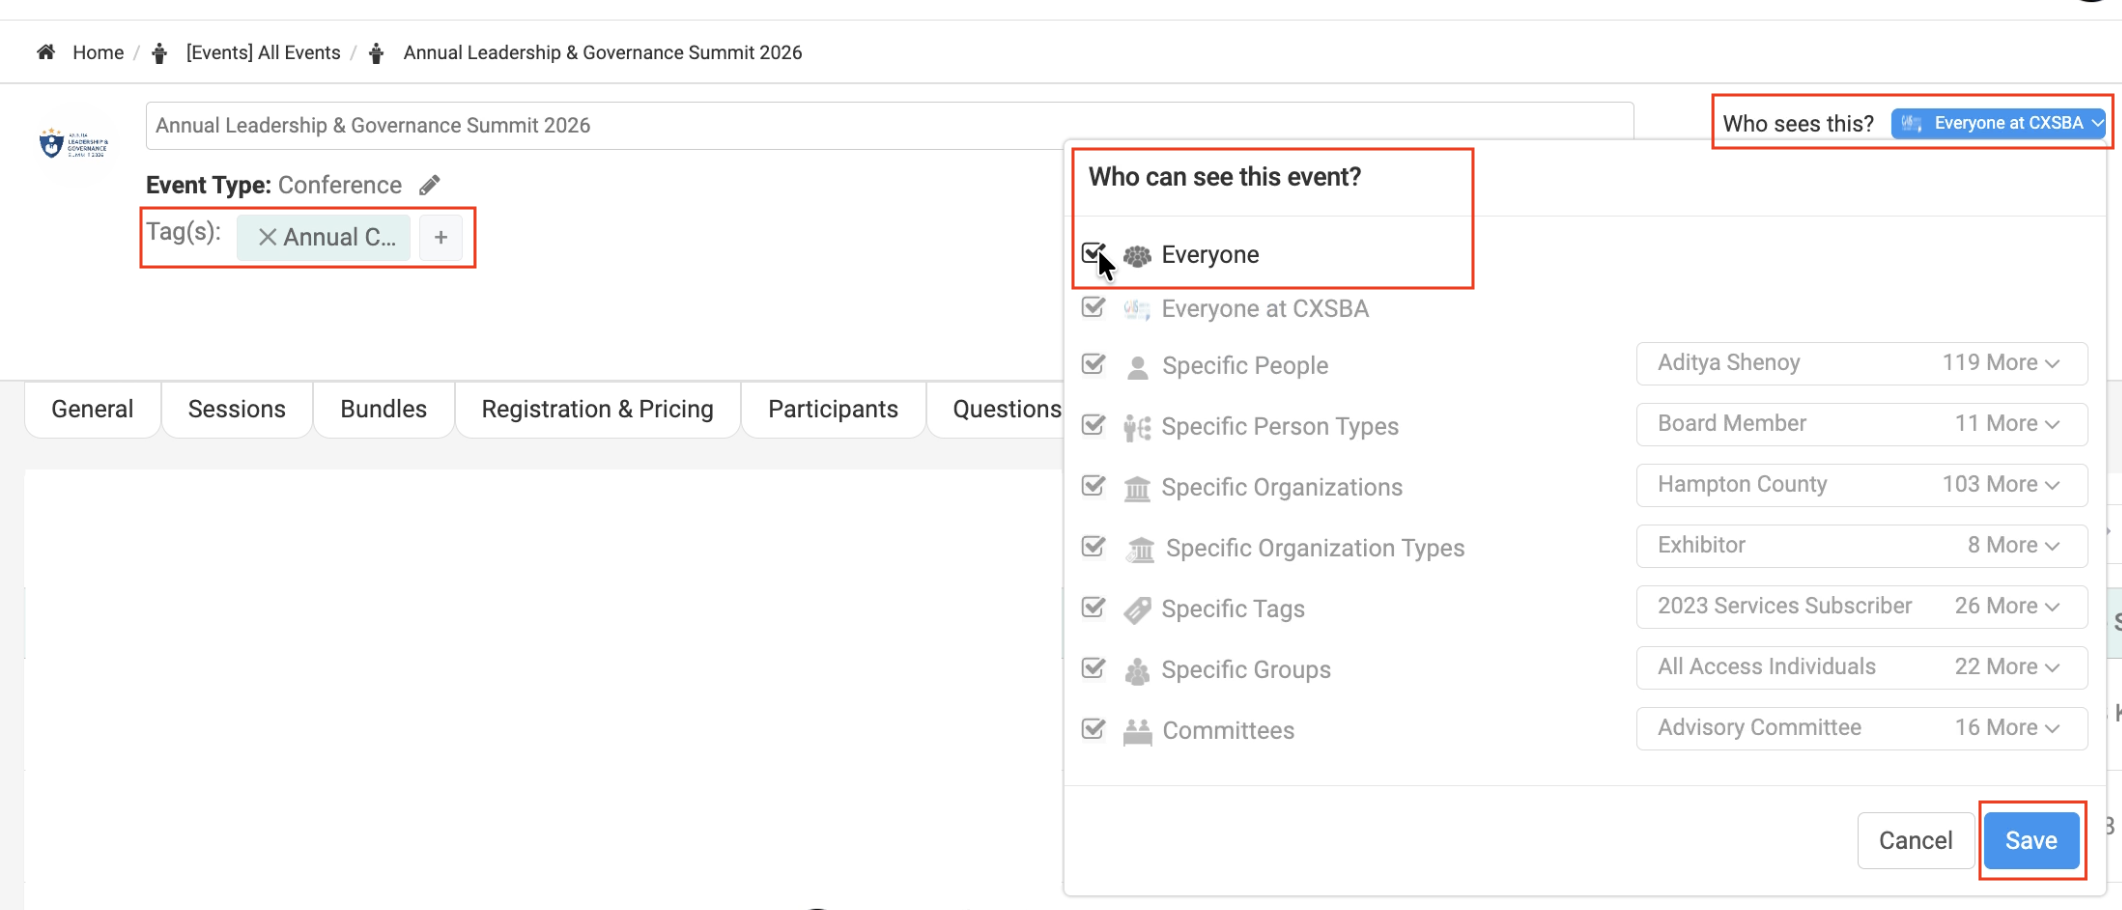
Final Steps
Before publishing your event:
- Upload an event logo
- Add tags (e.g., Annual Conference)
- Set visibility (e.g., Everyone or specific audience)
- Click Save
Your event is now fully configured and ready for registration.
How Your Event Appears to Registrants
Here’s a short preview of what your members will see when they access the registration page.
.gif?hsLang=en)
Key Benefits
- End-to-End Event Setup in one platform
- Flexible Registration Configuration
- Customizable Attendee Experience through sessions and bundles
- Improved Planning with registration questions
- Centralized Resource Management via Library
We hope this guide helps you successfully create and manage events in Engagifii.
Have questions or feedback? Please write to our support team at support@engagifii.com