
Summary
Many organizations use Engagifii to manage events, registrations, memberships, and payments, while relying on QuickBooks Online as their primary accounting system. The QuickBooks Online Integration connects these two platforms, allowing accounting teams to synchronize their Chart of Accounts, assign revenue to the appropriate General Ledger (GL) accounts, and prepare journal entries for posting. This streamlines month-end accounting, reduces manual effort, and helps ensure revenue is accurately reflected in QuickBooks.
Before You Begin
Before configuring the integration, make sure you have:
- Administrator access to Engagifii
- A QuickBooks Online administrator account
- The required Chart of Accounts already configured in QuickBooks Online
- Permission to manage accounting integrations
Note: Connecting to QuickBooks Online is a one-time setup. After the initial configuration, you'll only need to perform additional synchronization when new accounts are created in QuickBooks.
Step 1. Open Accounting Integration
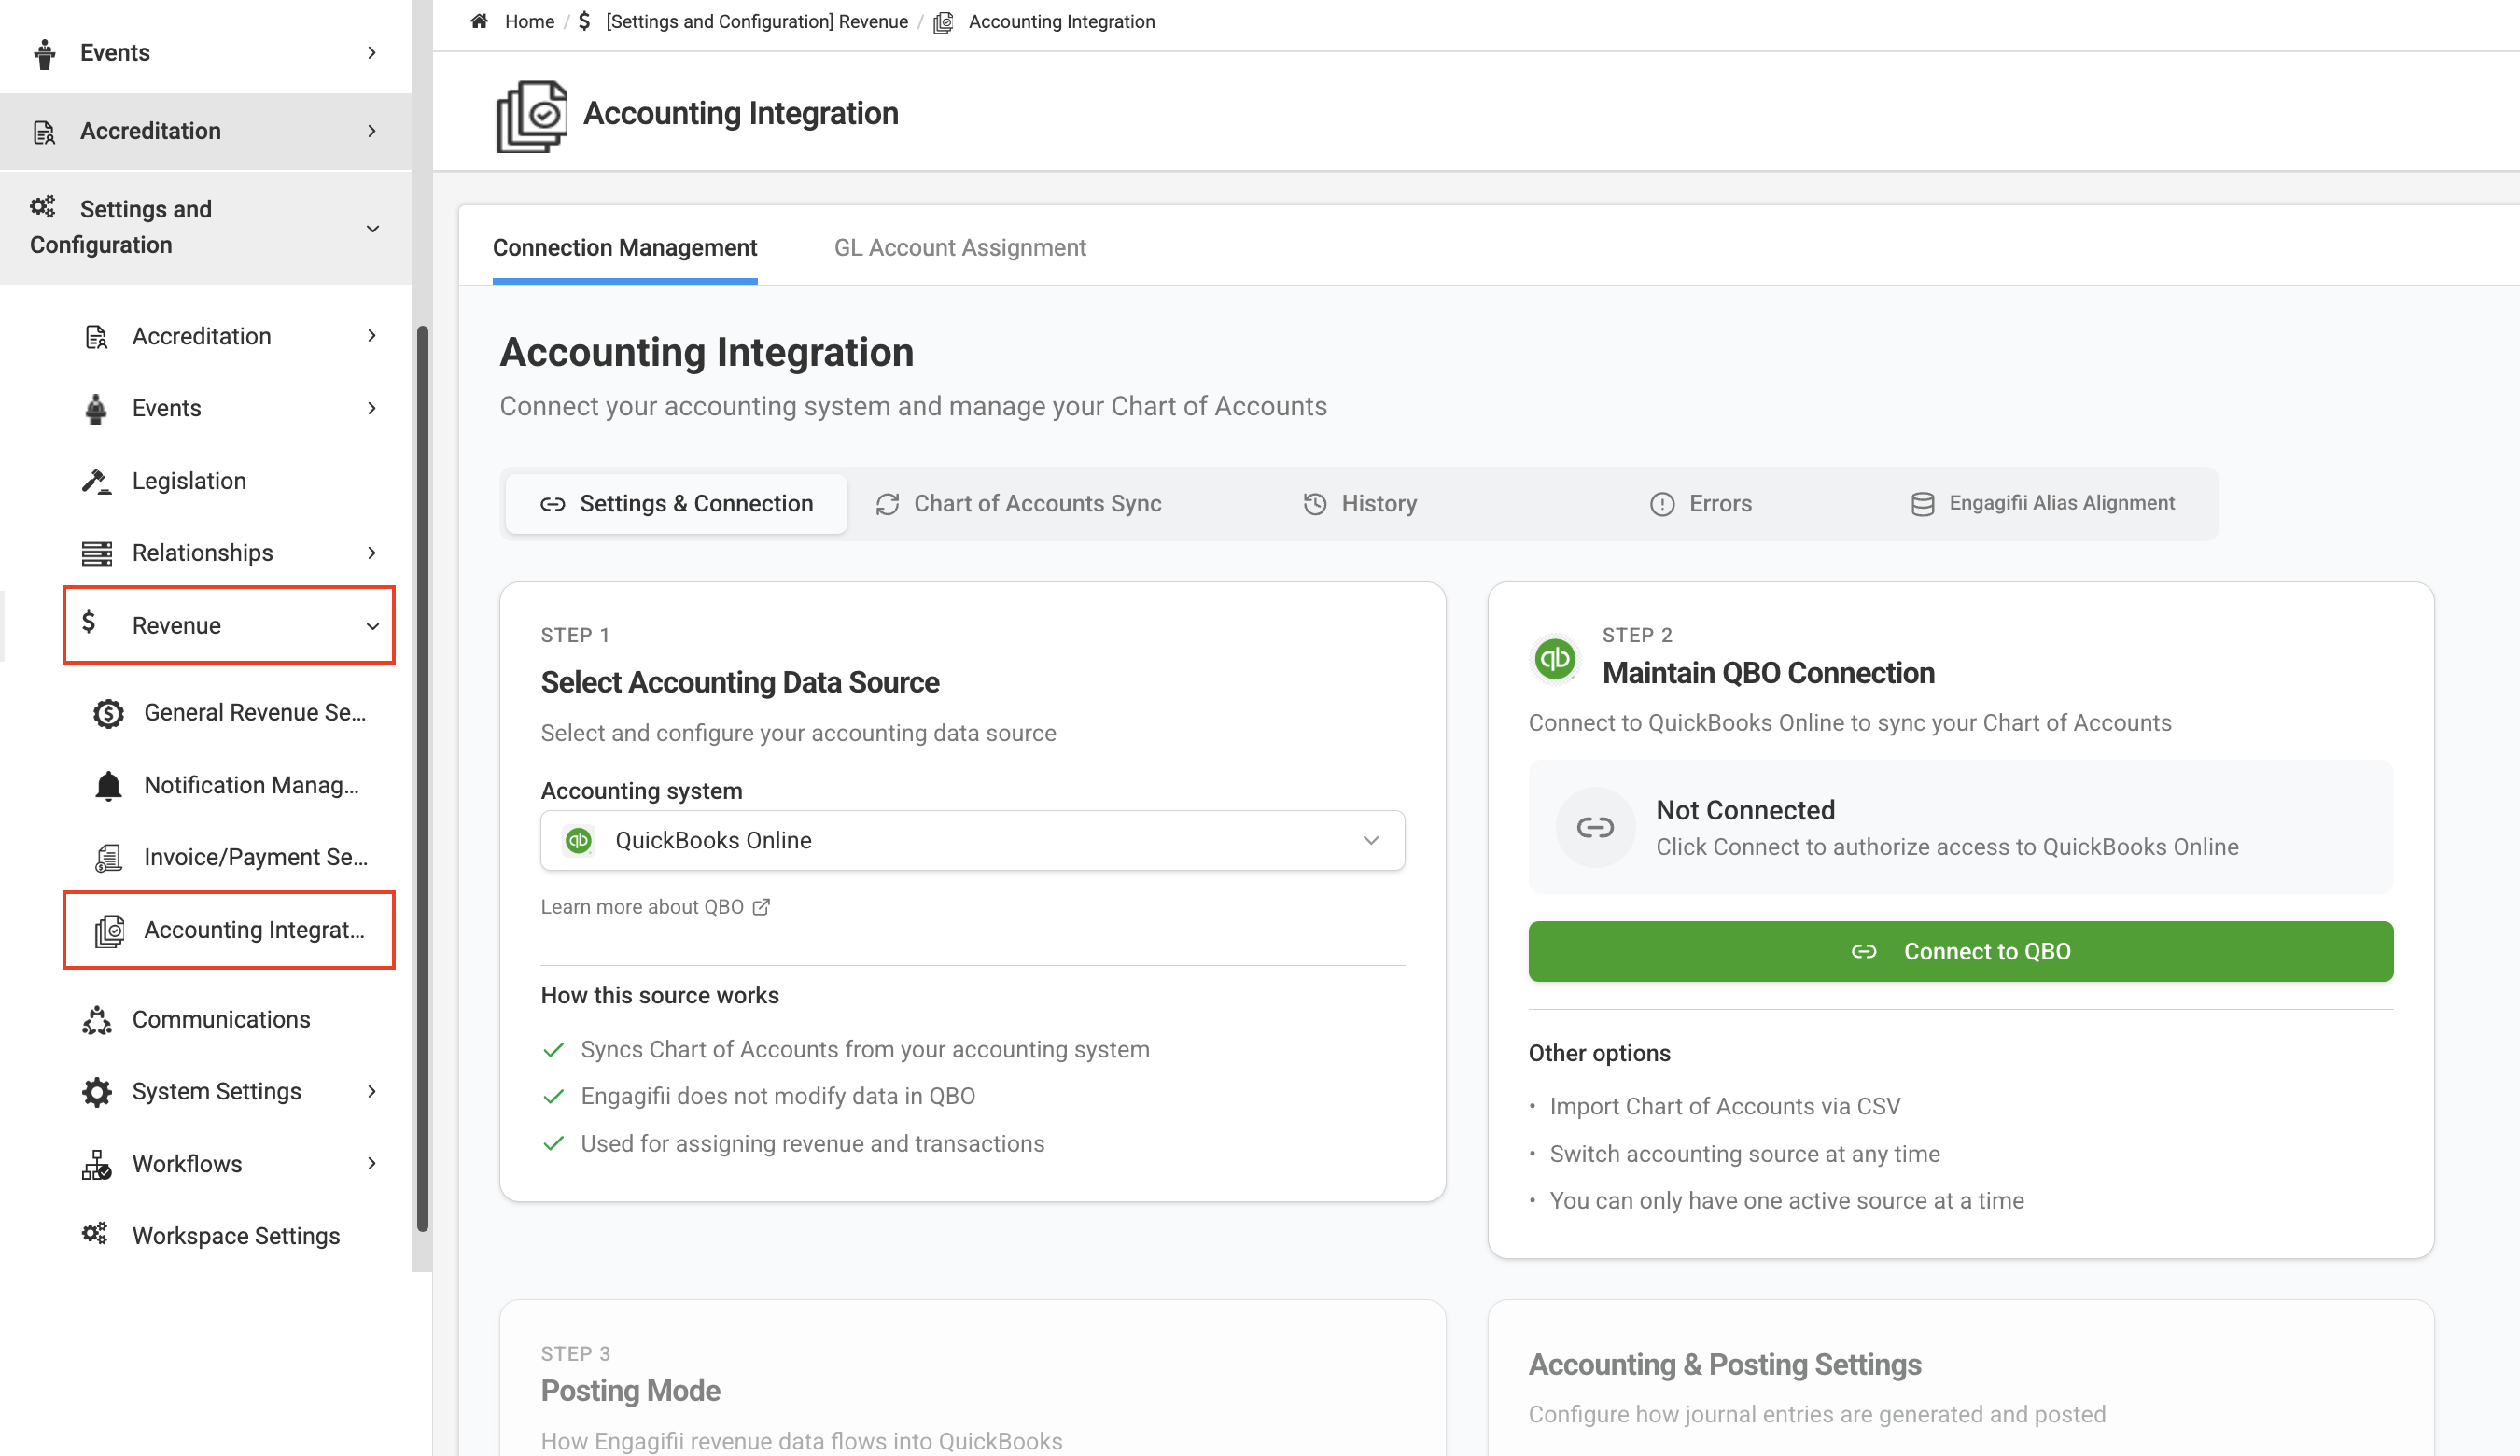
Navigate to: Settings & Configuration → Revenue → Accounting Integration
This page is used to configure your accounting connection, posting preferences, and account synchronization.
Step 2. Select Your Accounting Data Source
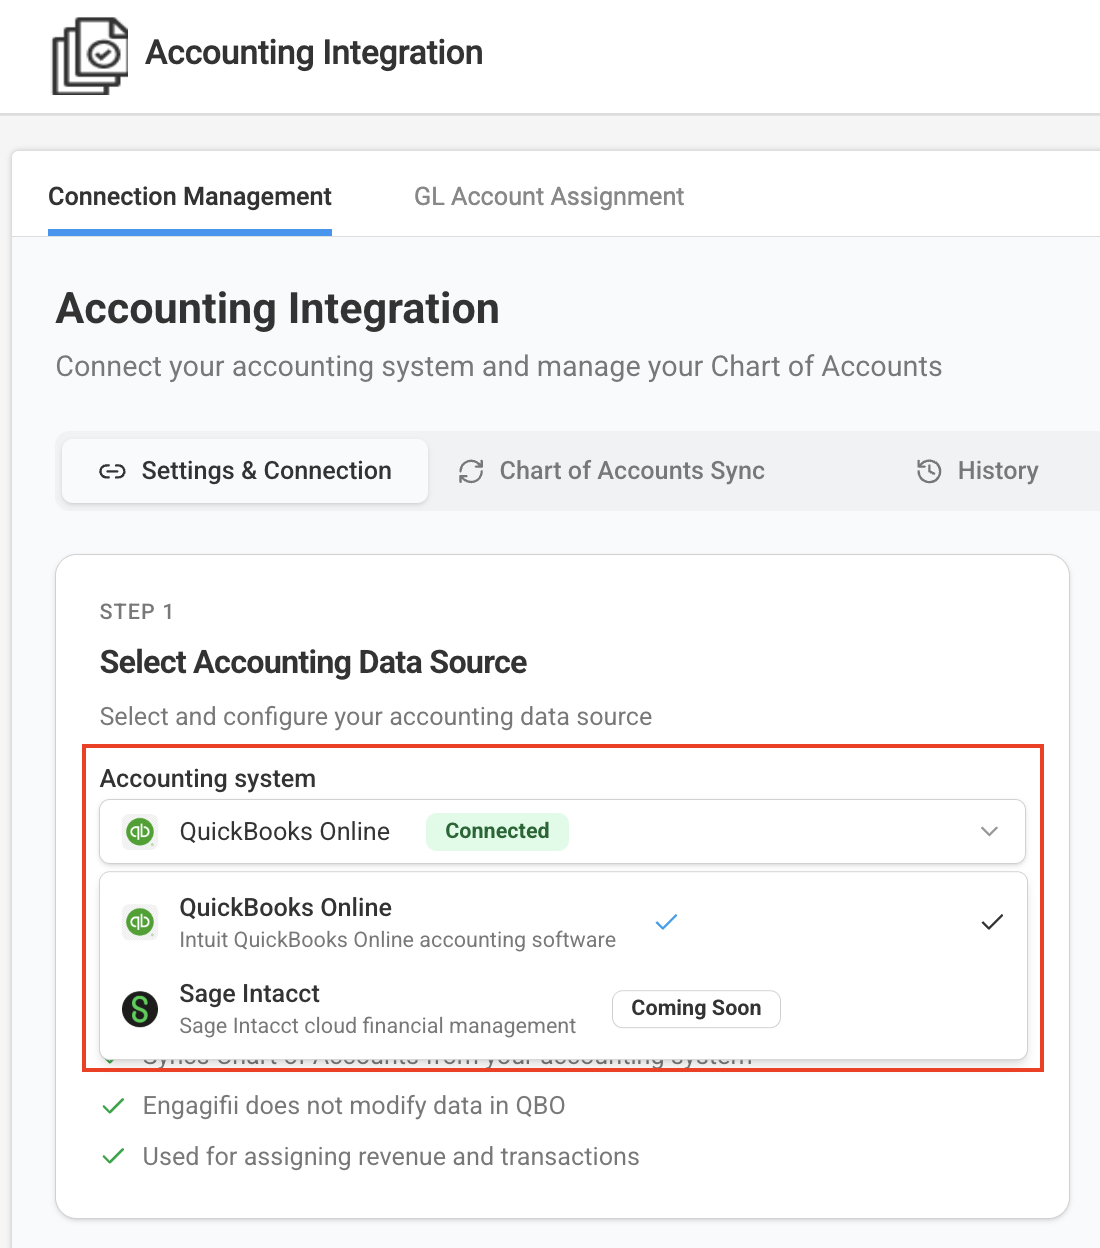
Under Accounting Data Source, choose: QuickBooks Online
This tells Engagifii which accounting platform you'll be connecting to.
Step 3. Connect to QuickBooks Online
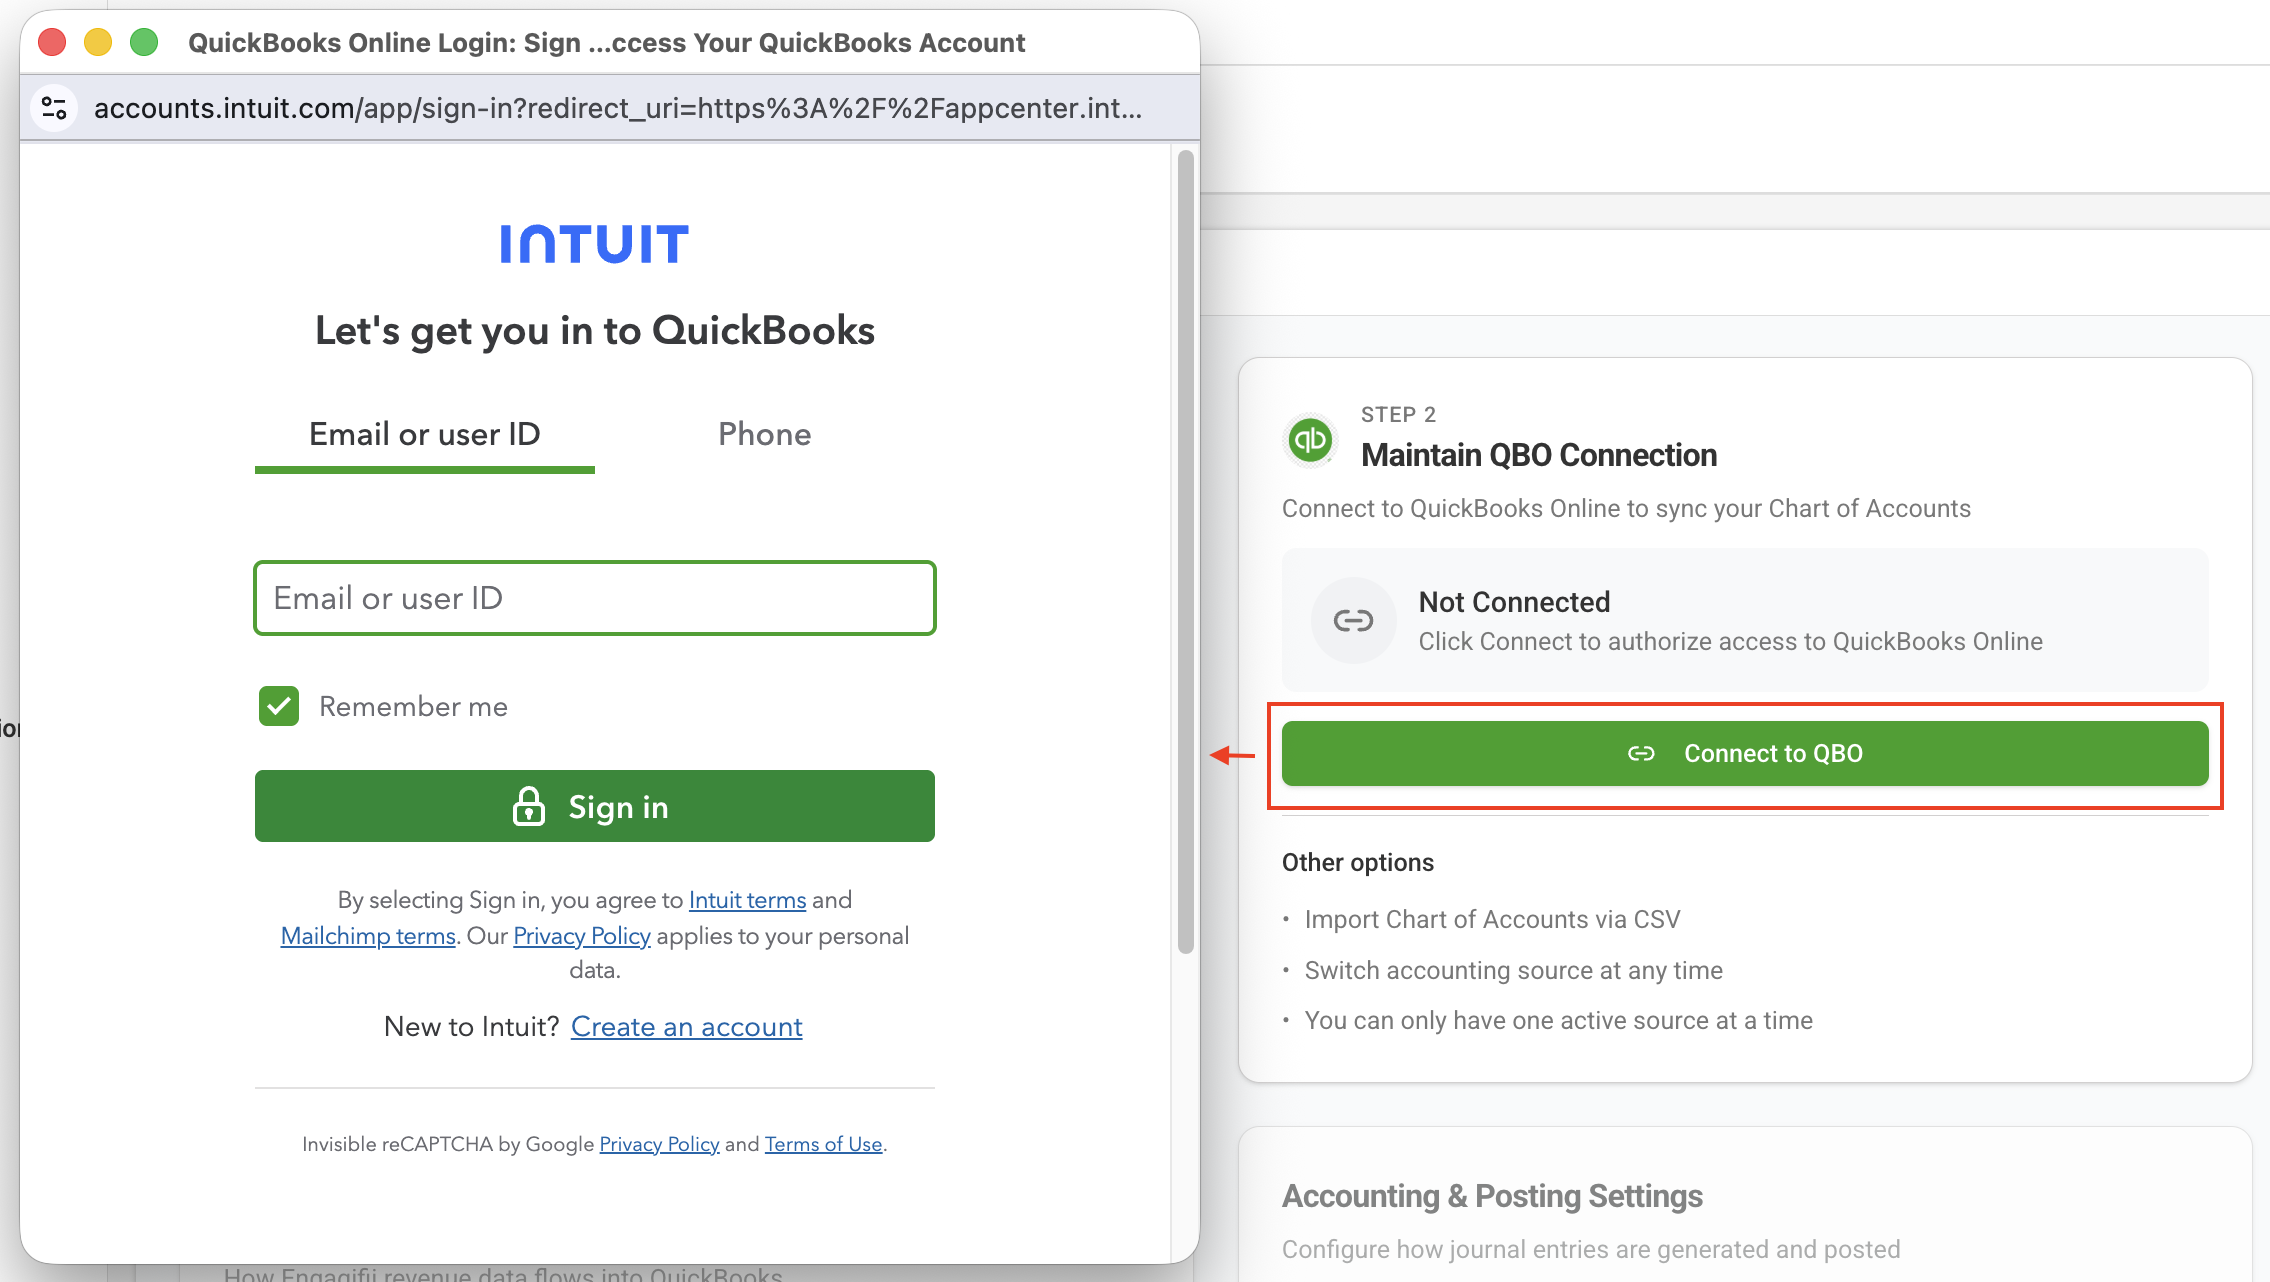
Click Connect.
A QuickBooks Online sign-in window will open.
- Sign in using your QuickBooks Online administrator credentials.
- Authorize Engagifii to access your QuickBooks Online company.
- Once authentication is complete, the connection will be established automatically.
After connecting successfully, Engagifii securely stores the authorization token so the connection remains active for future synchronization.
Step 4. Configure Your Posting Mode
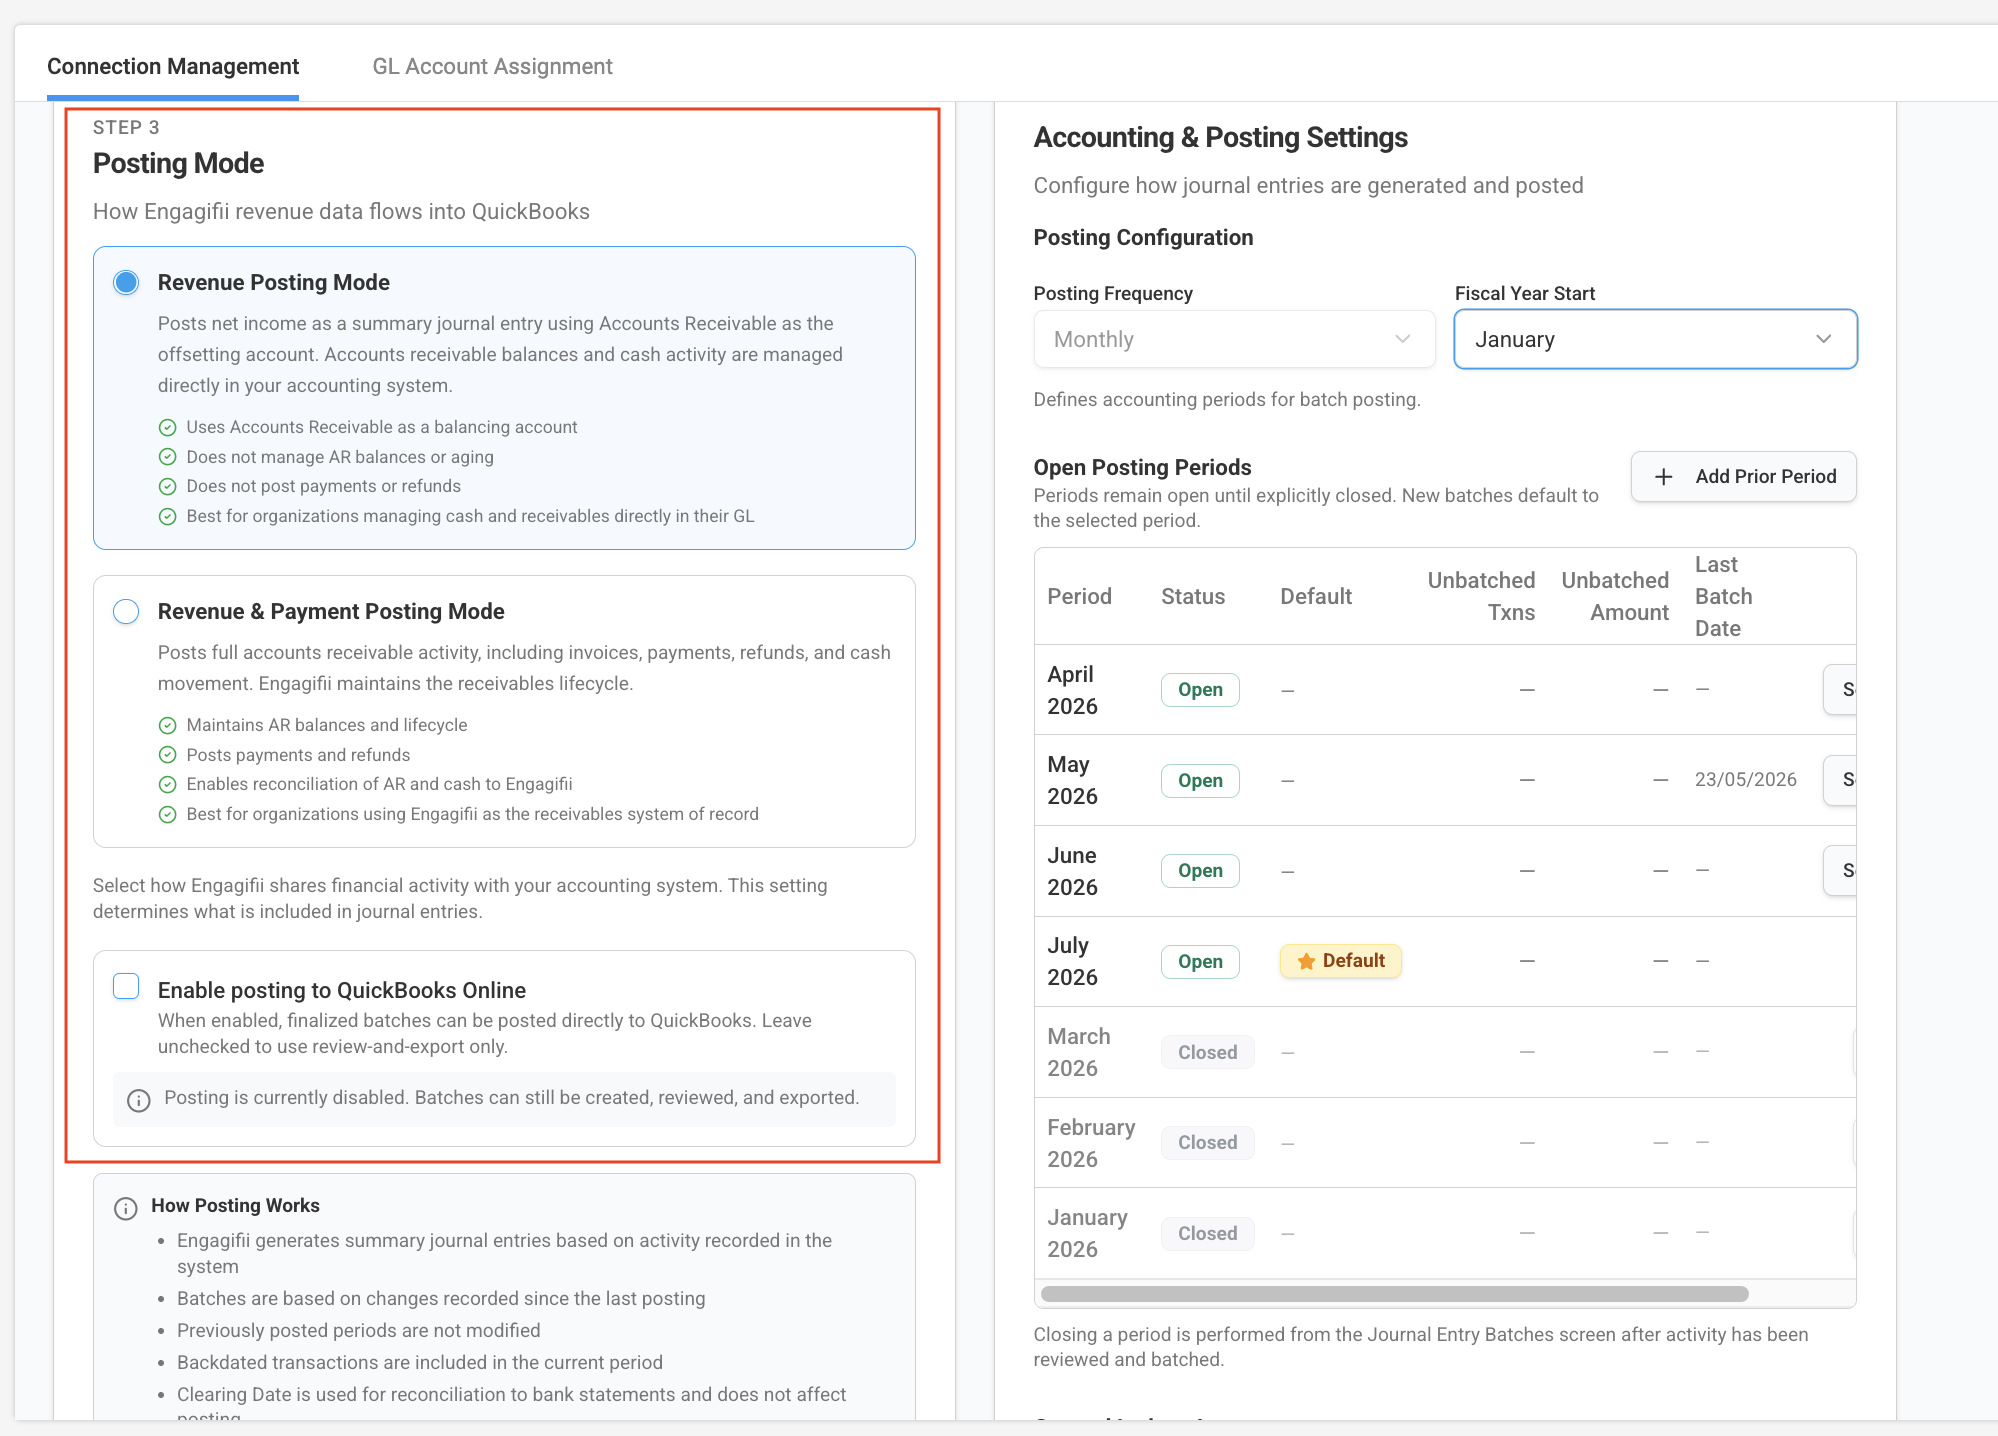
Choose how accounting information will be prepared for QuickBooks. Available options include:
1. Revenue Posting
Creates summary journal entries for invoice revenue generated in Engagifii. This mode is best for organizations that manage cash activity and accounts receivable directly in their accounting system.
2. Revenue & Payments Posting
Creates journal entries for both revenue and payments, allowing Engagifii to track the full accounts receivable lifecycle.
Choose the posting mode that best aligns with your organization's accounting process.
Enable Posting to QuickBooks Online
Enable this option to post finalized Journal Entry Batches directly to QuickBooks Online. If disabled, batches must be exported and imported manually.
Note: You can enable direct posting during the initial setup or return later to enable it once you've completed your GL account assignments and posting configuration.
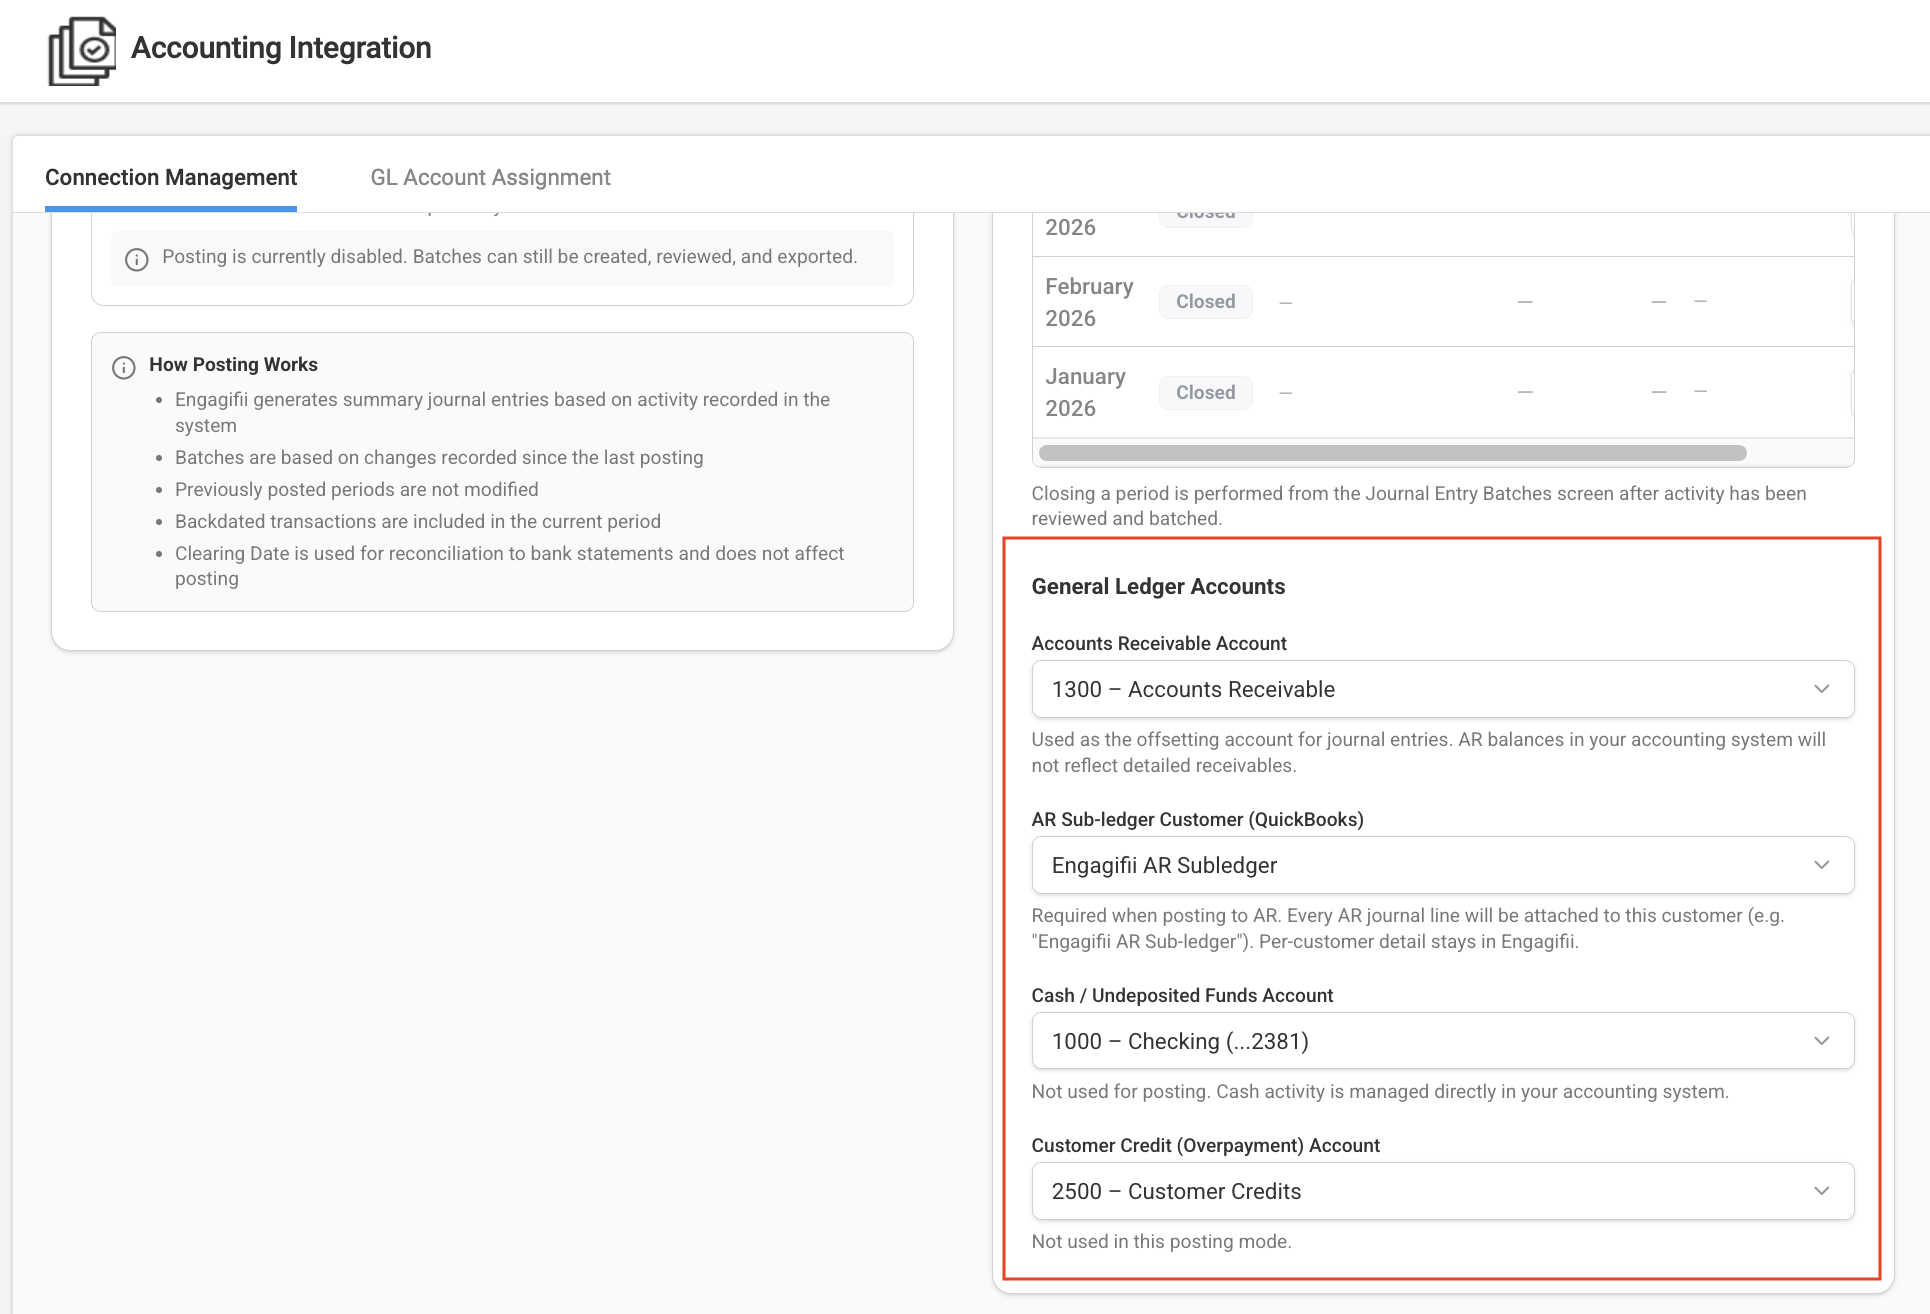
Step 5. Configure Default Posting Accounts
Before journal entries can be created, configure the required default accounts.
These include:
- Accounts Receivable Account
- Cash Account
- Customer Credit Account
These accounts determine where accounting entries will be recorded in QuickBooks Online during posting.
Step 6. Synchronize Your Chart of Accounts
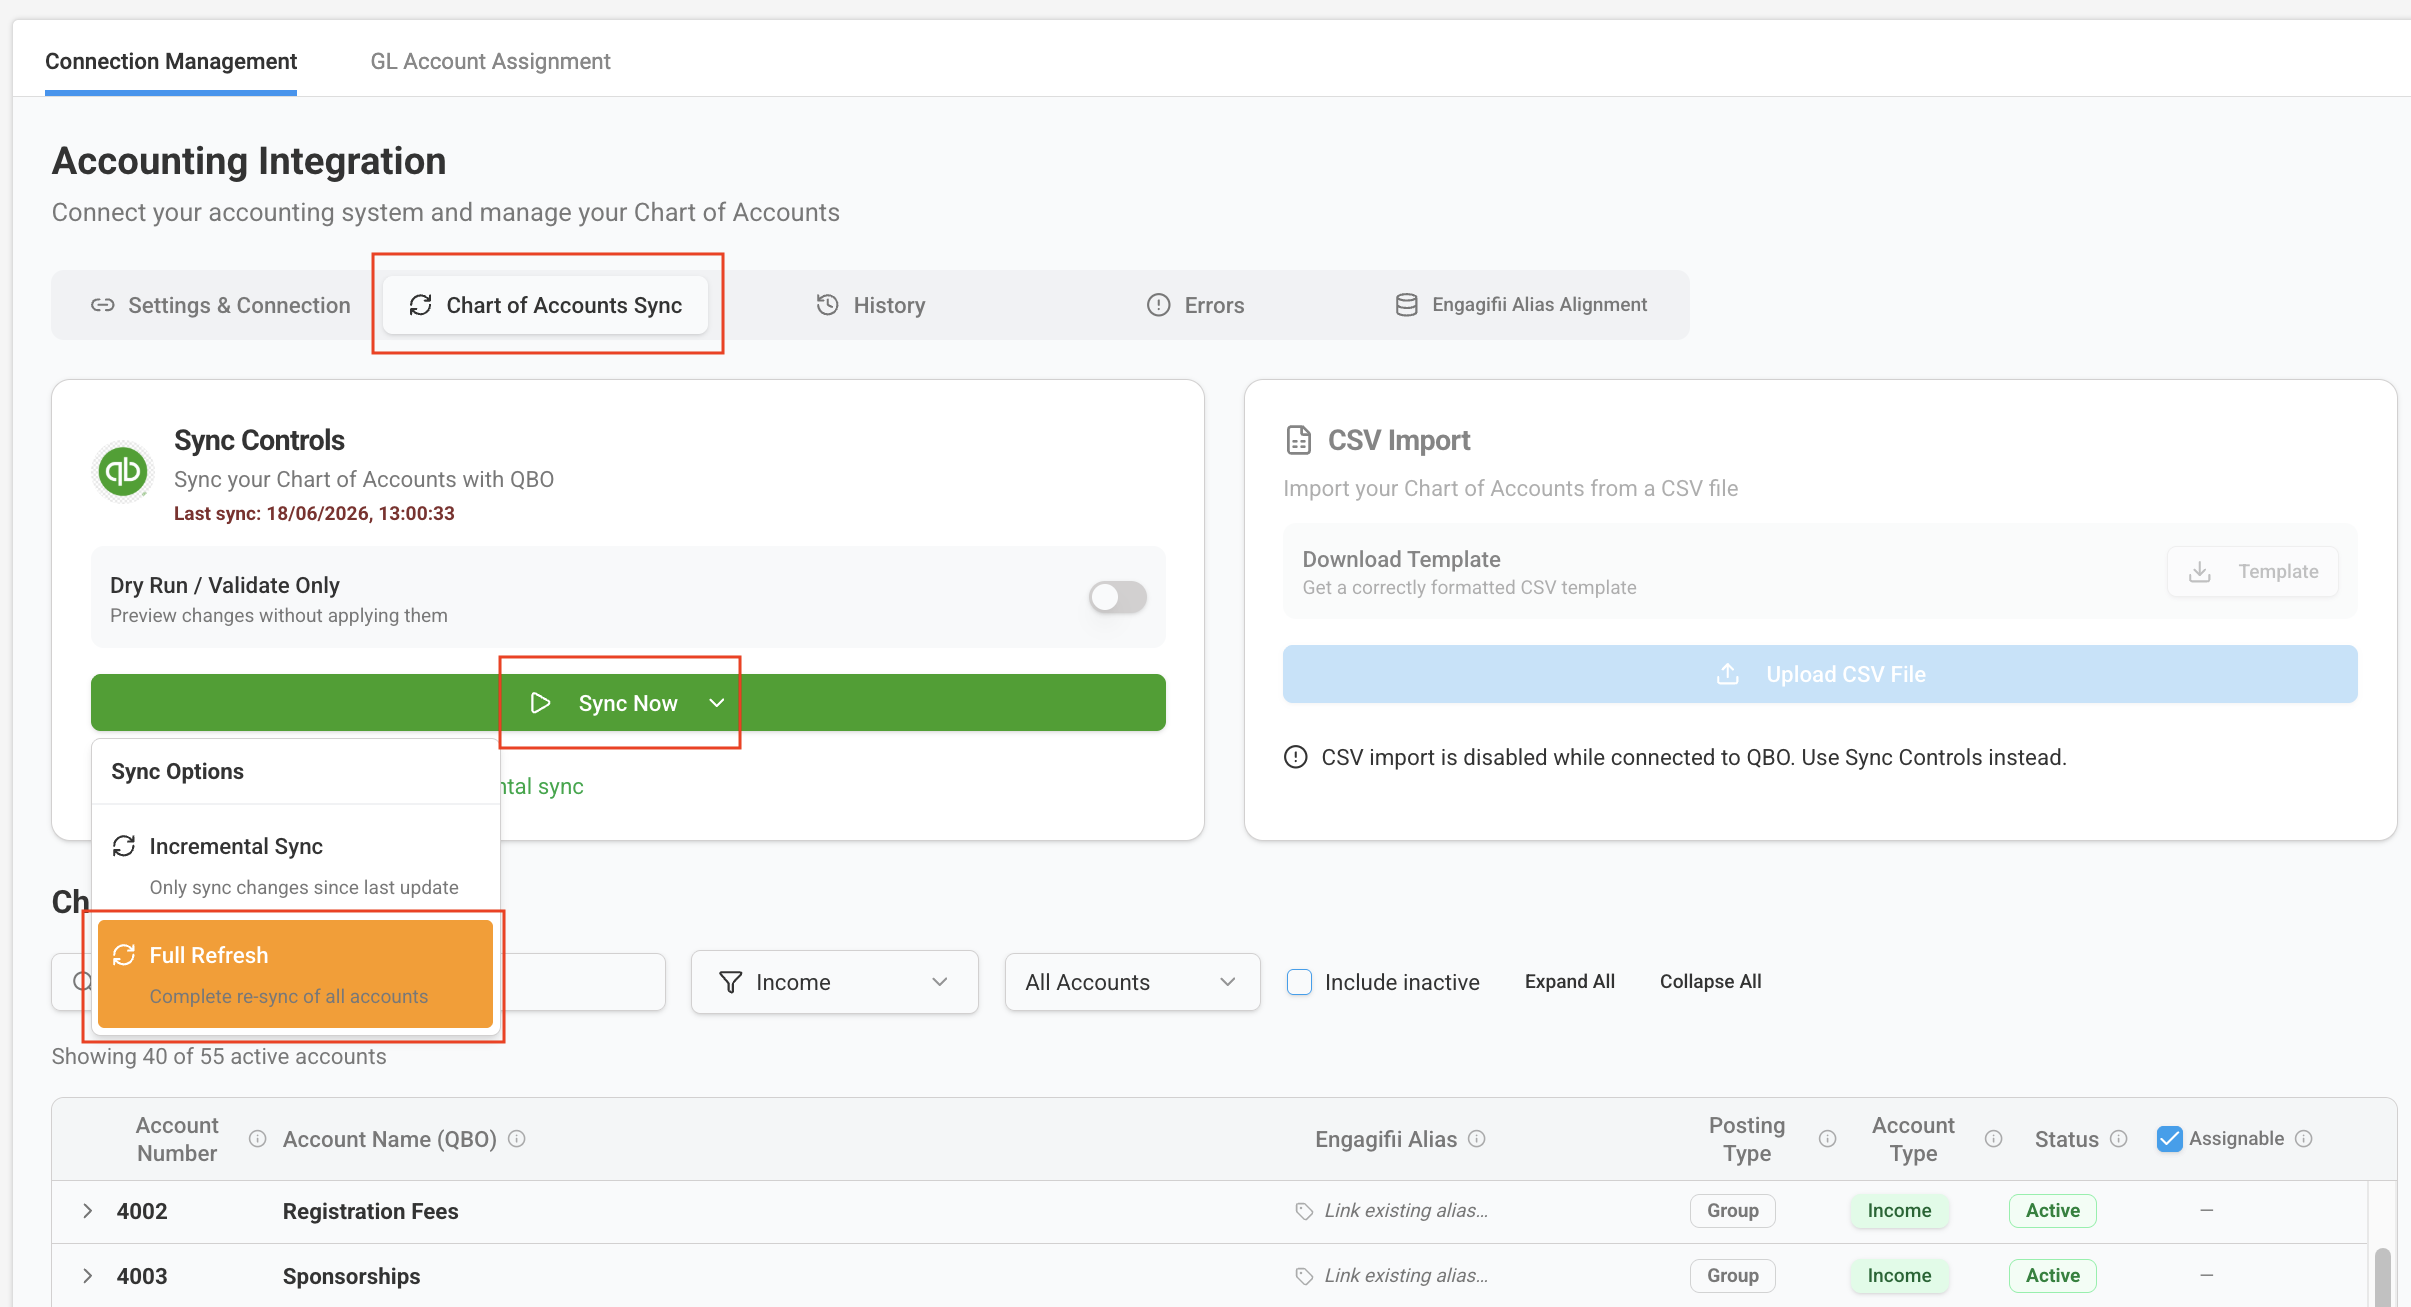
After connecting to QuickBooks Online, synchronize your Chart of Accounts.
Navigate to:
Chart of Accounts Sync → Click Sync Now.
For your initial setup, select: Full Sync
This imports your QuickBooks Online Chart of Accounts into Engagifii, including:
- Account Numbers
- Account Names
- Account Types
These accounts are then available for mapping within Engagifii.
Step 7. Future Account Synchronization
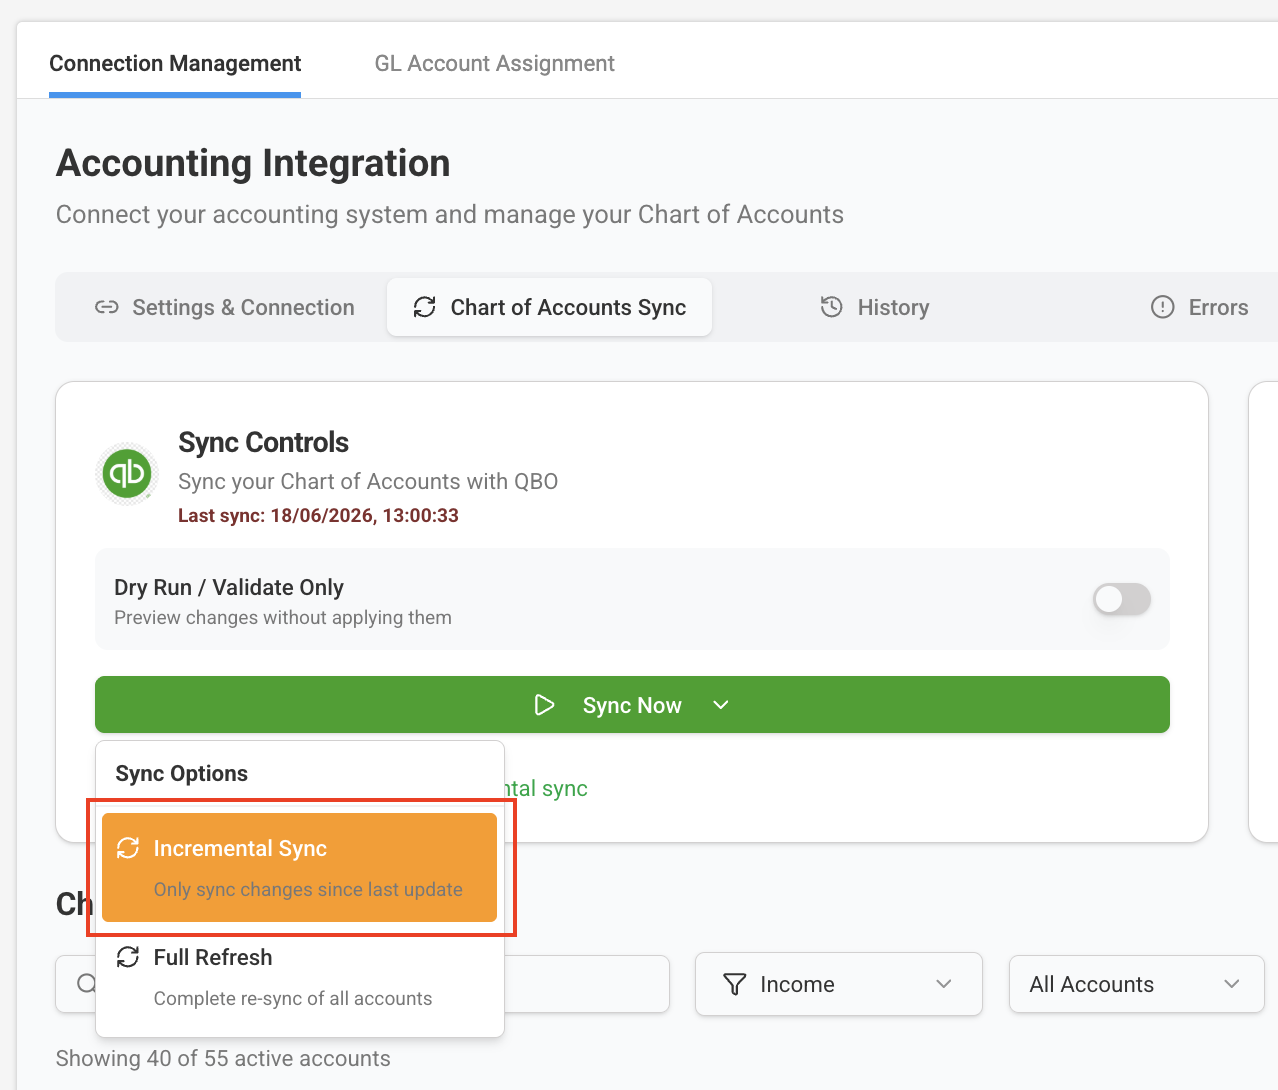
If you create additional revenue accounts in QuickBooks Online later, you don't need to perform another full synchronization.
Instead, select: Incremental Sync
This imports only the newly created accounts, making them available for assignment in Engagifii.
Step 8. Verify the Imported Accounts
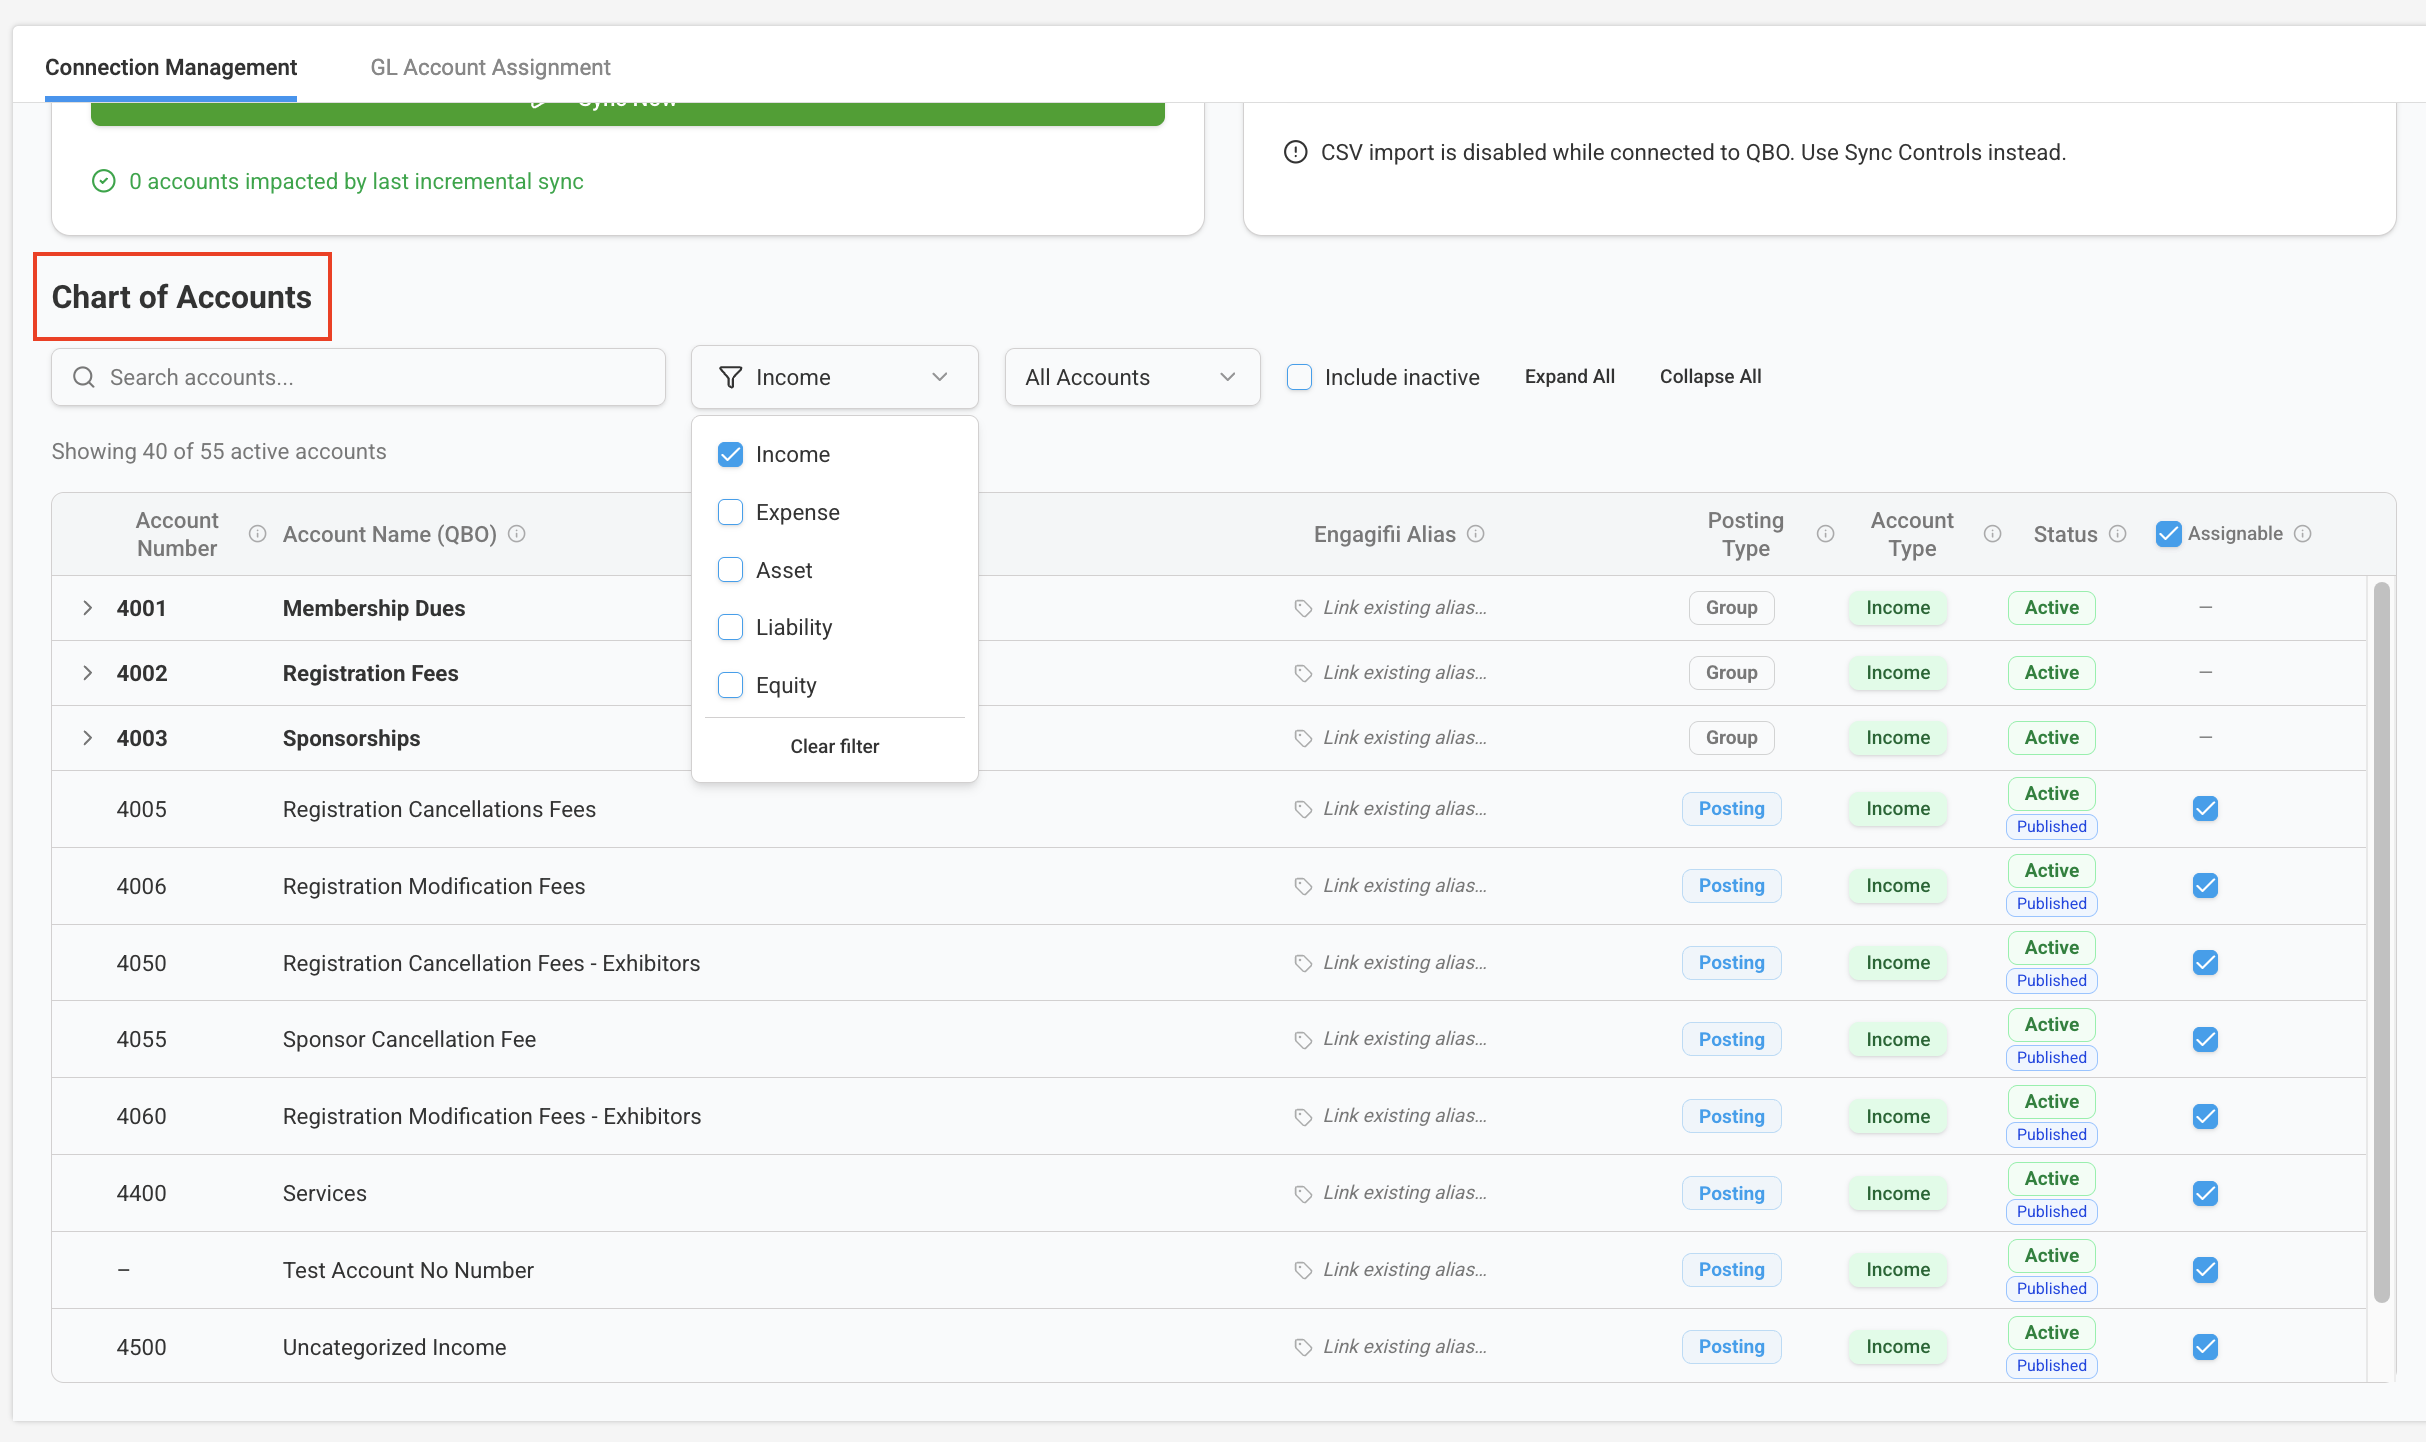
After synchronization completes:
- Review the imported accounts
- Verify account names and numbers
- Confirm the required revenue accounts are available
- Mark accounts as Assignable where appropriate
Only assignable accounts can later be mapped to events and revenue items.
Best Practices
- Complete the connection before creating GL assignments.
- Perform a Full Sync only during the initial setup.
- Use Incremental Sync whenever new accounts are added to QuickBooks Online.
- Verify imported accounts before making assignments.
- Review your posting mode before processing journal entries.
What's Next?
Once your QuickBooks Online connection is established and your Chart of Accounts have been synchronized, you're ready to map revenue to the appropriate General Ledger accounts.
Continue with the next guide:
Assign General Ledger Accounts and Prepare Revenue for Posting
We hope this guide helps you successfully connect Engagifii with QuickBooks Online. If you have any questions or feedback, please reach out to support@engagifii.com.