
Summary
Journal Entry Batches consolidate revenue generated in Engagifii into accounting-ready journal entries for a selected posting period. Before posting, administrators can review transaction summaries, identify missing GL assignments, verify debit and credit balances, and ensure revenue is mapped correctly. Once approved, batches can be finalized and exported or posted directly to QuickBooks Online, helping streamline month-end accounting while reducing manual effort and reconciliation issues.
Before You Begin
Before generating a Journal Entry Batch, ensure that:
- Your QuickBooks Online connection is active.
- Your Chart of Accounts has been synchronized.
- All required GL account assignments have been completed and published.
- Your posting settings have been configured.
Tip: Complete the Set Up the QuickBooks Online Integration and Assign GL Accounts and Prepare Revenue for Posting guides before creating journal entry batches.
Step 1. Open Journal Entry Batches
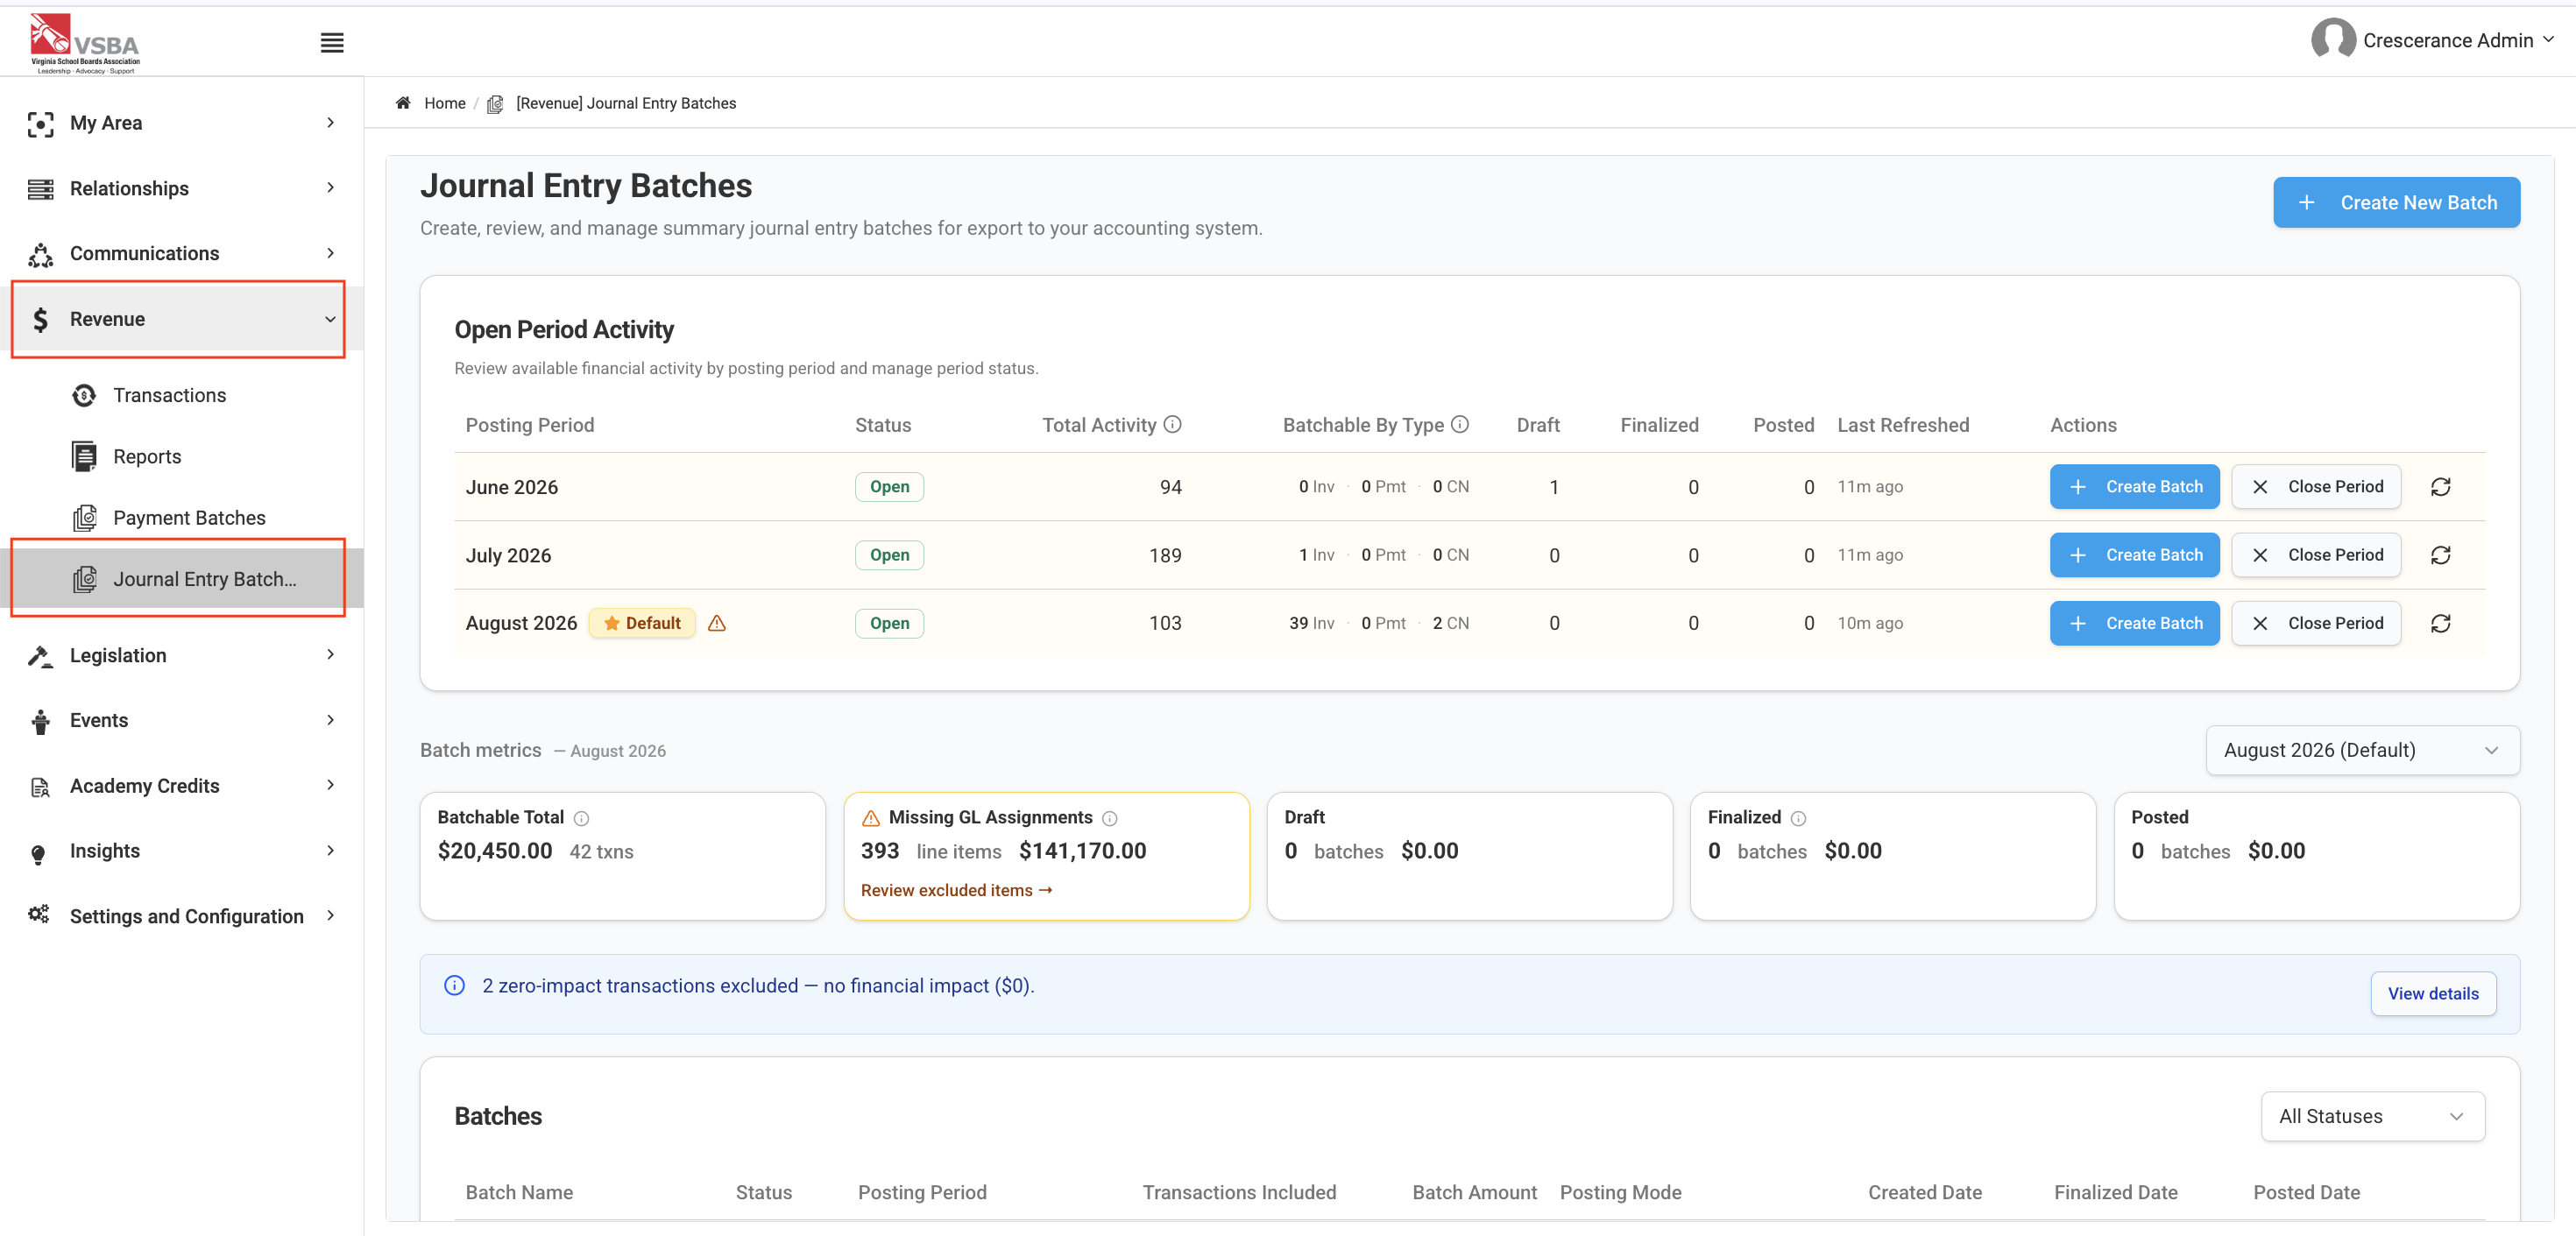
Navigate to:
Settings & Configuration → Accounting Integration → Journal Entry Batches
This page displays previously created batches and allows you to create new ones.
Step 2. Create a New Batch
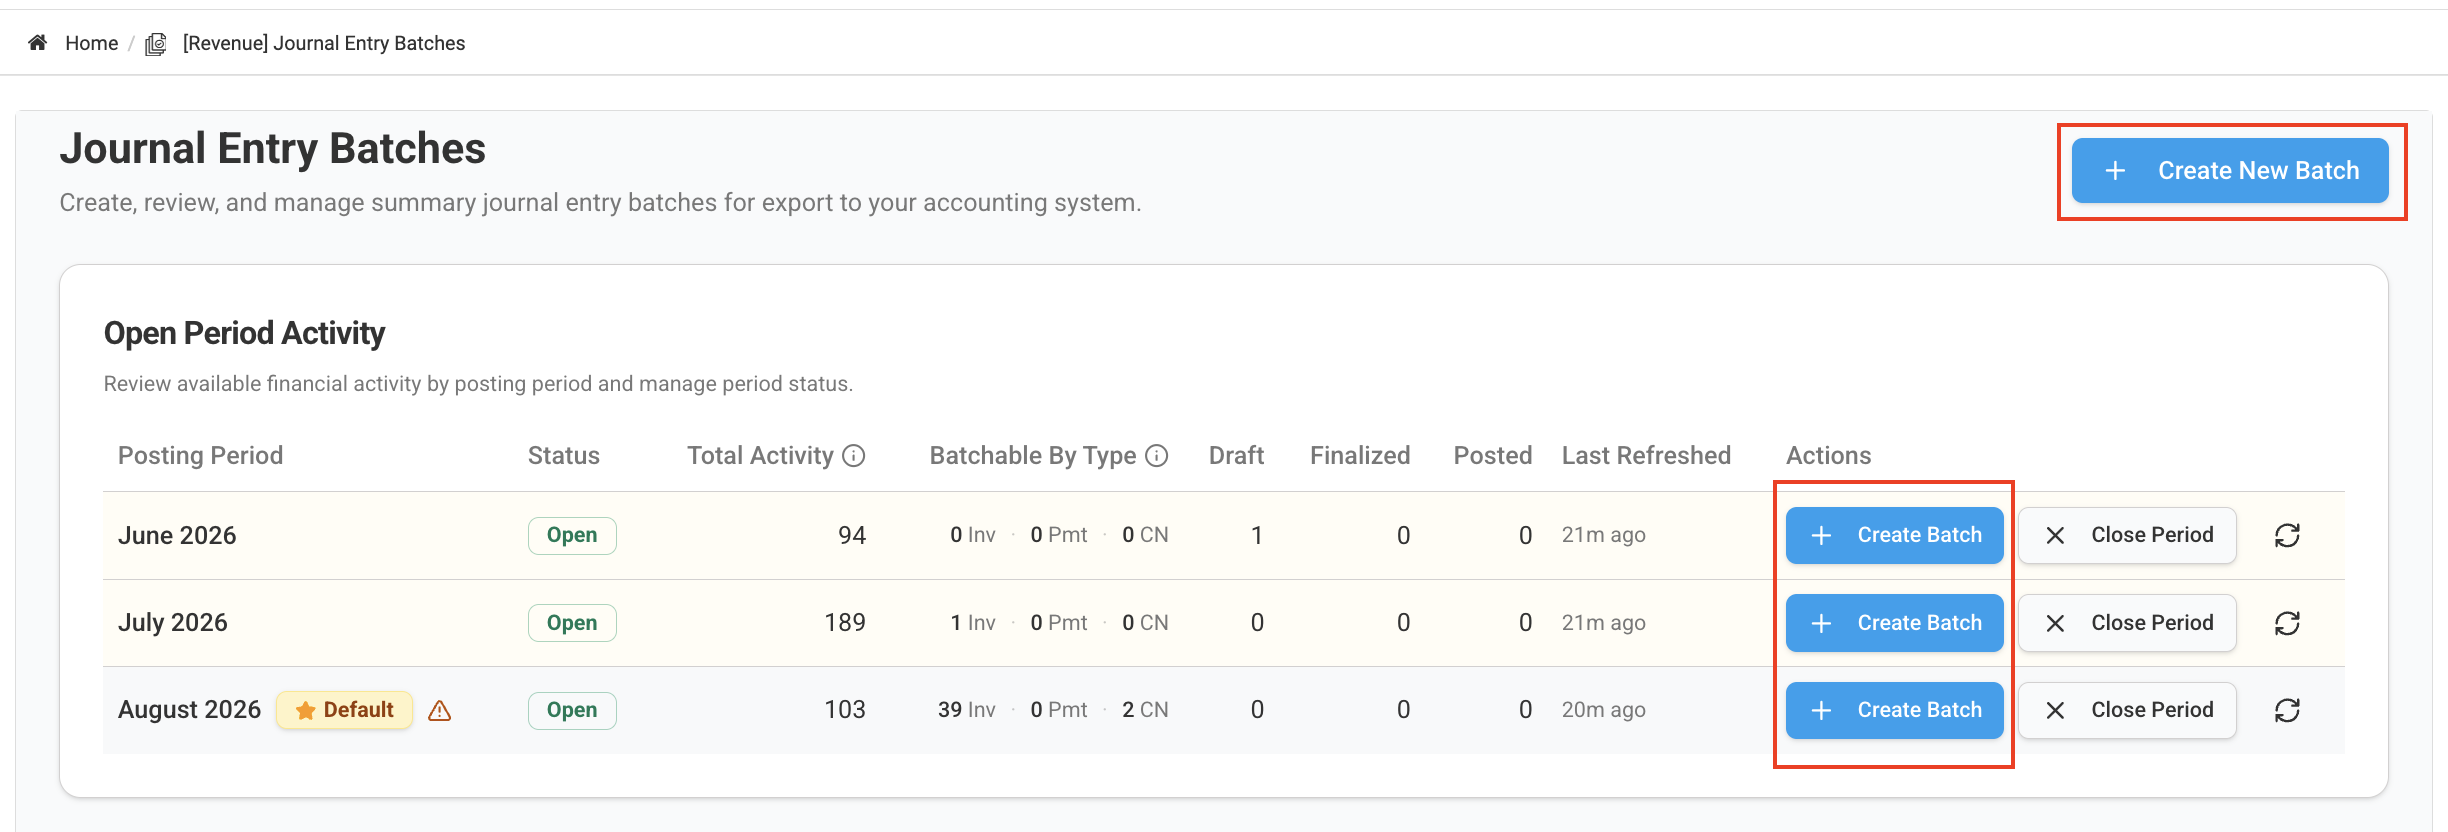
You can start a new Journal Entry Batch in either of two ways:
- Click Create New Batch at the top of the Journal Entry Batches page.
- Under Open Period Activity, locate the applicable posting period and click Create Batch.
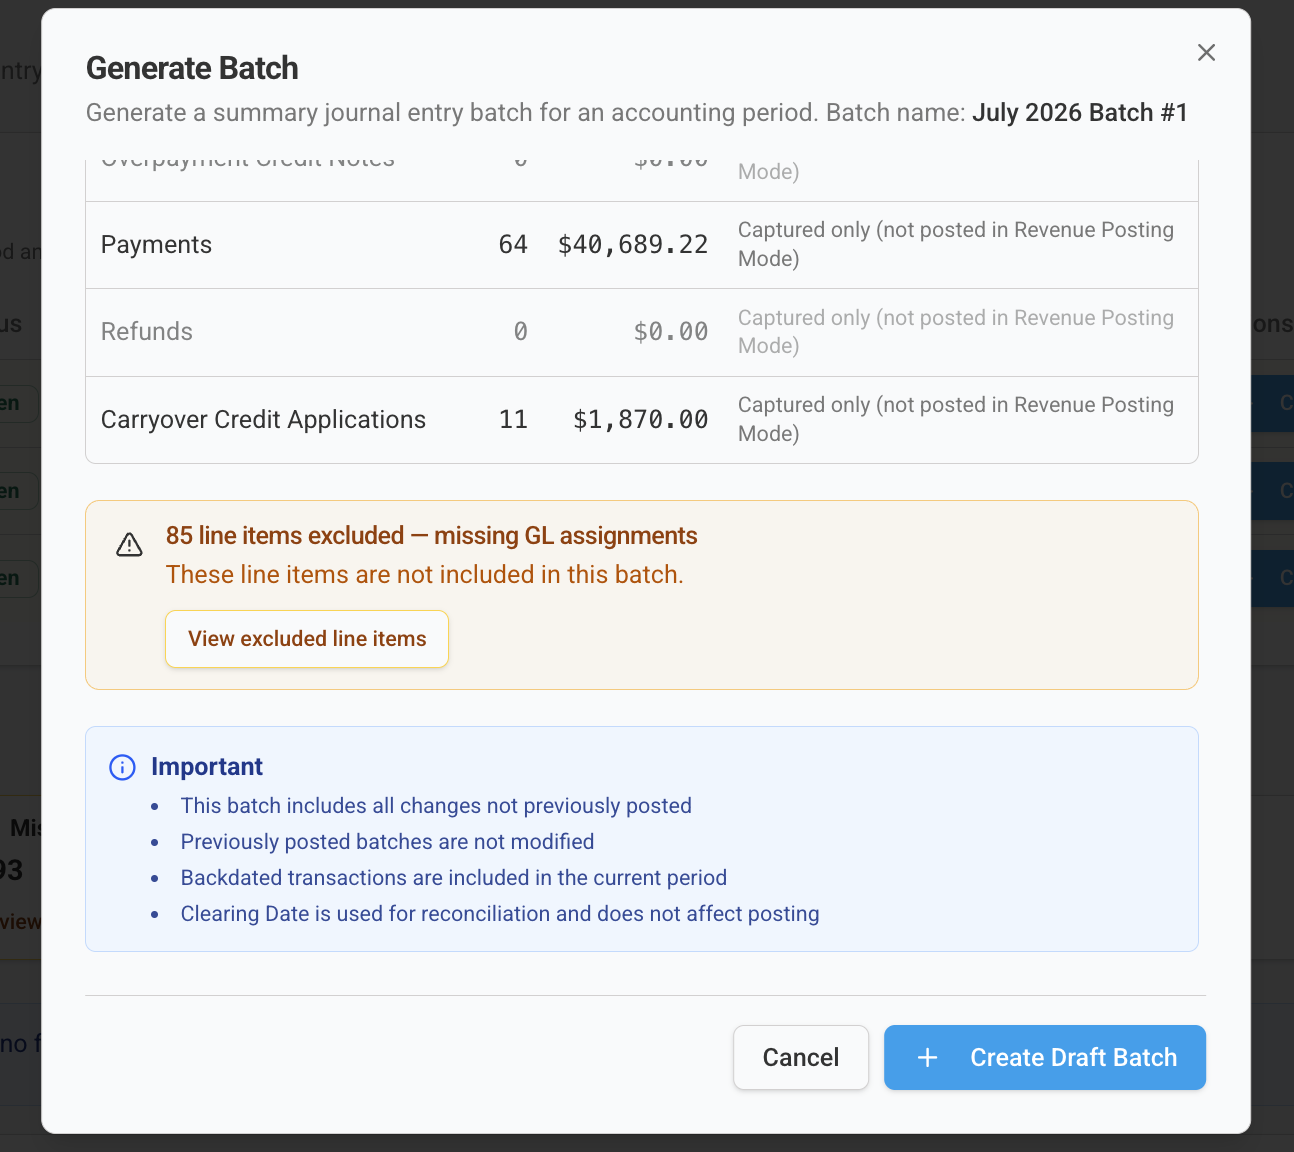
Step 3. Review the Journal Entry Preview
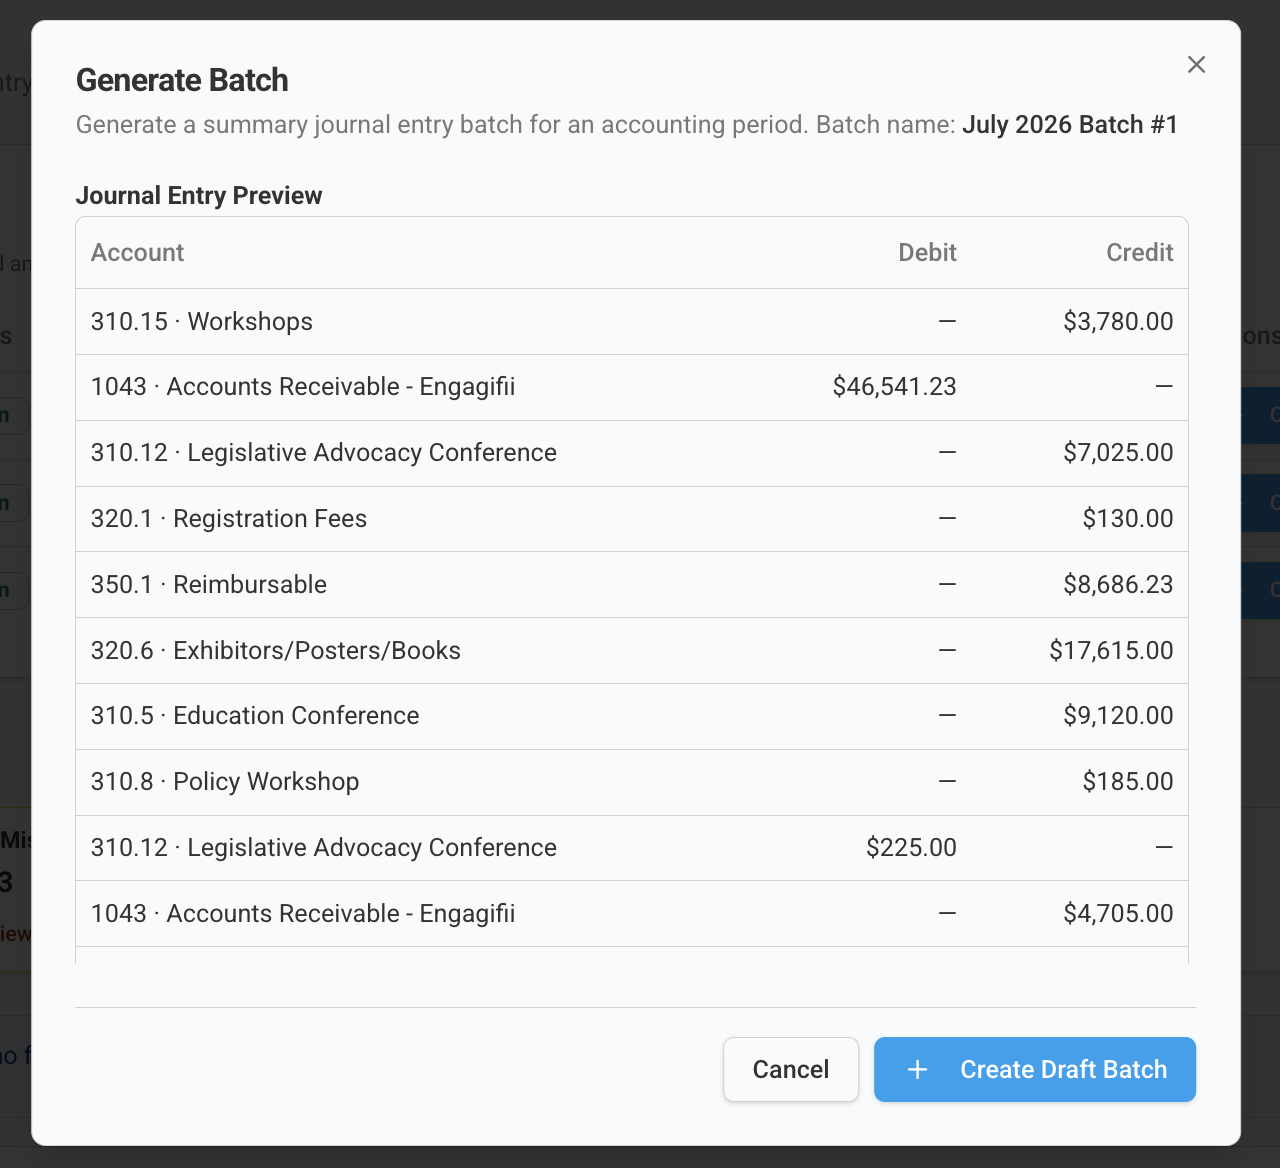
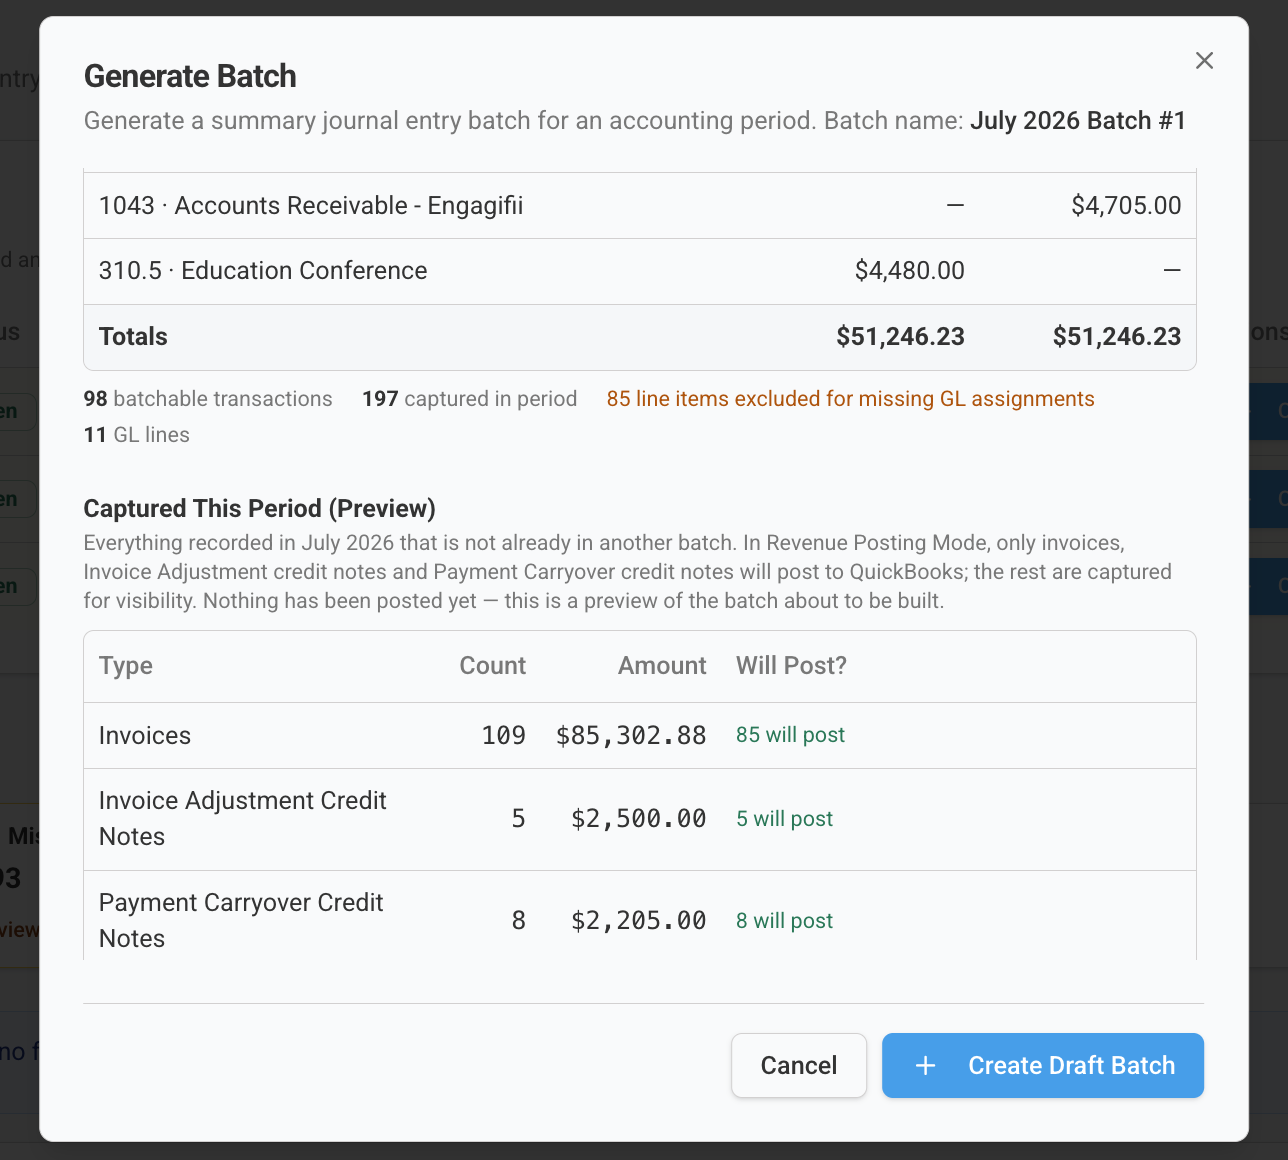
Before creating the batch, Engagifii generates a summary showing:
- Total transactions included
- Debit and credit totals
- Revenue accounts used
- Accounts Receivable offset account
- Transactions included in the posting period
This preview allows you to verify that the journal entry balances correctly before posting.
Step 4. Review Missing GL Assignments
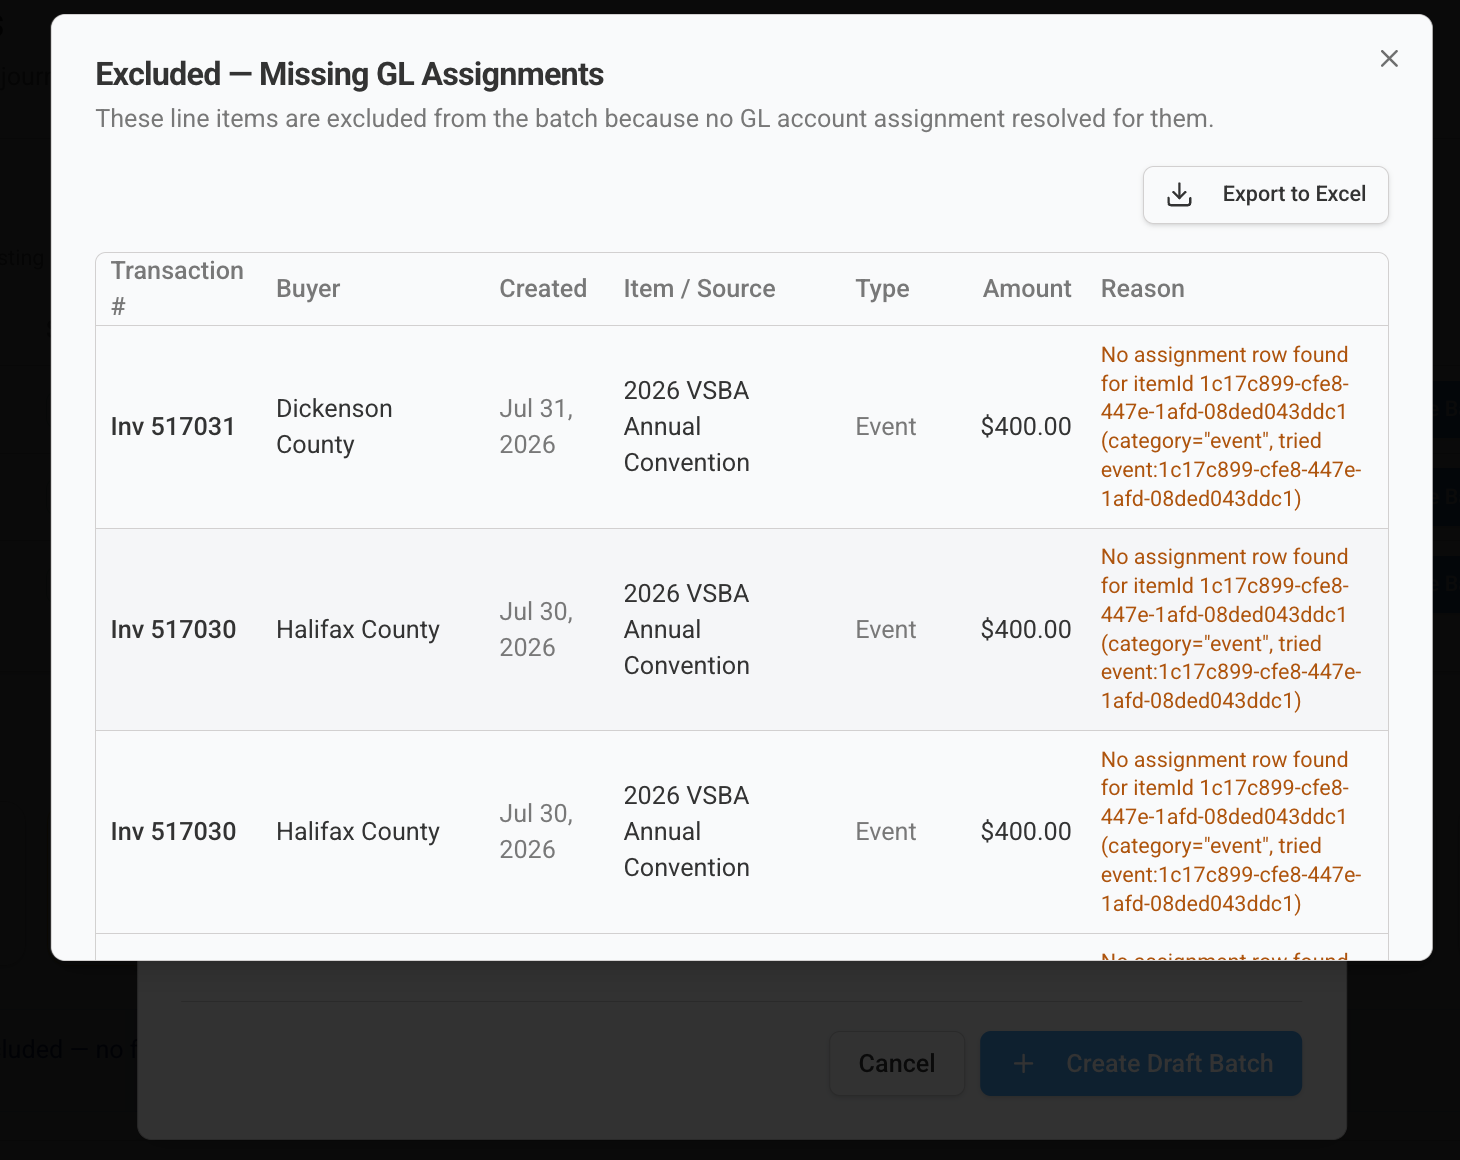
If any revenue items have not been mapped to a GL account, they will appear as Missing GL Assignments.
Review the list to identify:
- Events
- Bundles
- Registration fees
- Cancellation or modification fees
- Other revenue items that still require mapping
These transactions will be excluded until valid GL account assignments have been configured.
Step 5. Create the Journal Entry Batch
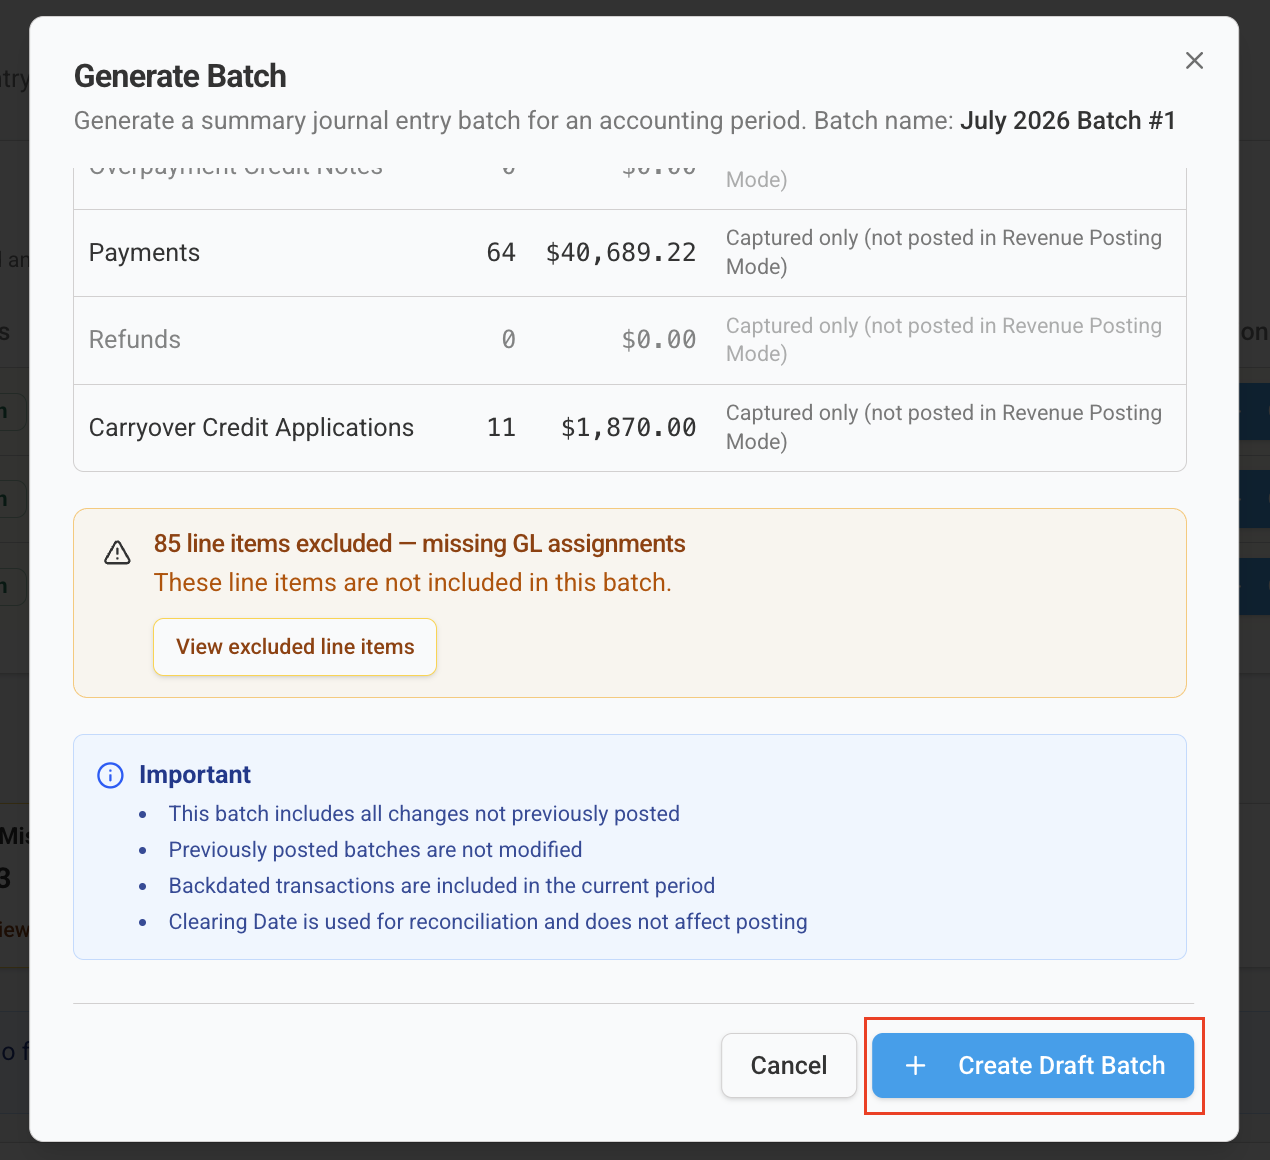
Once you've reviewed the preview, create the batch.
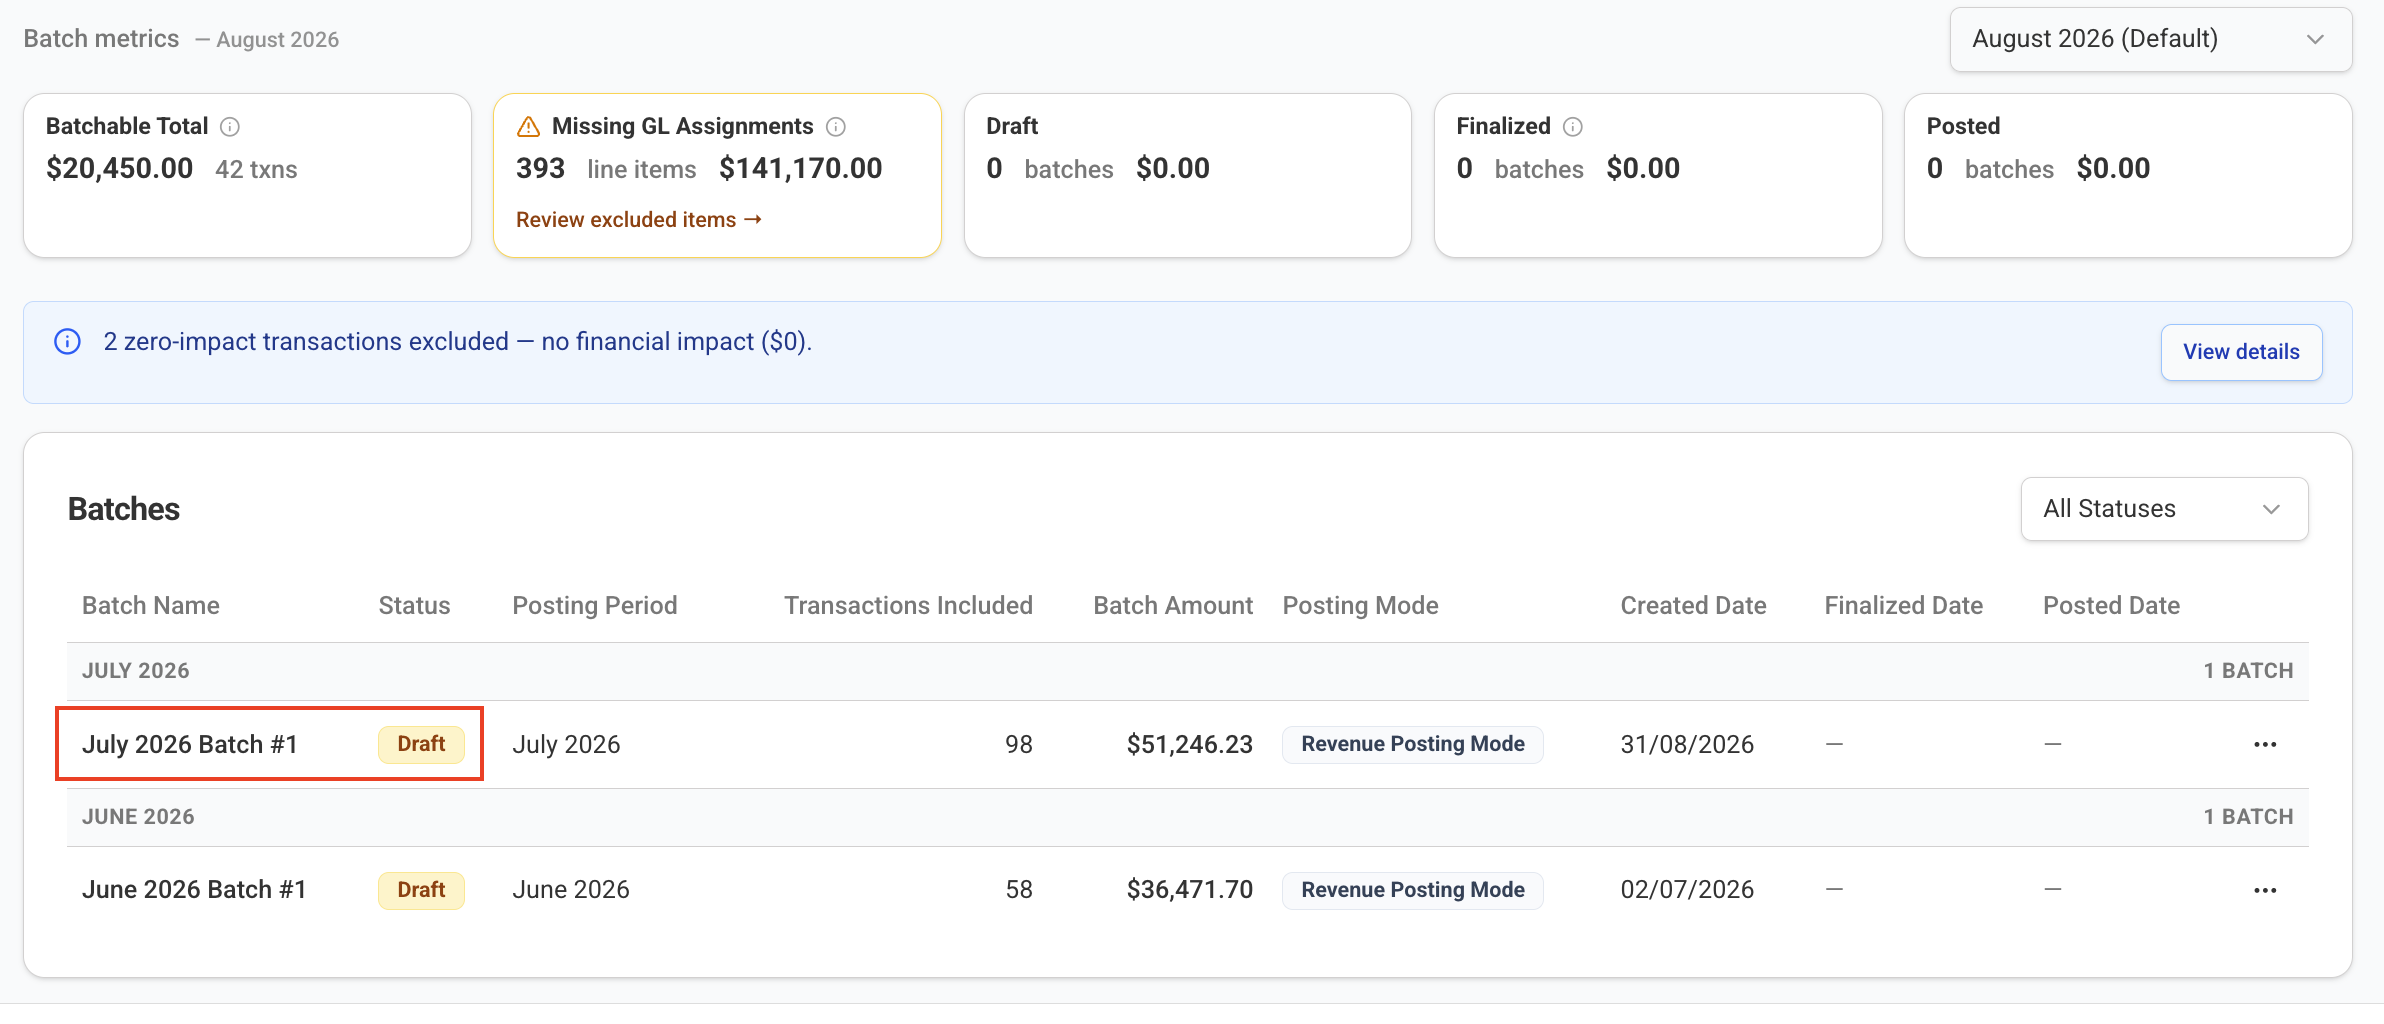
The system generates a draft Journal Entry Batch containing all eligible transactions for the selected posting period.
At this stage, the batch can still be reviewed before it is finalized.
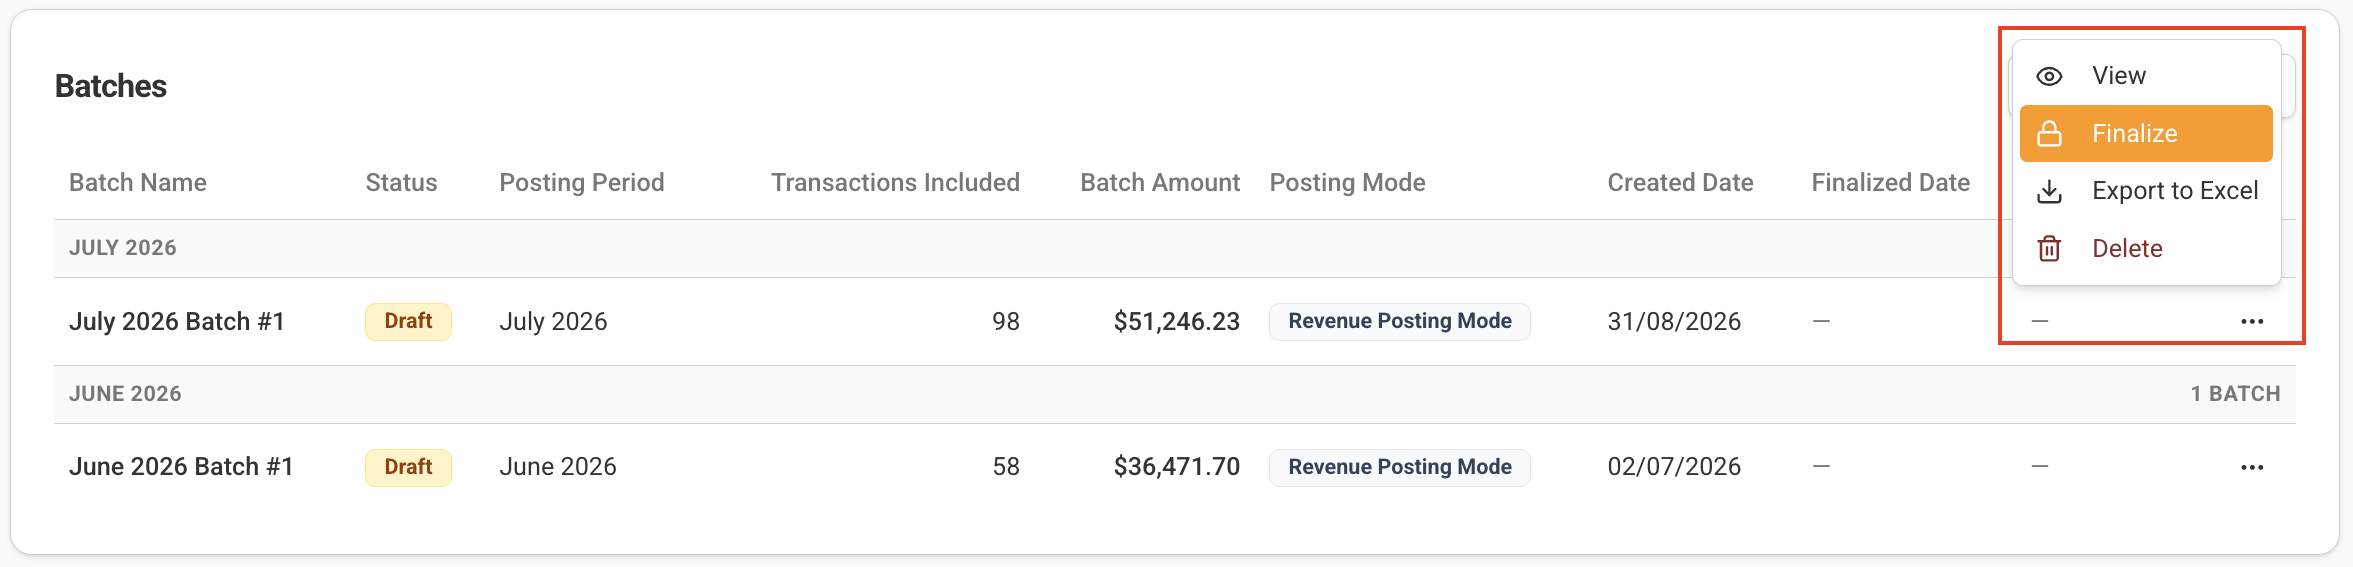
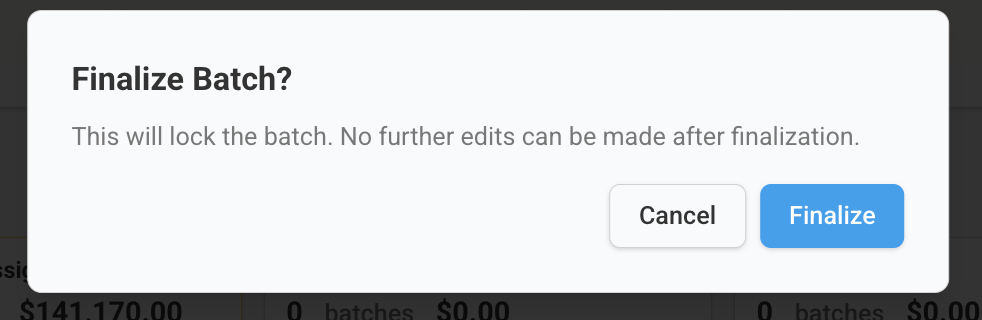
Step 6. Finalize the Batch
After confirming the batch details, finalize the batch.
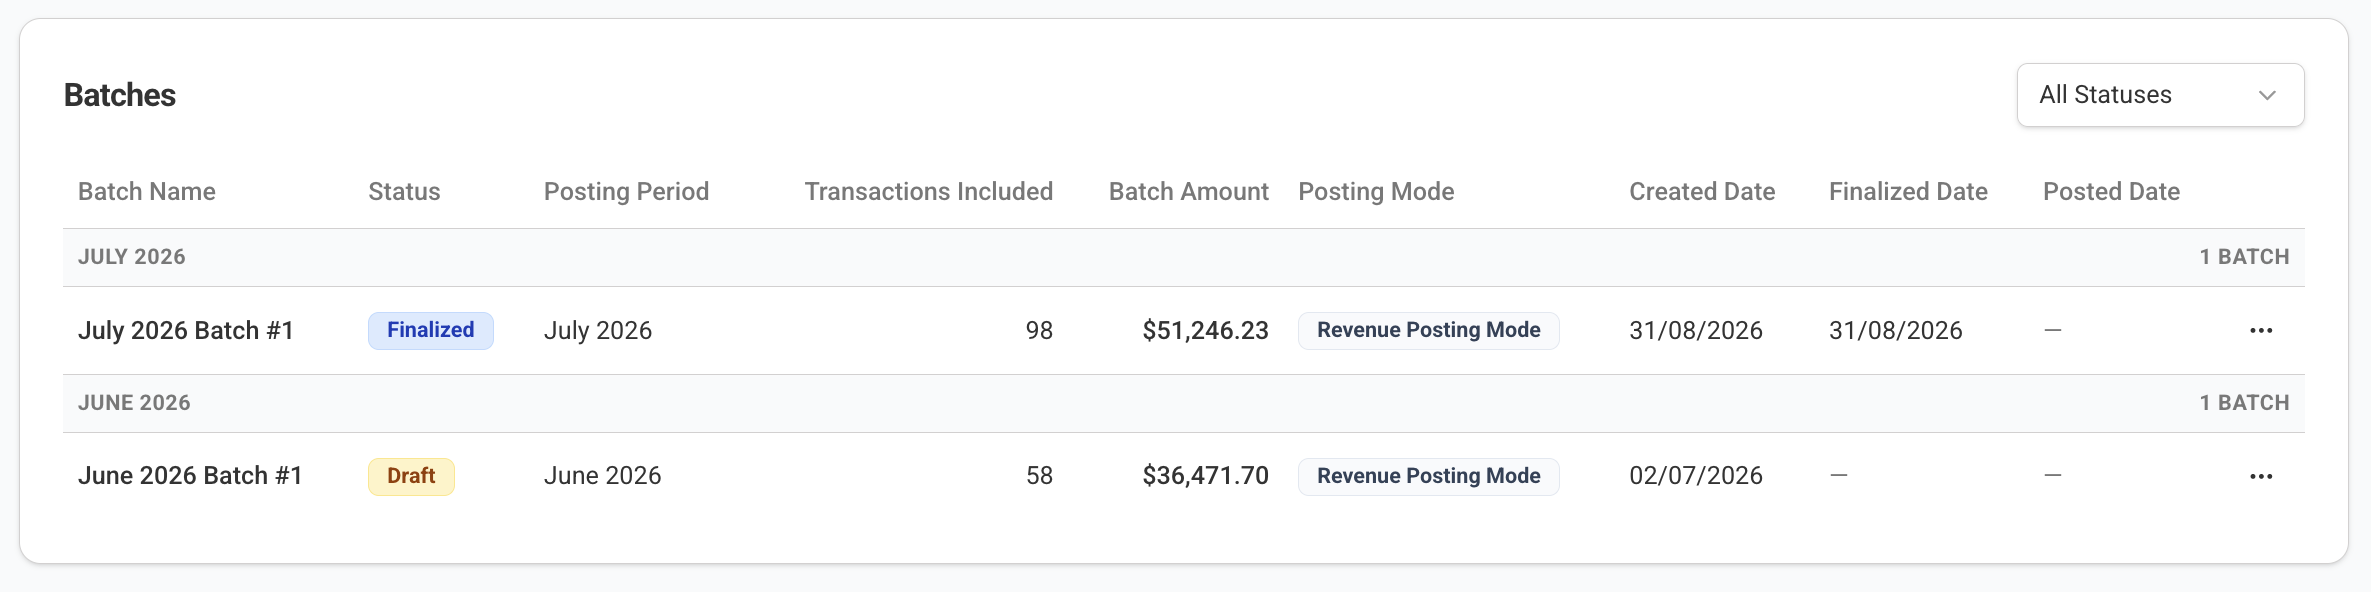
Once finalized, the batch becomes part of your accounting records for that posting period.
Depending on your organization's workflow, the batch can then be:
- Exported for manual import into QuickBooks Online, or
- Posted directly to QuickBooks Online if Enable Posting has been turned on.
Step 7. Post or Export the Batch
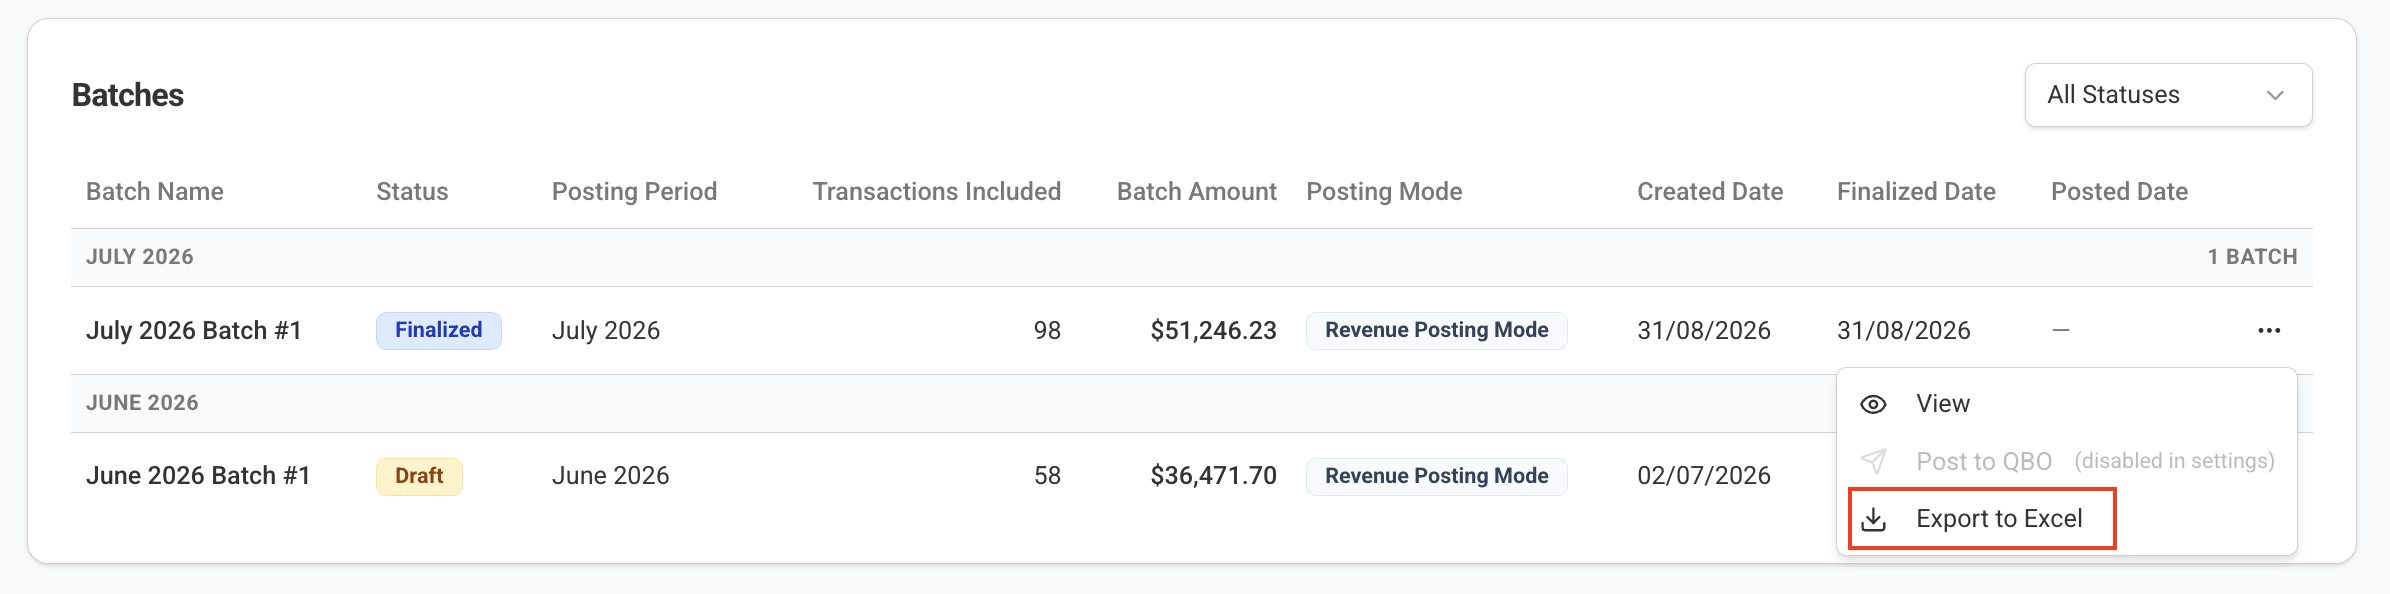
Once the batch is finalized, click the three-dot menu next to the batch to view the available options.
Depending on your posting configuration, you can:
- Post to QBO to send the finalized batch directly to QuickBooks Online.
- Export to Excel to download the batch for review or use in your accounting workflow.
If direct posting is not enabled, the Post to QBO option will appear disabled.
Best Practices
- Review journal entry previews before creating batches.
- Resolve all missing GL assignments before finalizing.
- Verify debit and credit balances before posting.
- Finalize batches only after completing your review.
- Keep posting periods organized to simplify month-end reconciliation.
What's Next?
Once your Journal Entry Batch has been posted, review your transactions in QuickBooks Online to confirm they have been recorded correctly. Continue using this workflow for each accounting period to keep your financial records synchronized between Engagifii and QuickBooks Online.
We hope this guide helps you generate, review, and post Journal Entry Batches with confidence. If you have any questions or feedback, please reach out to us at support@engagifii.com.