Summary
Recurring events often share the same structure, schedules, pricing models, registration questions, exhibitor setups, and event resources. Engagifii helps administrators save time by duplicating an existing event and automatically adjusting dates, registration windows, and other configurations. You can choose exactly what should be copied, review every component before creation, and make changes without affecting the original event. Whether you're preparing an annual conference, regional meeting, or exhibitor event, Copying Events helps streamline event setup while maintaining flexibility.
Before You Begin
Important Notes
- Copying an event creates a completely new event, while retaining the original source event.
- Changes made for the copied event do not affect the original event.
- You can choose which items should and should not be copied over.
- Nothing is saved until you click Create Copy.
Step 1: Select an Event to Copy
Users can copy an event from either location:
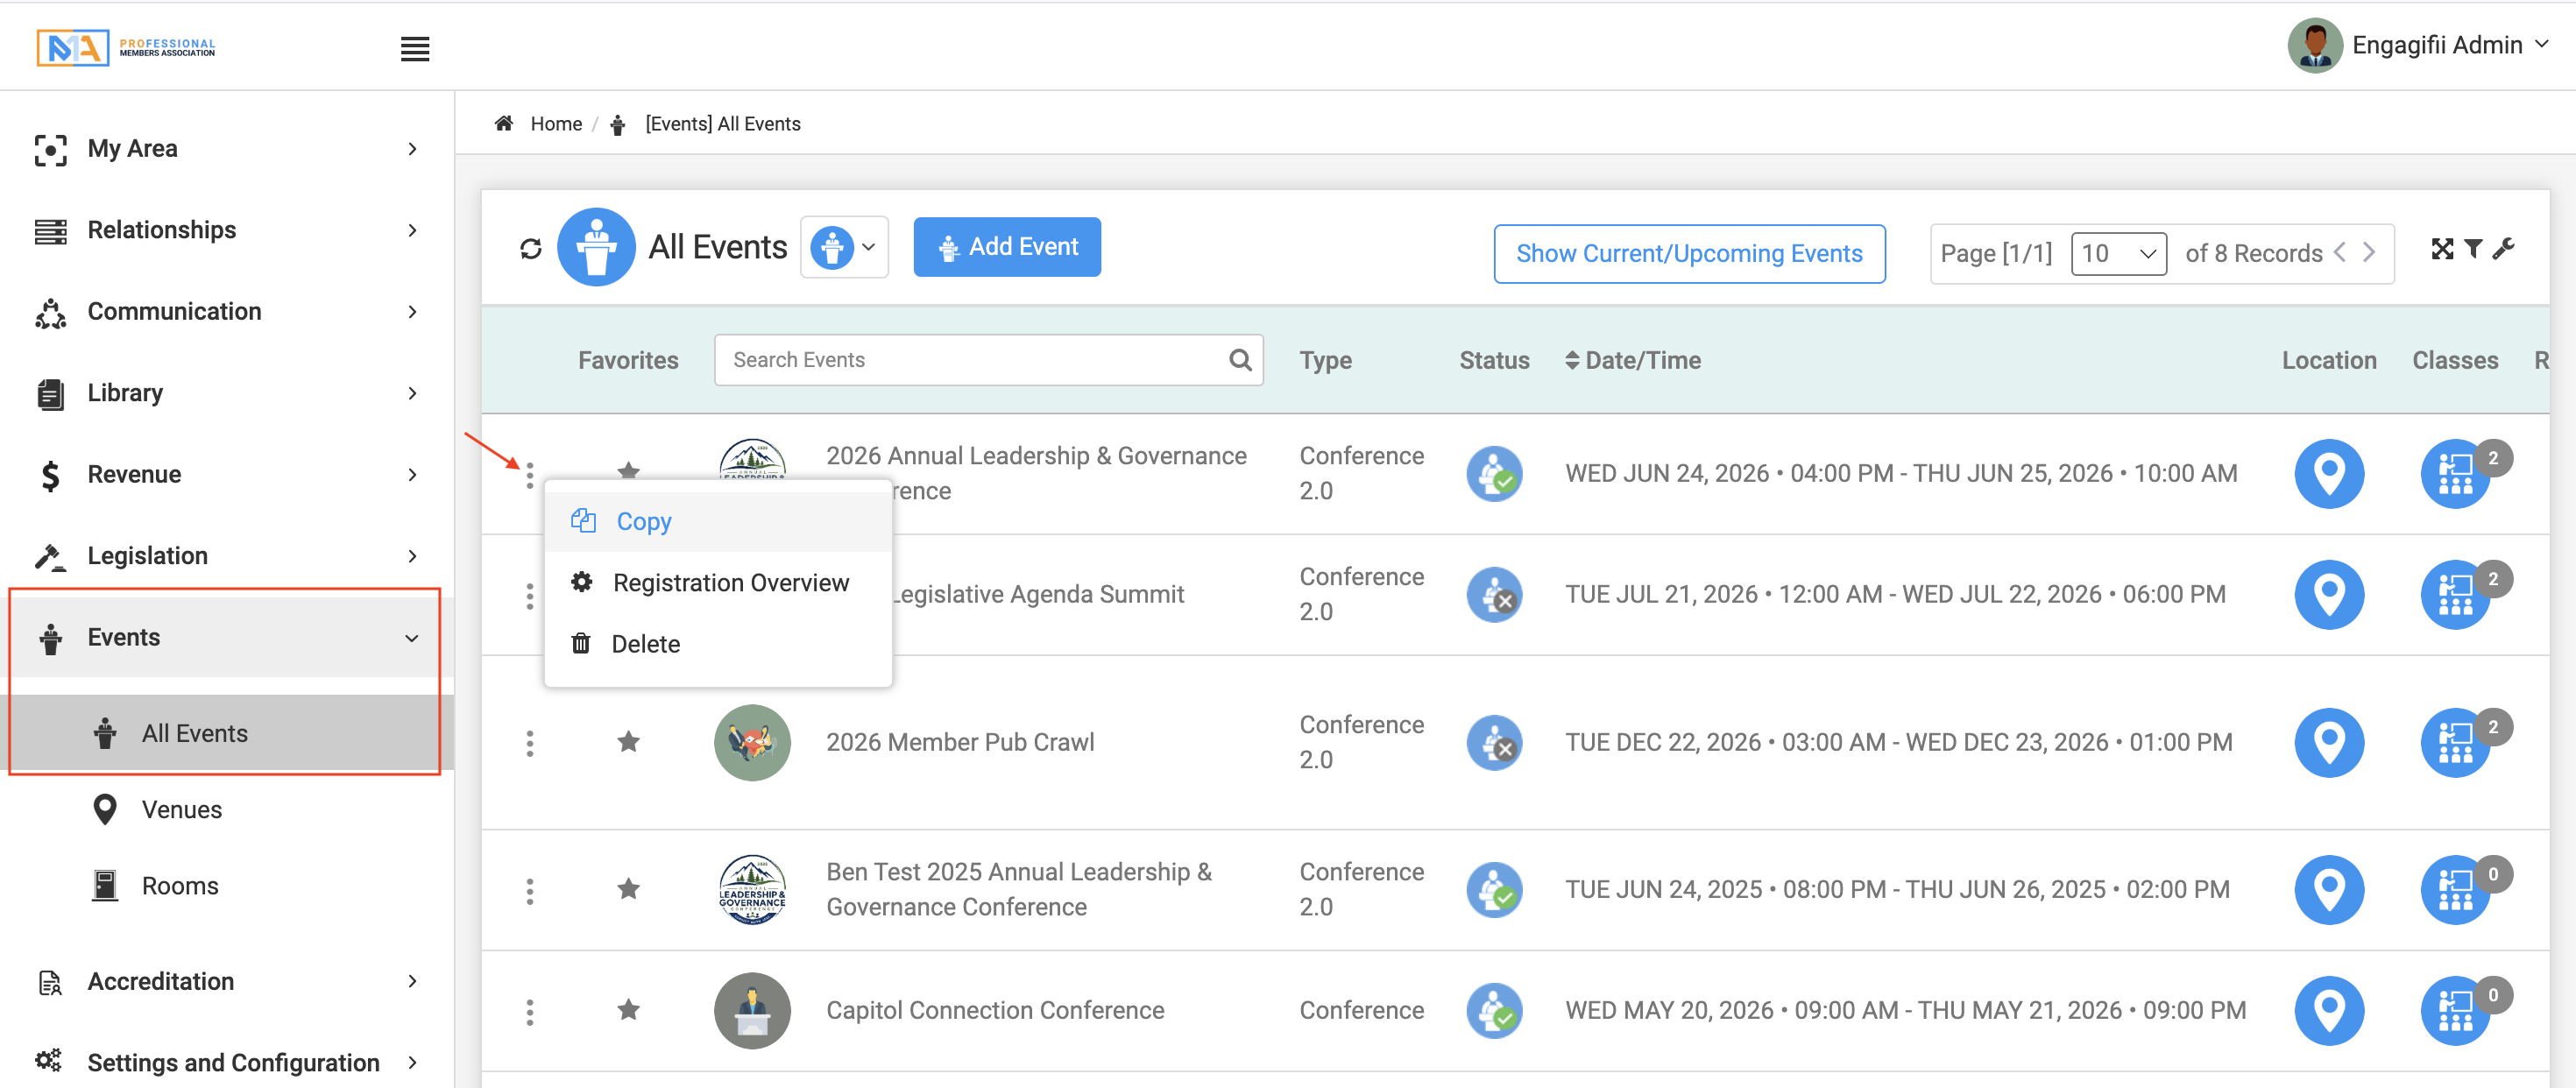
Option 1: From All Events
- Navigate to Events → All Events
- Locate the event you want to copy
- Click the three-dot menu to the left of the event name
- Select Copy Event
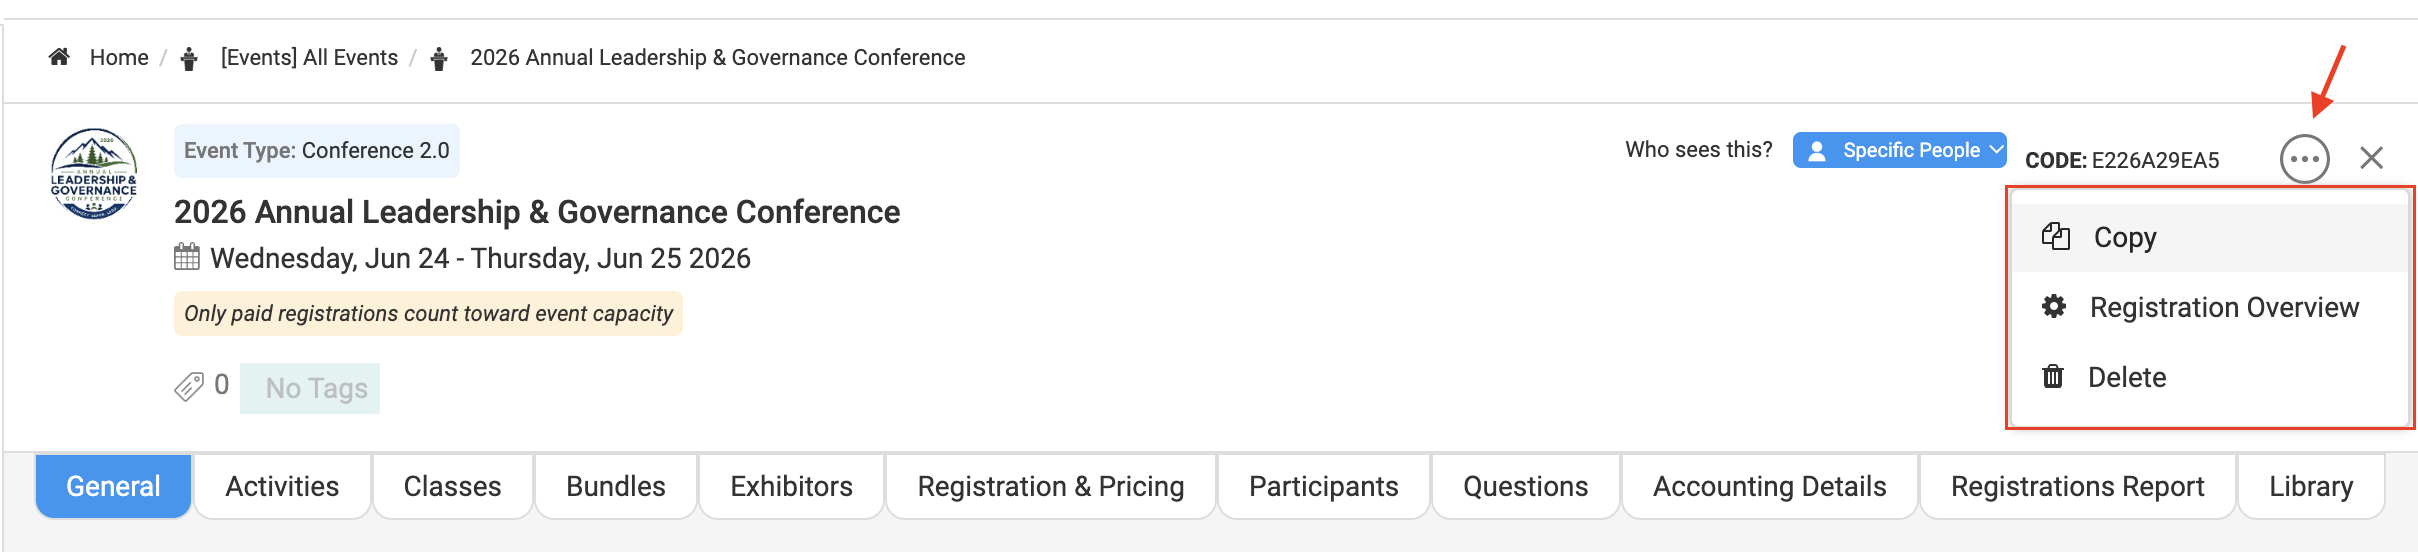
Option 2: From Inside the Event
- Open the event
- Click the three-dot menu
- Select Copy Event
Step 2: Update Basic Event Information
At the top of the Copy Event window:
Event Name
Update the name of the new event.
Example:
- 2025 Annual Conference
- 2026 Annual Conference
Event Type
If needed, select a different event type for the copied event.
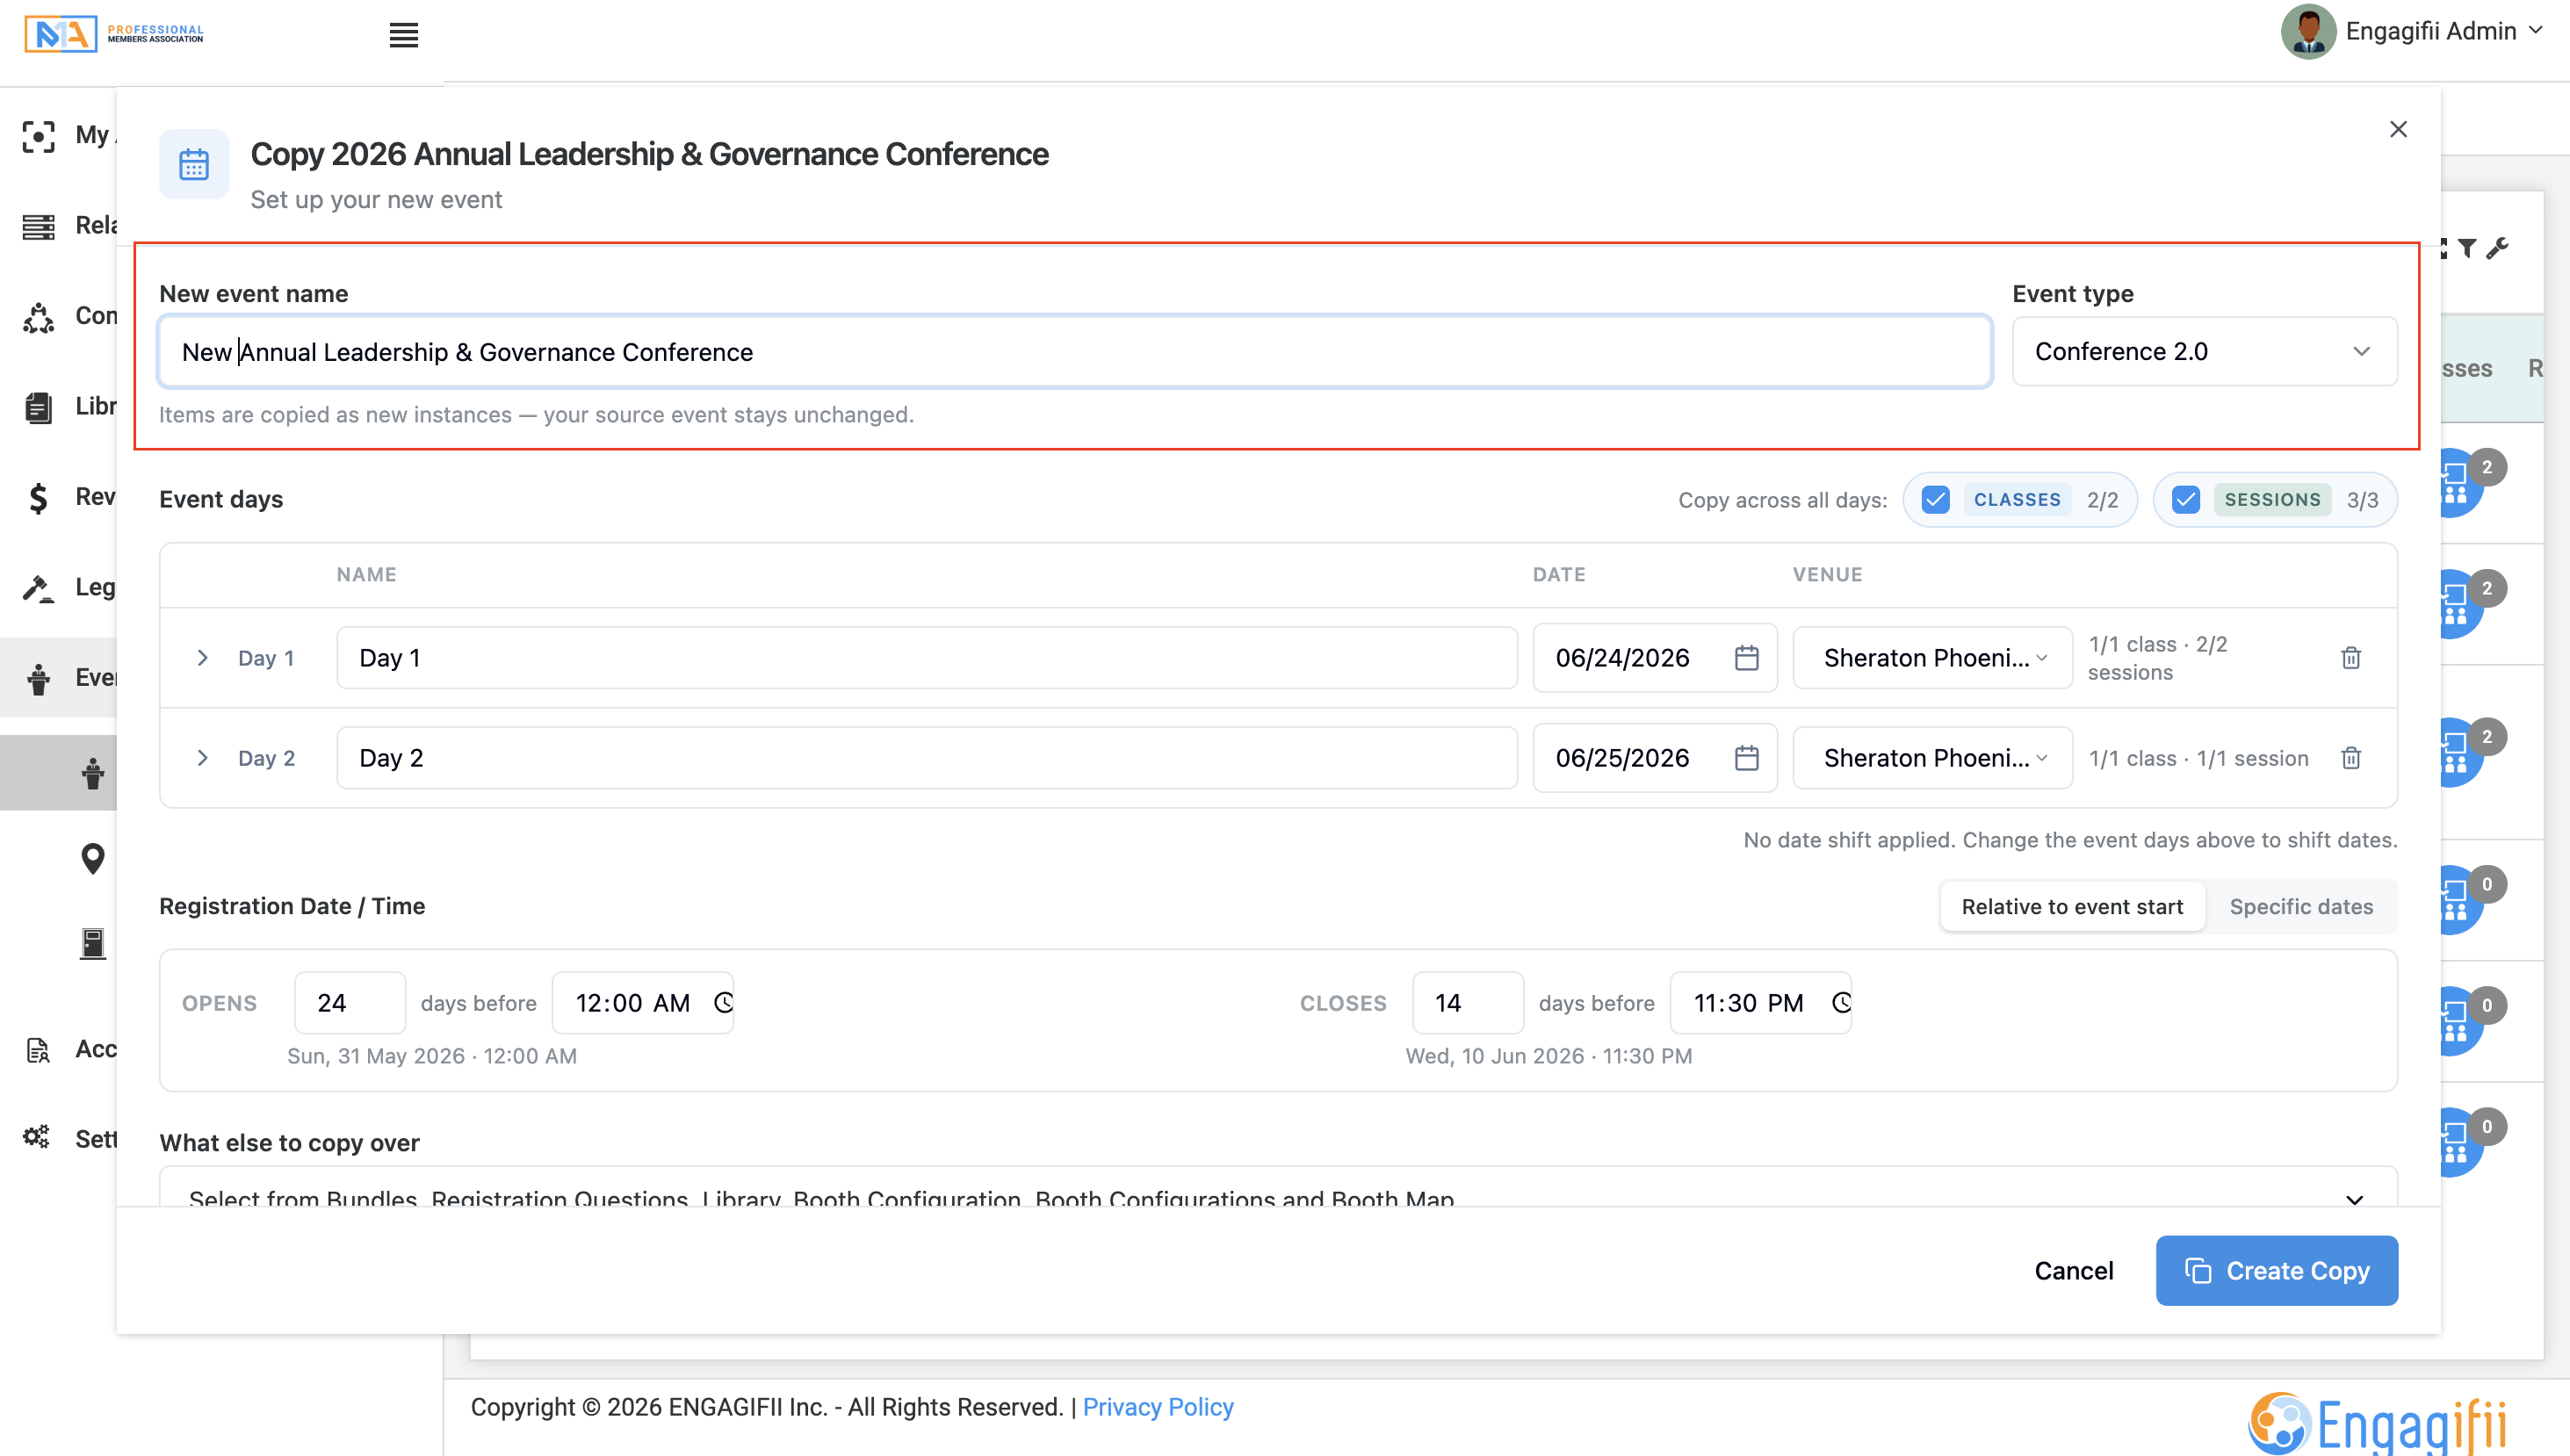
Step 3: Review Event Days
The Event Days section allows you to review and update:
- Day Names
- Dates
- Venues
- Start Times
- End Times
Automatic Date Shifting
Note: Change one date and all other dates shift with it!
One of the biggest advantages of Copying Events is automatic date shifting.
When you change the date for the first event day:
- Remaining event days automatically update
- Registration windows automatically adjust
- Embedded sessions automatically adjust
- Event schedules remain aligned
The system also displays the number of days shifted from the original event

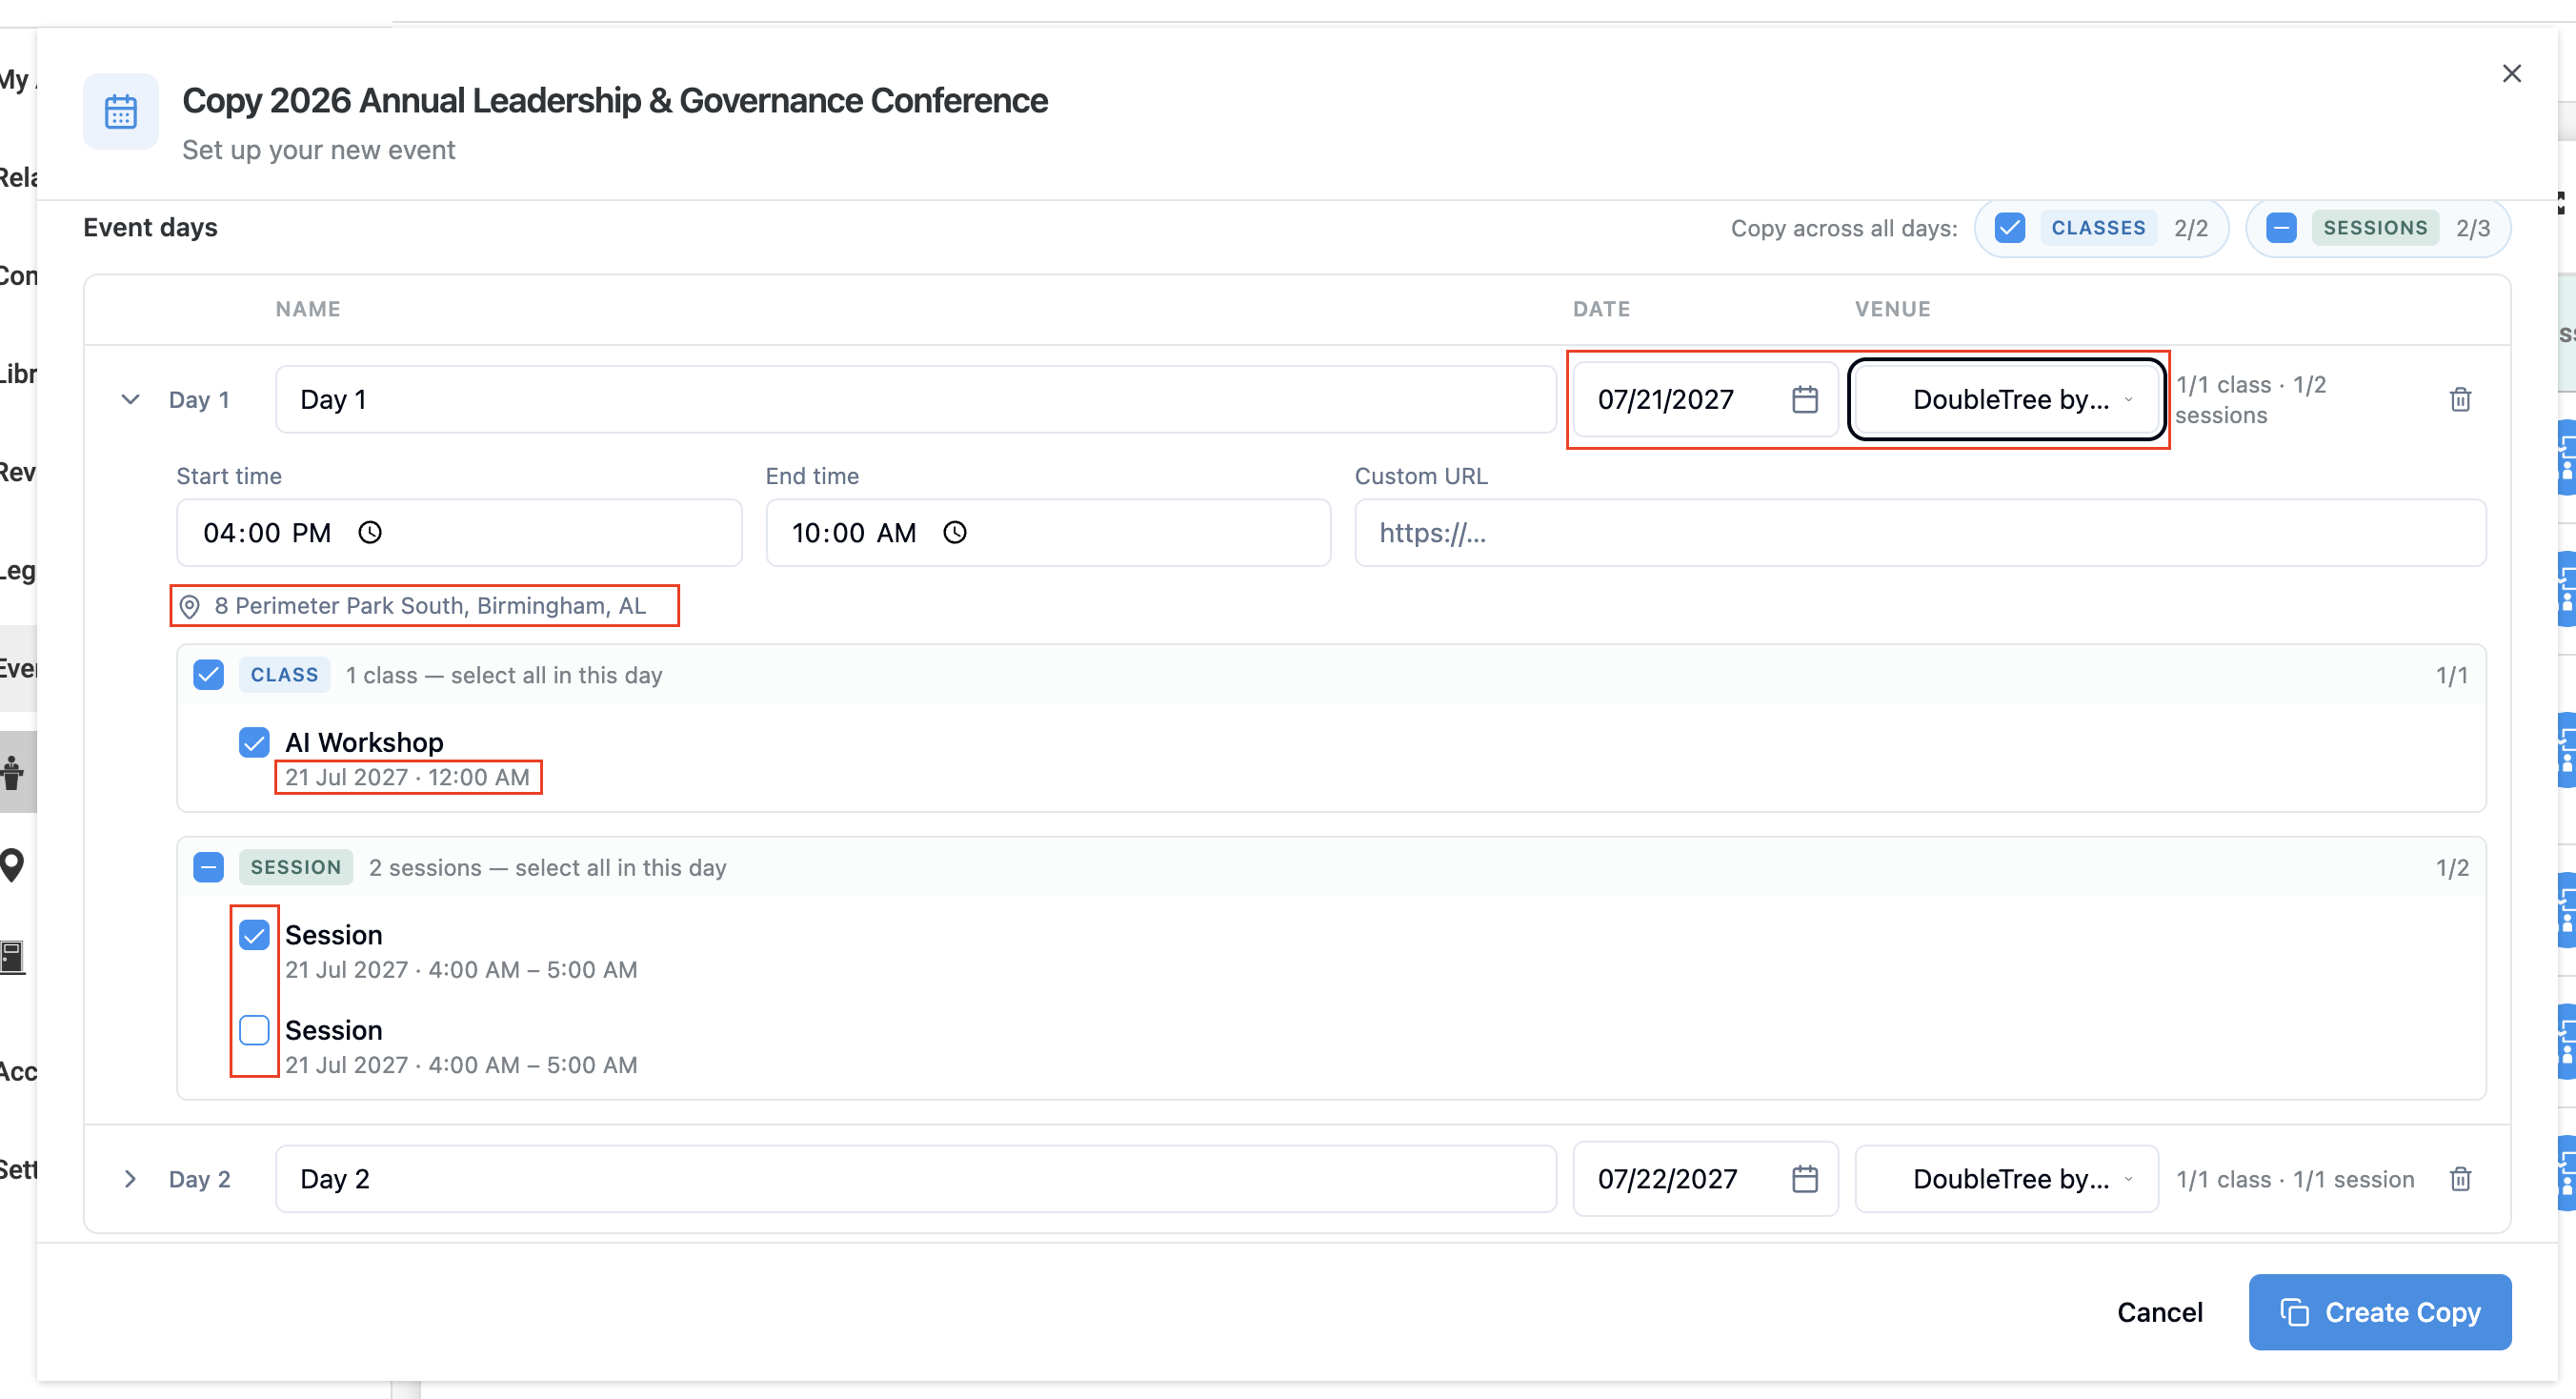
Step 4: Review Sessions & Classes
Expand each event day to review its contents. The class dates are automatically adjusted to align with the newly selected event dates.
Within each day, you can:
- Change start and end times
- Include or exclude sessions
- Include or exclude classes
Simply uncheck any session or class that should not be included in the new event.
Step 5: Configure Registration Dates & Times
The Registration Date/Time section controls when registration opens and closes.
Option 1: Specific Dates
Choose exact registration open and close dates.

Option 2: Relative to Event Start
Set registration dates based on the event start date.
Examples:
- Open registration 90 days before event start
- Close registration 3 days before event start
The system automatically calculates the corresponding dates.

Step 6: Review Other Items
Some items may not align with any specific event day.
These items appear under Other Items and will still be copied to the new event.
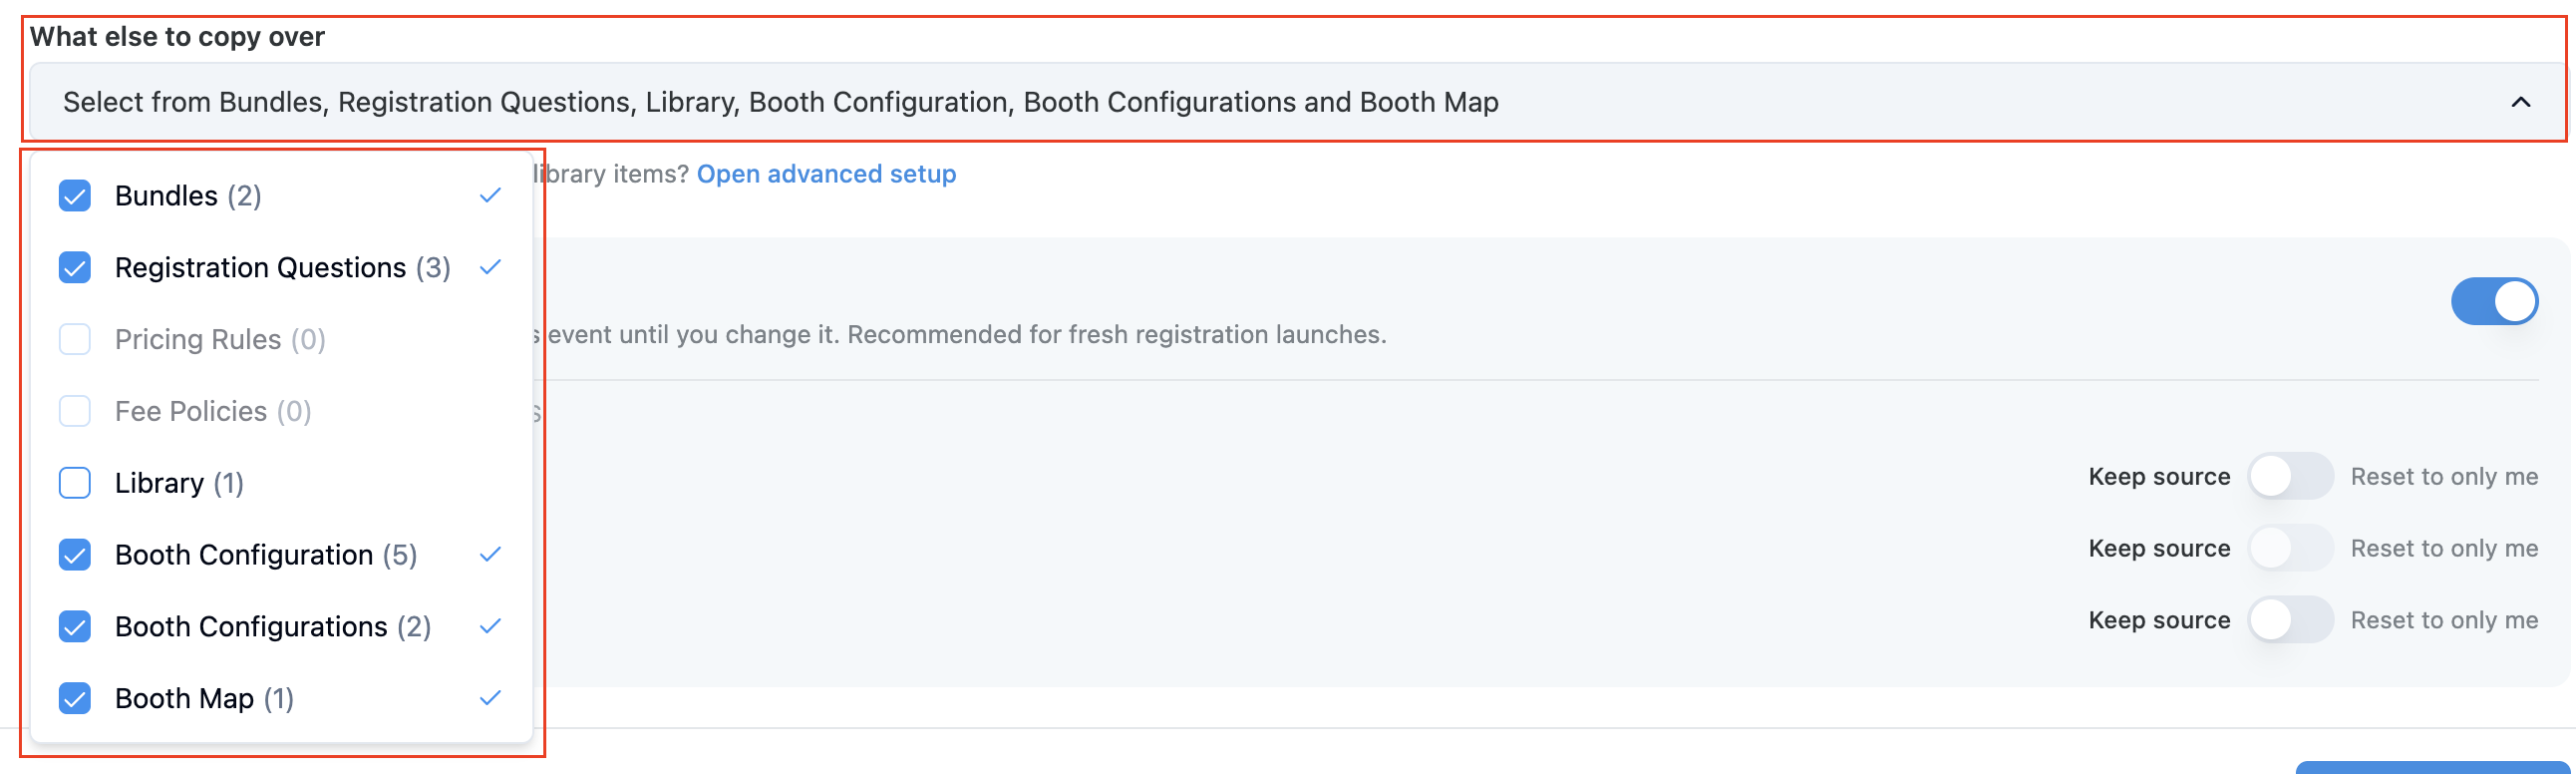
Step 7: Select What Else to Copy
The What Else to Copy section allows administrators to choose additional event components.
Available options include:
- Bundles
- Registration Questions
- Pricing Rules
- Library Files
- Fee Policies
- Booth Configurations
- Booth Maps
- Revenue Accounting Settings
Simply check or uncheck the items you want to include in the copied event.
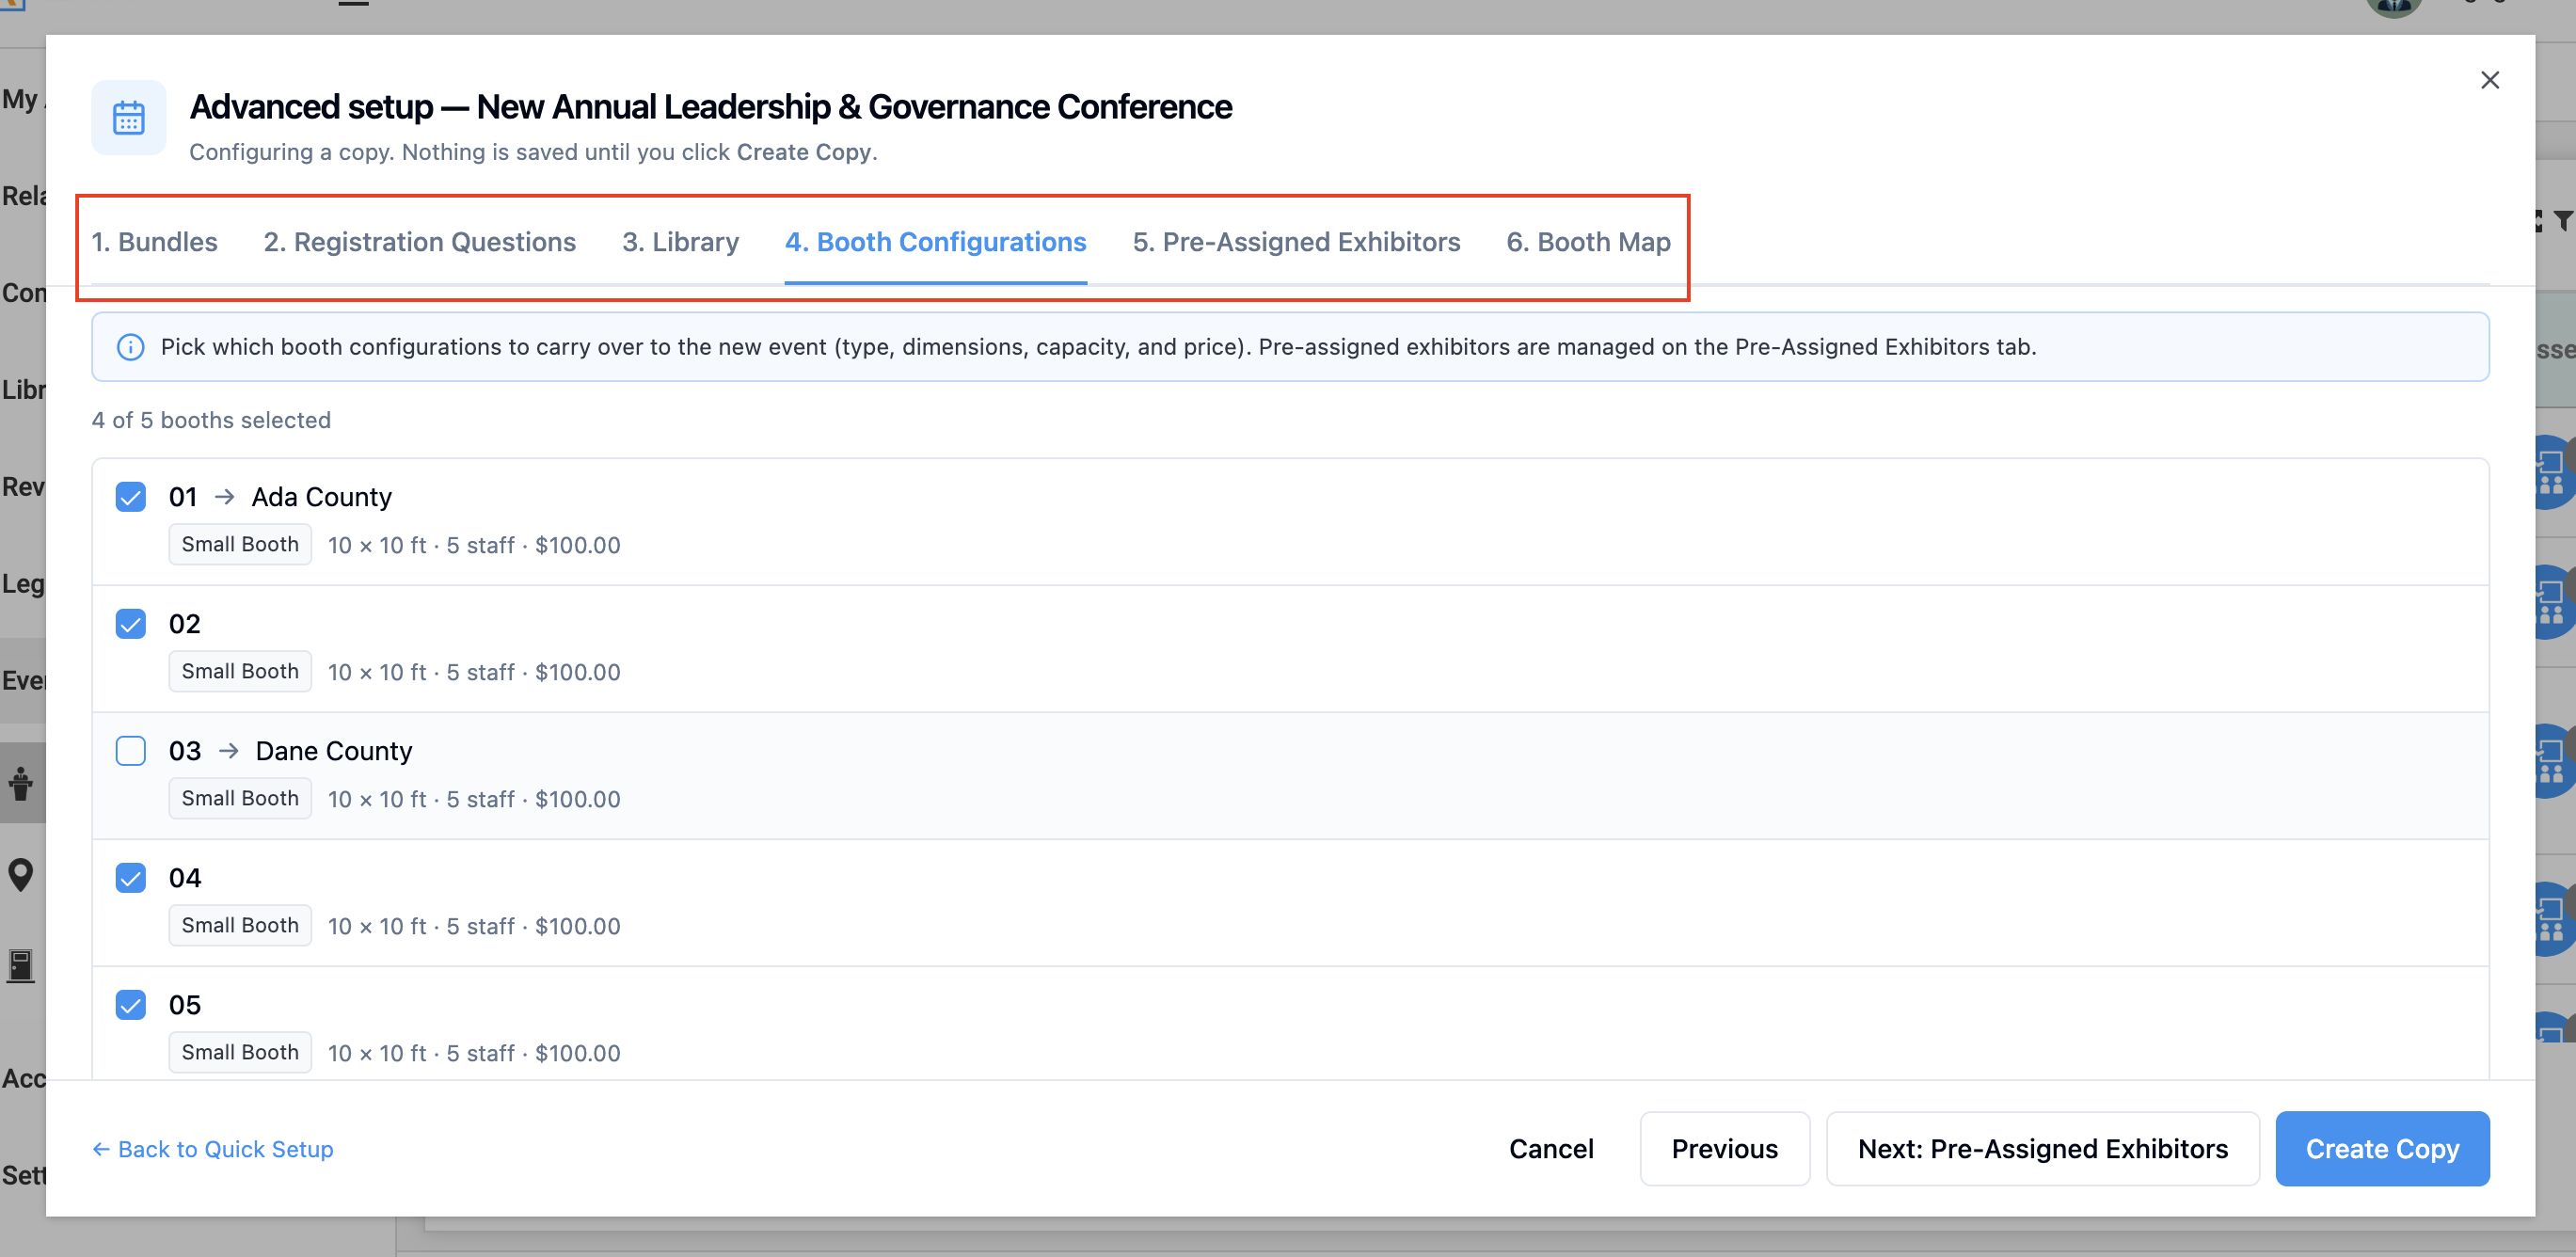
Step 8: Review Advanced Setup
Click Open Advanced Setup to review detailed configurations before copying.

Depending on what was selected, you can review:
Bundles
Review:
- Bundle names
- Pricing
- Included sessions
- Included event days
Registration Questions
Choose which questions should carry forward.
Pricing Rules
Review existing pricing configurations.
Booth Configurations
Review:
- Booth sizes
- Booth pricing
- Booth assignments
Booth Maps
Carry forward:
- Markers
- Layouts
- Booth locations
This gives administrators full control over what is included in the copied event.
Step 9: Configure Visibility Settings
Use the Reset Event Visibility options to control who can view the copied event.
Event Visibility
When enabled:
- Only administrators can see the copied event initially.
When disabled:
- The copied event inherits visibility settings from the source event.
The same visibility options are available for:
- Classes
- Sessions
- Bundles
This helps administrators prepare the event before making it visible to registrants.

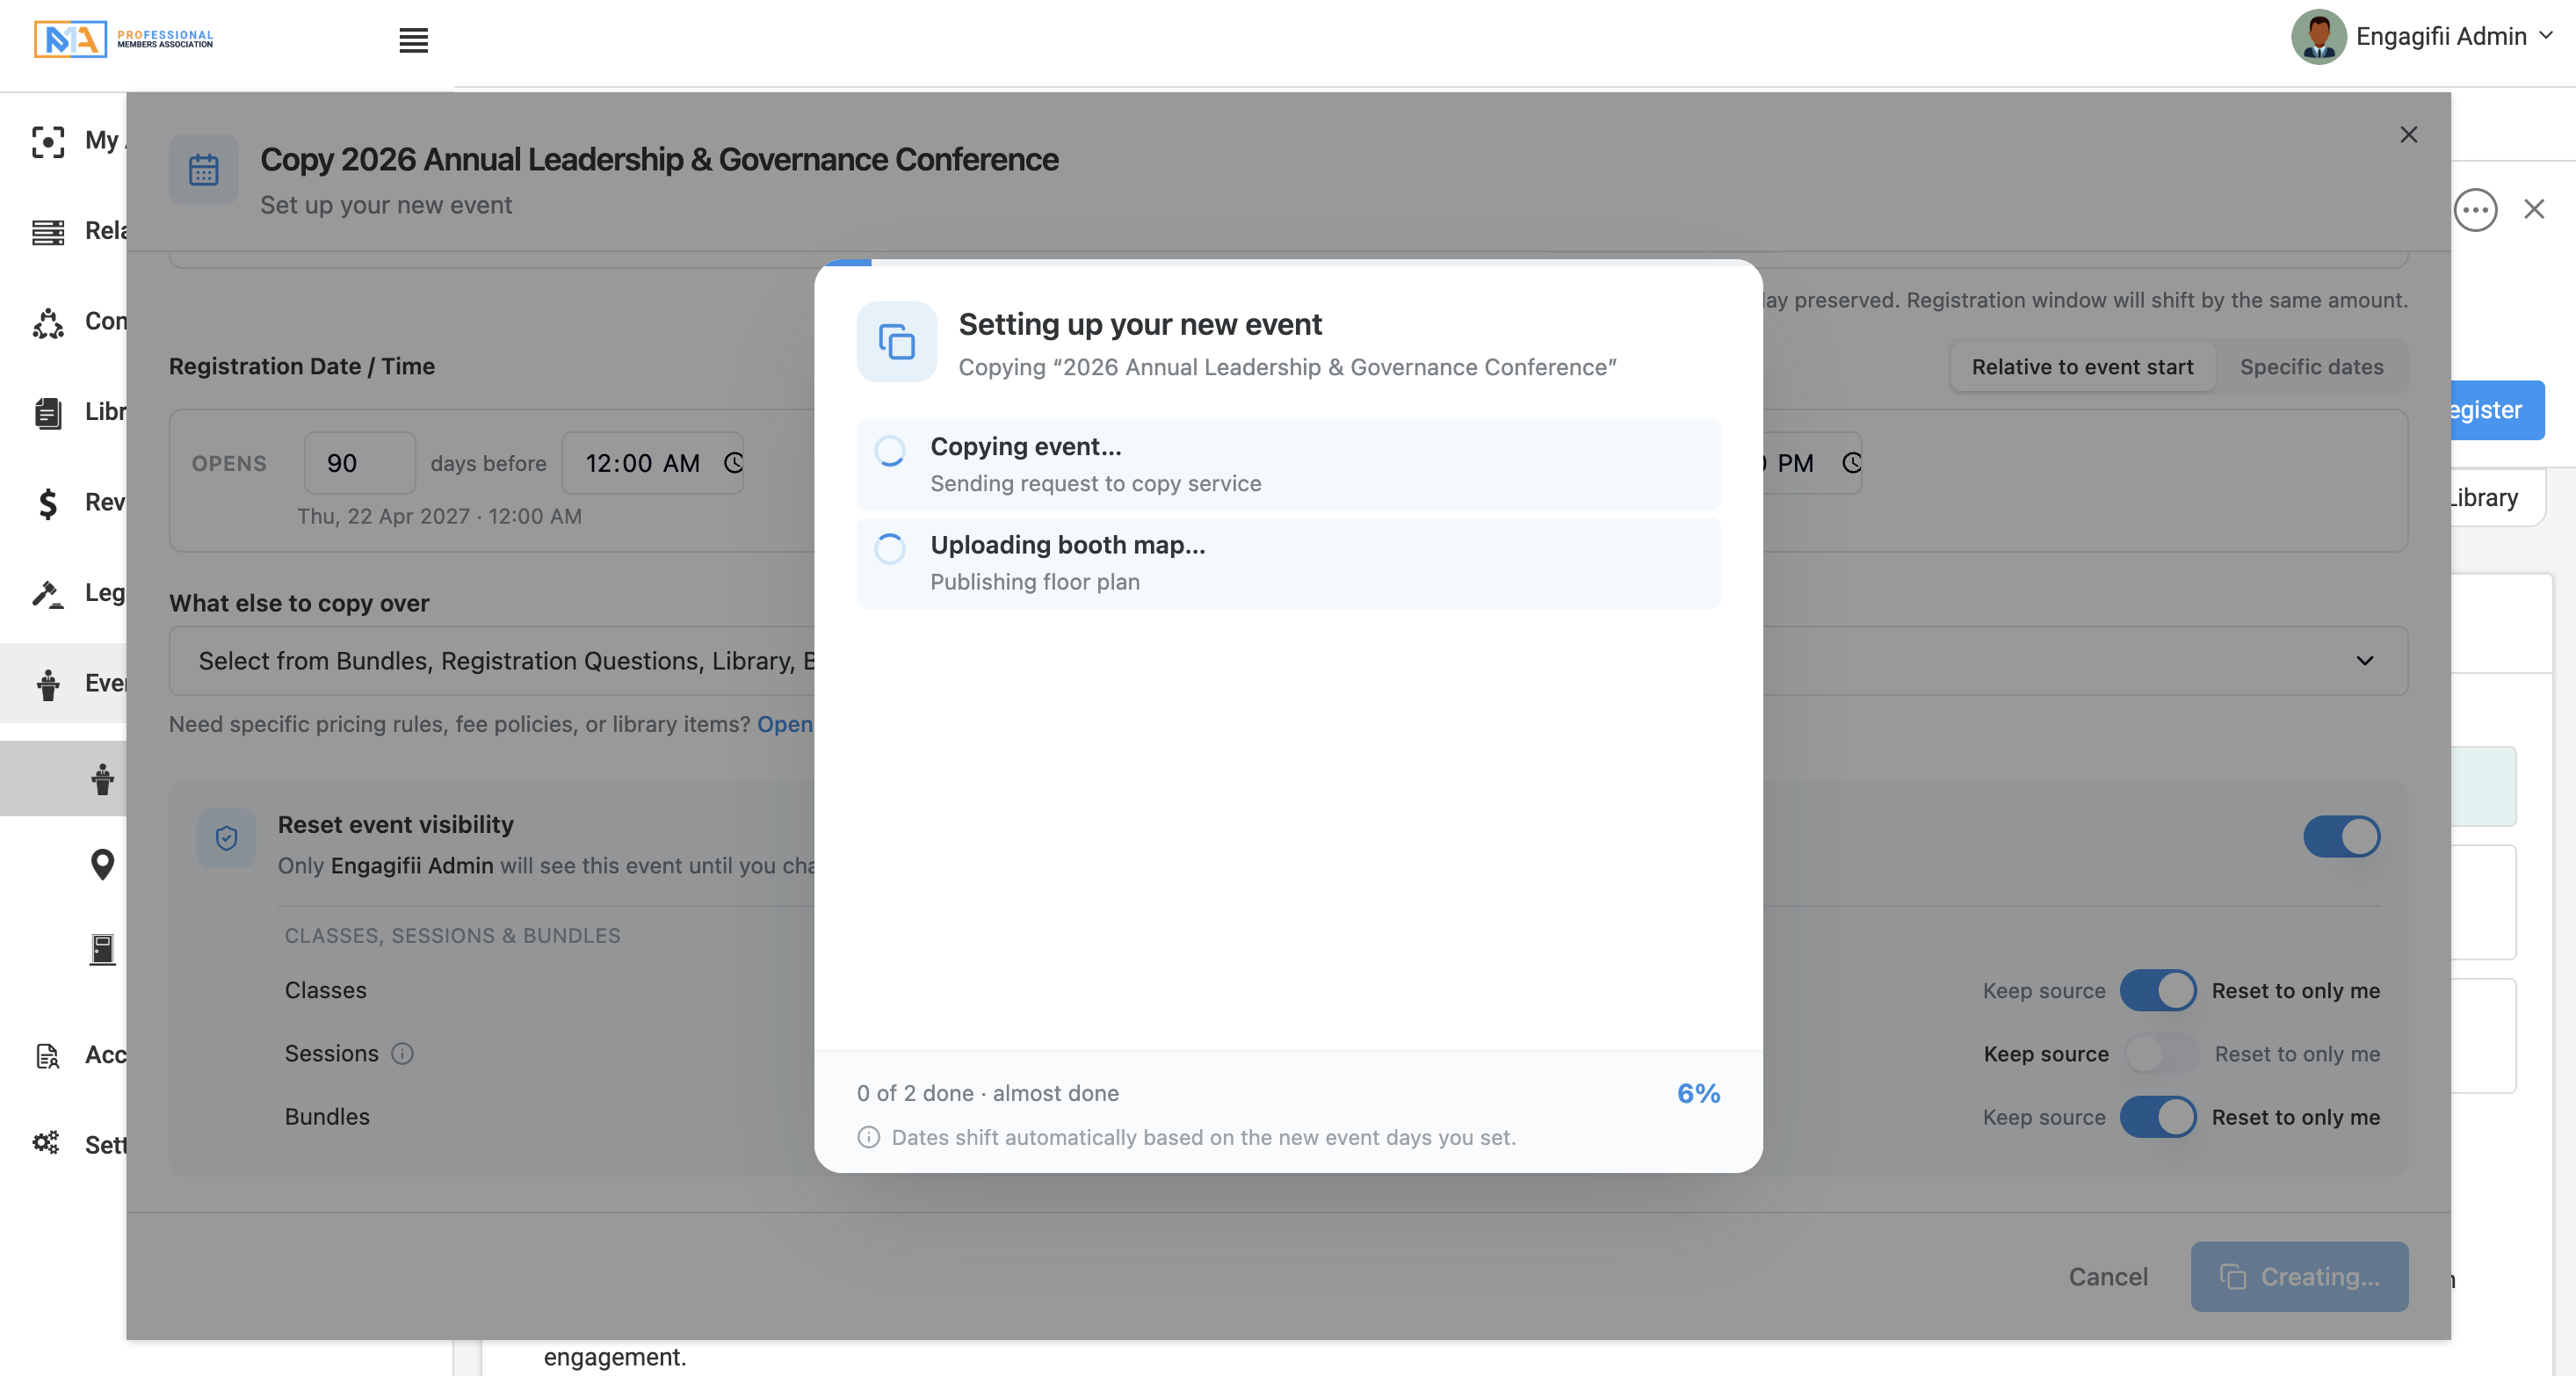
Step 10: Create the Copy
After reviewing all settings:
- Click Create Copy
- Wait for the process to complete
The system creates a new event based on your selected configuration.
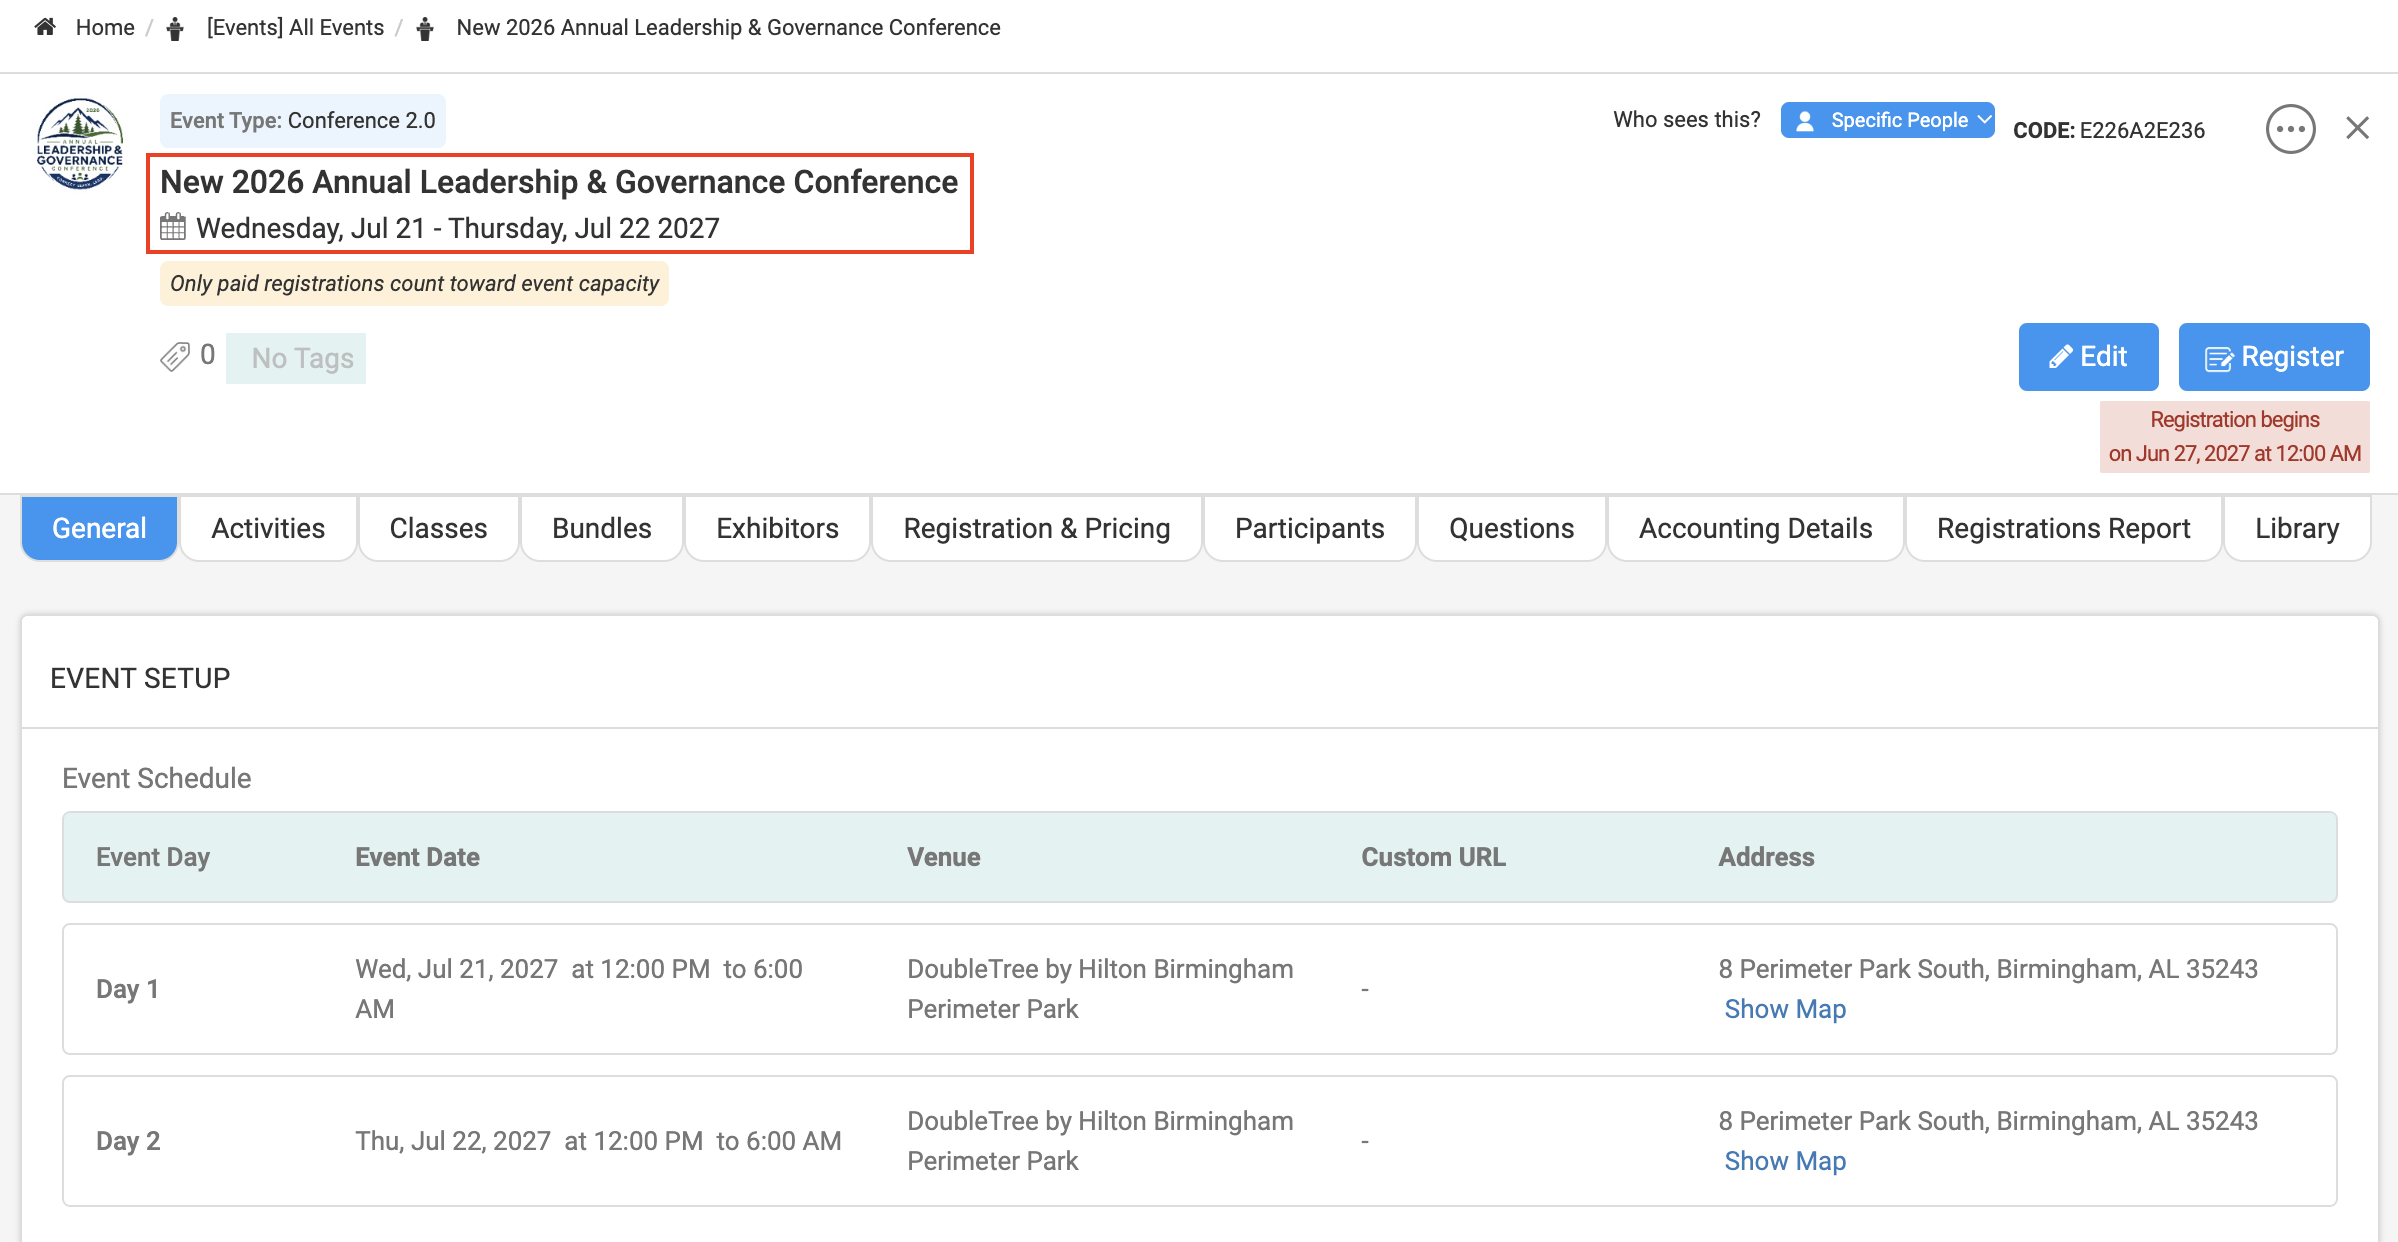
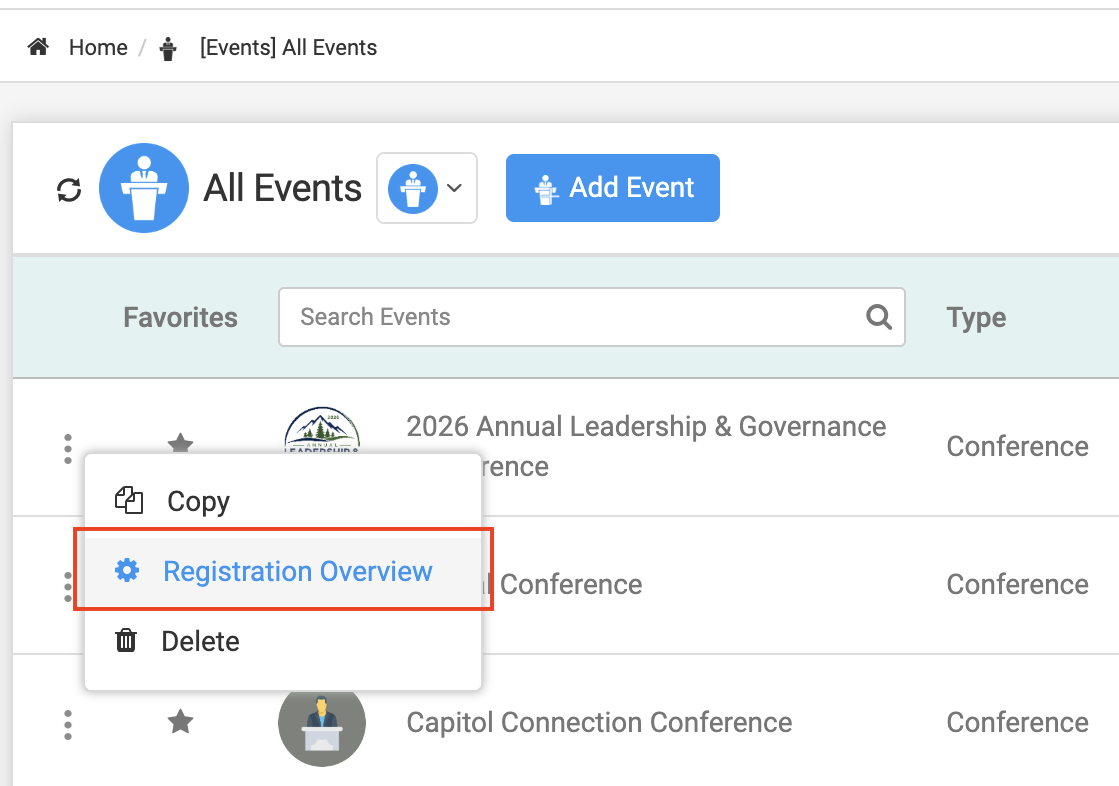
Step 11: Review Your Event Using Registration Overview
After the event has been copied, use the Registration Overview page to quickly review and verify the event configuration before opening registration.
Navigate to: Event → Click on Three Dots → Select Registration Overview
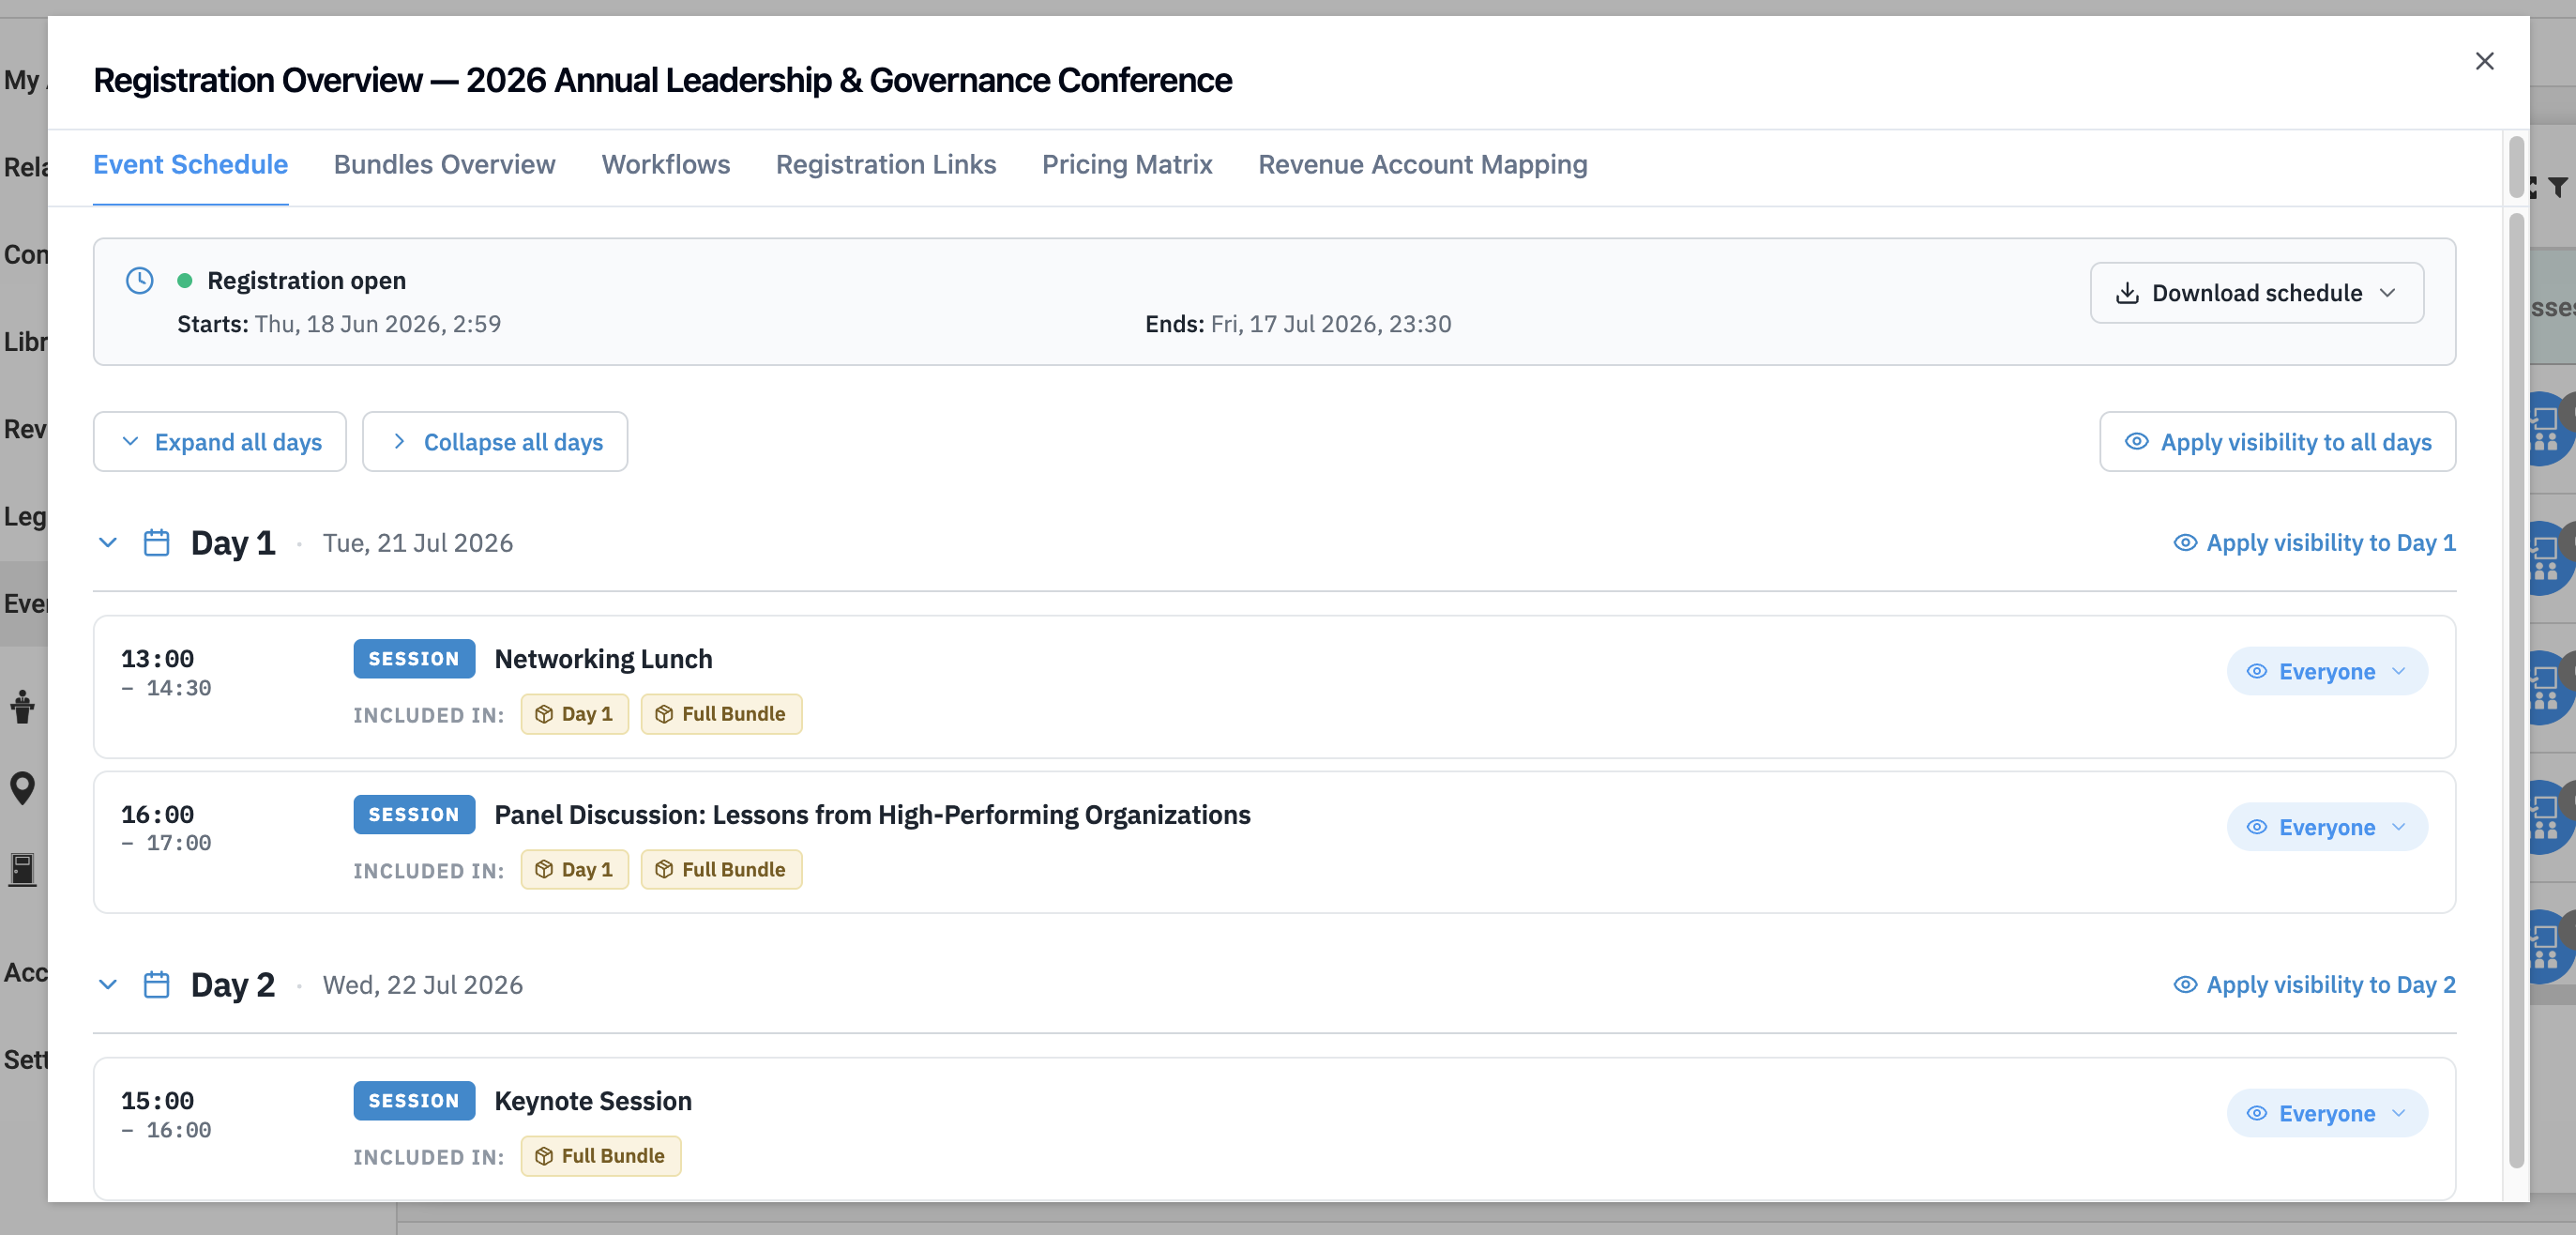
From here, you can review key registration details in one place, including:
- Event Details (schedule, dates, contacts, and registration links)
- Pricing Matrix and Revenue Account Mapping
- Bundles and Registration Workflows
- Classes, Sessions, and Exhibitor Settings
- Registration Questions and other related configurations
This centralized view helps confirm that the copied event has been configured correctly before it is shared with registrants.
Manage Visibility Before Registration Opens
Registration Overview also allows you to review and update visibility settings for:
- Event
- Classes
- Sessions
- Bundles
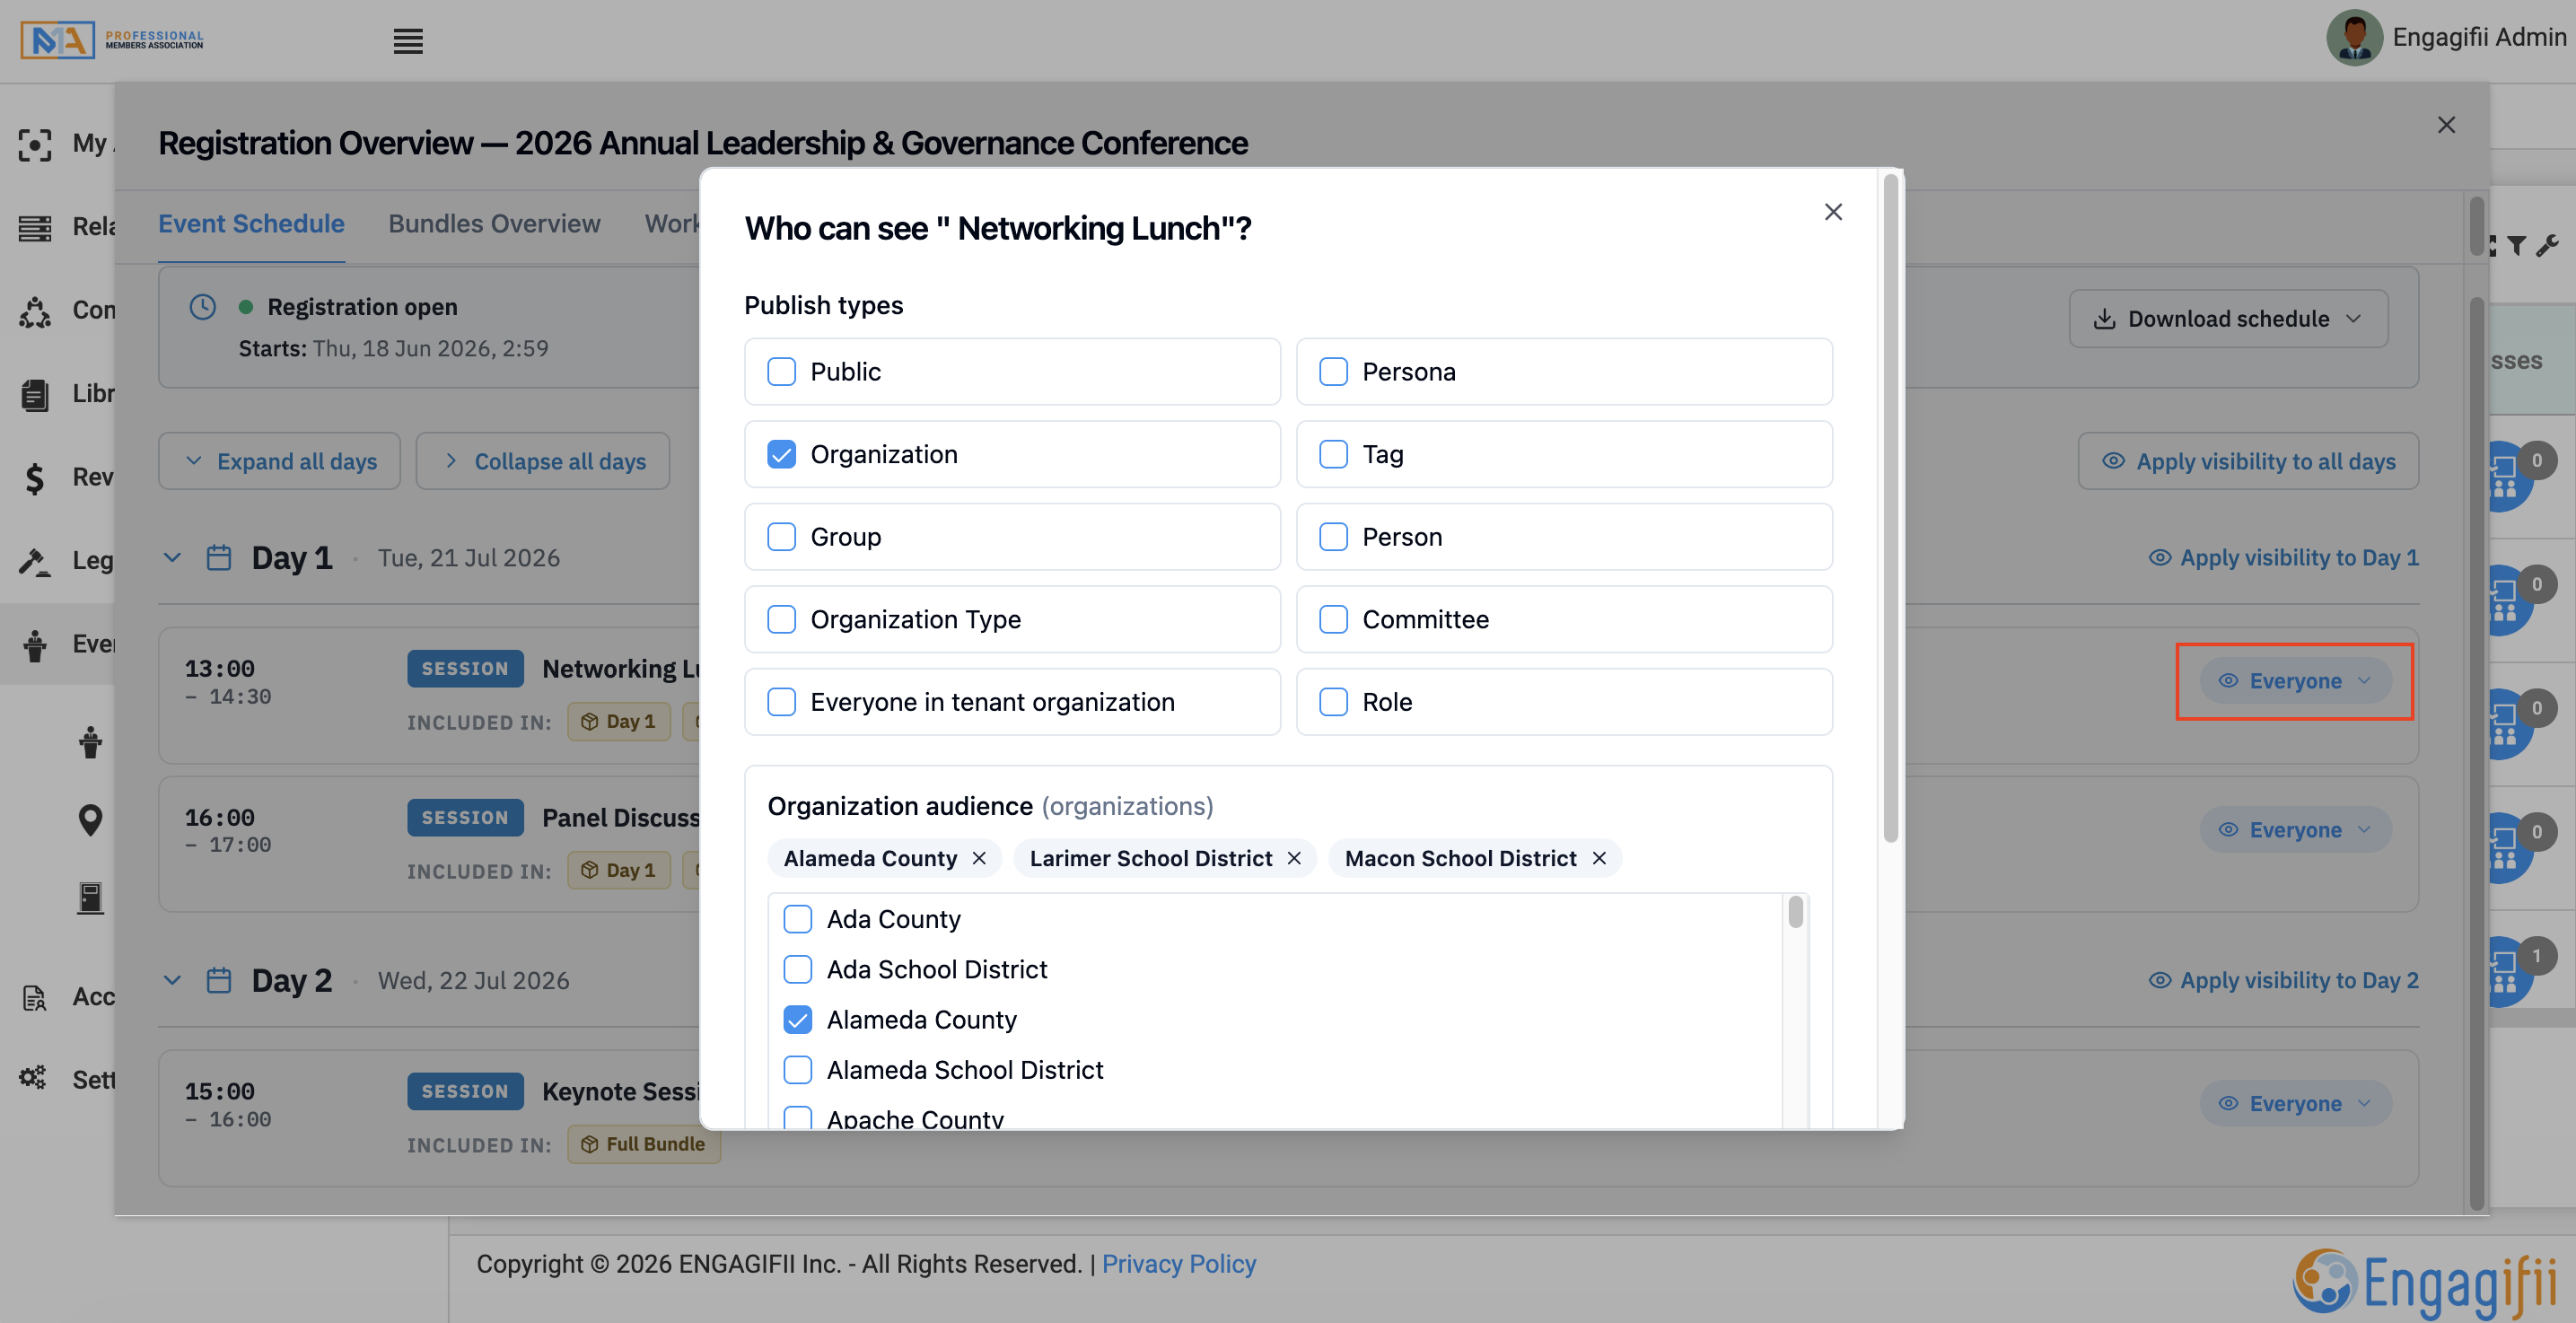
You can choose to keep the original visibility settings or update them before publishing the event, ensuring only the intended audience can view registration.
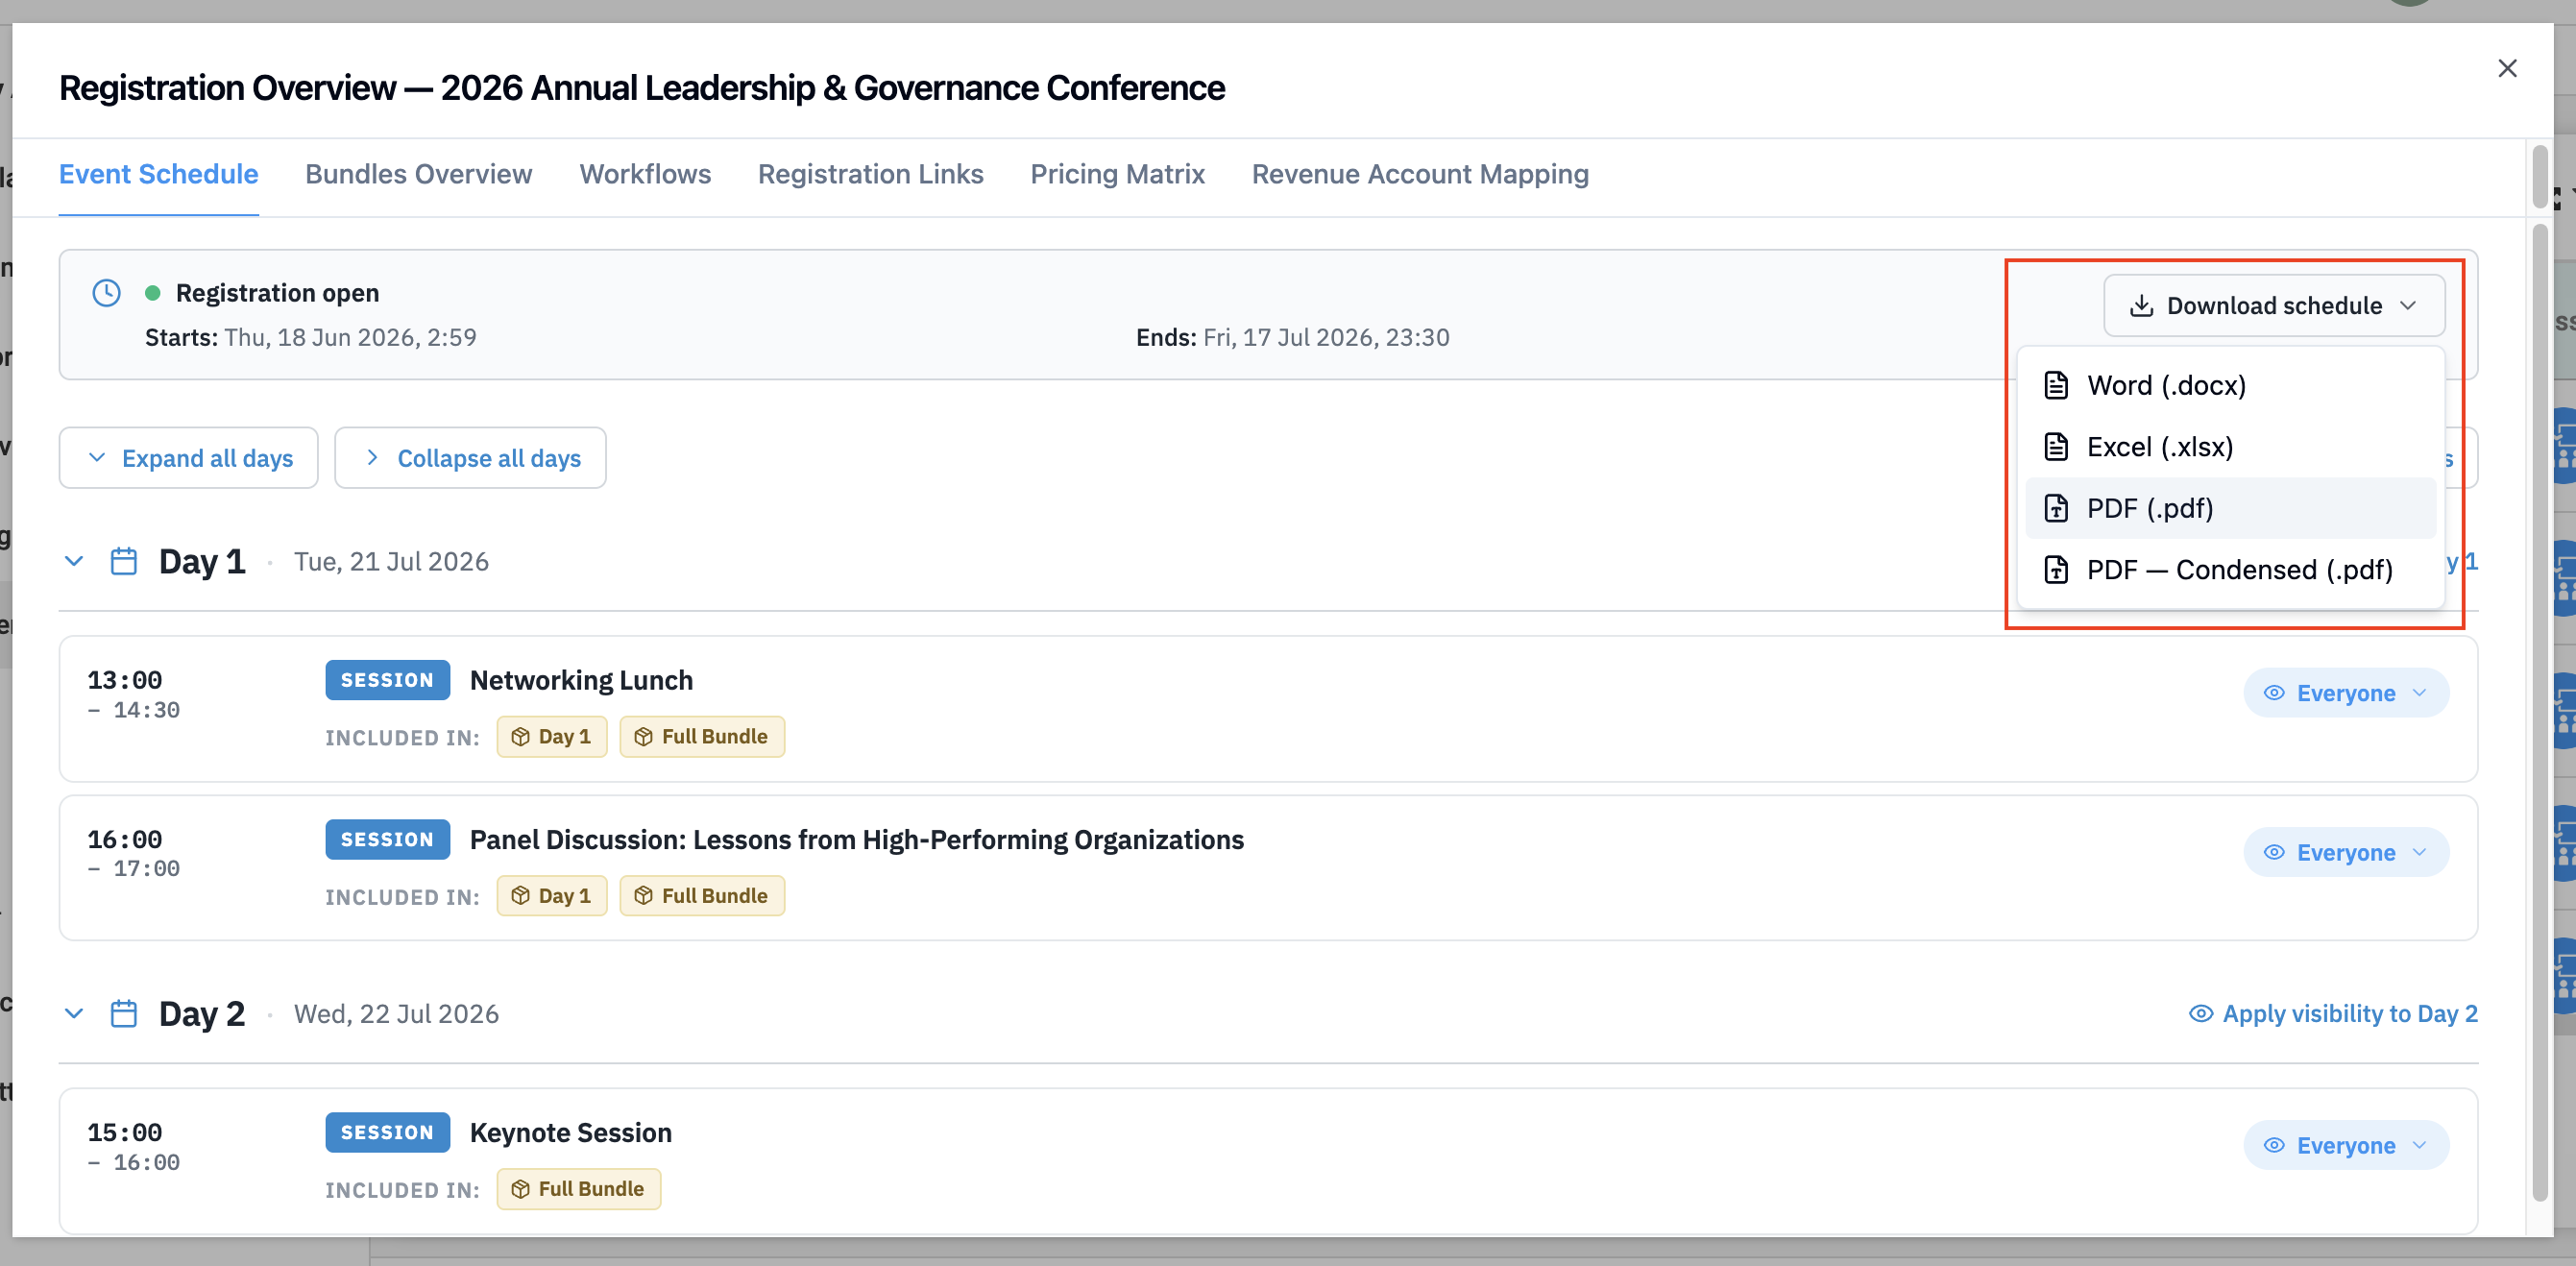
Download and Share the Event Schedule
From the Event Schedule tab, you can download the complete event agenda in PDF, Excel, or Word format. This makes it easy to review the schedule internally or share it with speakers, exhibitors, staff, or attendees before the event begins.
What Gets Copied?
Depending on your selections, Copy Events can carry forward:
- Event Days
- Sessions
- Classes
- Bundles
- Registration Questions
- Pricing Rules
- Library Resources
- Fee Policies
- Booth Configurations
- Booth Assignments
- Booth Maps
- Revenue Settings
This flexibility allows organizations to reuse as much or as little of an existing event as needed.
Closing Note
We hope this guide helps you quickly create new events using existing event configurations. If you have any questions or feedback, please reach out to our support team. We hope this guide helps you configure and manage your cancellation and modification policies effectively. If you have any questions, please reach out to us at support@engagifii.com.