
Summary
Every registration, bundle, cancellation fee, or other revenue item generated in Engagifii must be associated with a General Ledger (GL) account before it can be posted to QuickBooks Online. GL Account Assignments allow administrators to map revenue items to the appropriate accounts imported from QuickBooks, ensuring journal entries are posted accurately. Once assignments are published, Engagifii uses these mappings whenever journal entry batches are generated.
Before You Begin
Before assigning GL accounts, ensure that:
- Your QuickBooks Online connection has been established.
- Your Chart of Accounts has been synchronized.
- The required revenue accounts are available and marked as Assignable.
Tip: If you haven't completed the initial integration, refer to the Set Up the QuickBooks Online Integration guide first.
Understanding GL Account Assignments
General Ledger Account Assignments tell Engagifii where revenue should be recorded in QuickBooks Online.
For example:
- Conference Registration Fees → Conference Revenue
- Cancellation Fees → Cancellation Revenue
- Membership Dues → Membership Revenue
Once assigned, every qualifying transaction is automatically linked to the correct GL account during journal entry creation.
Step 1. Open GL Account Assignments
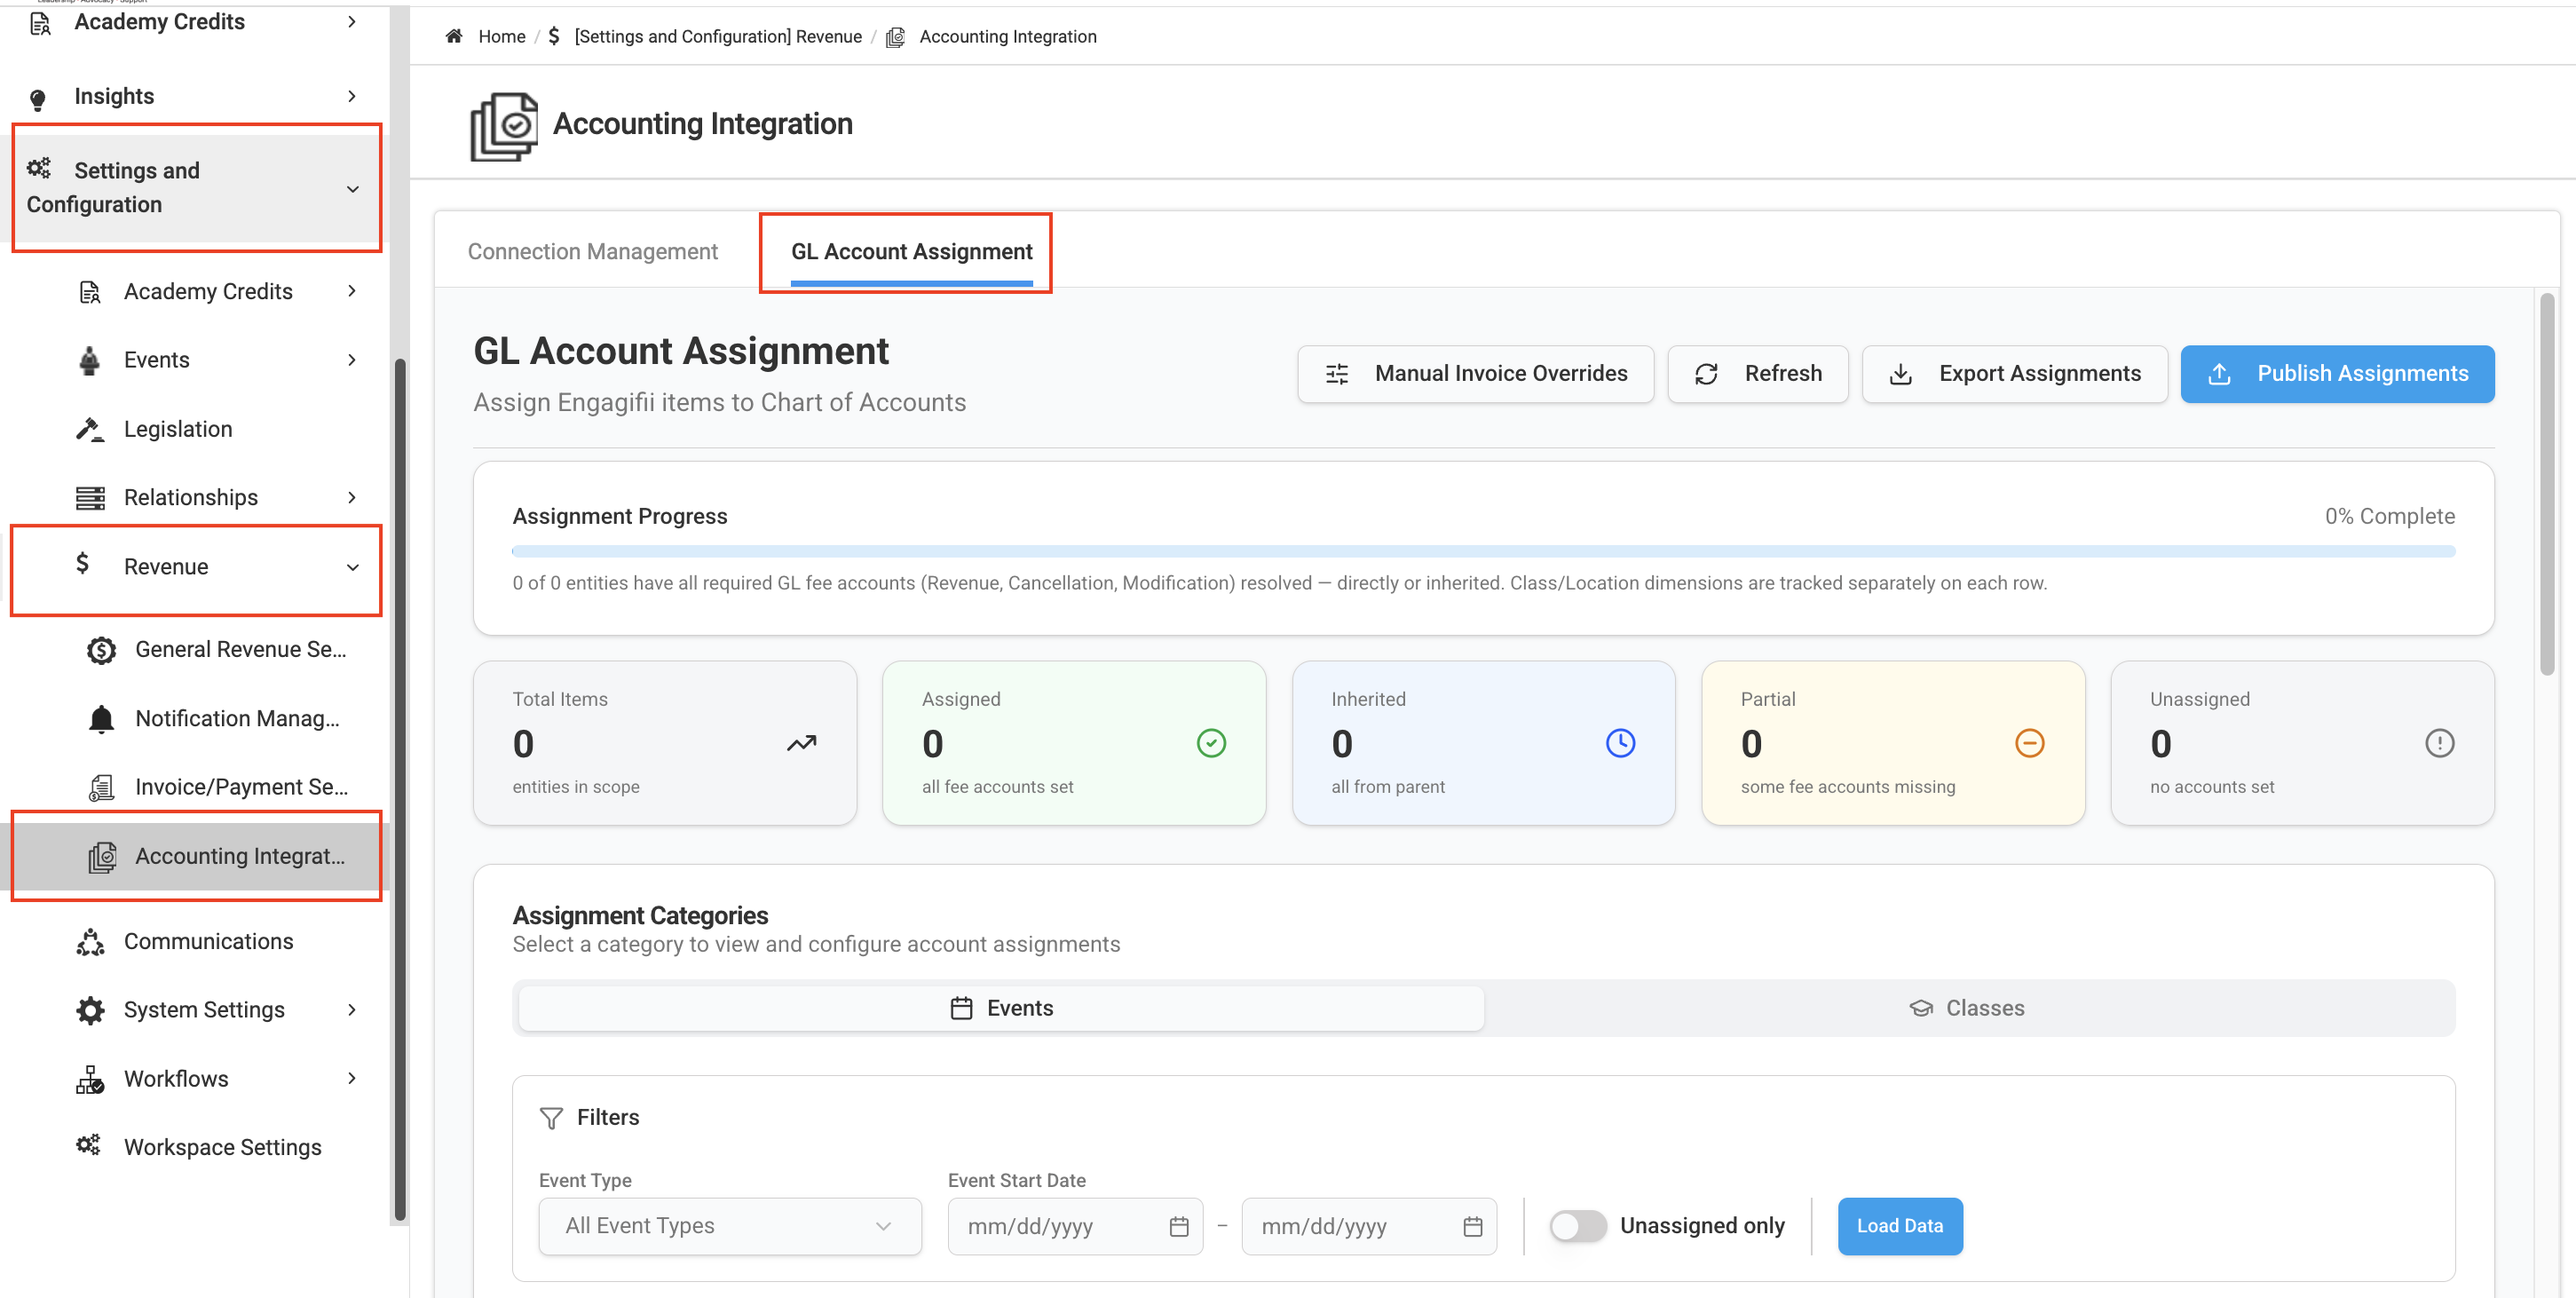
Navigate to:
Settings & Configuration → Accounting Integration → GL Account Assignment
This page displays the events and revenue items that can be mapped to your imported QuickBooks accounts.
Step 2. Filter the Items You Want to Assign
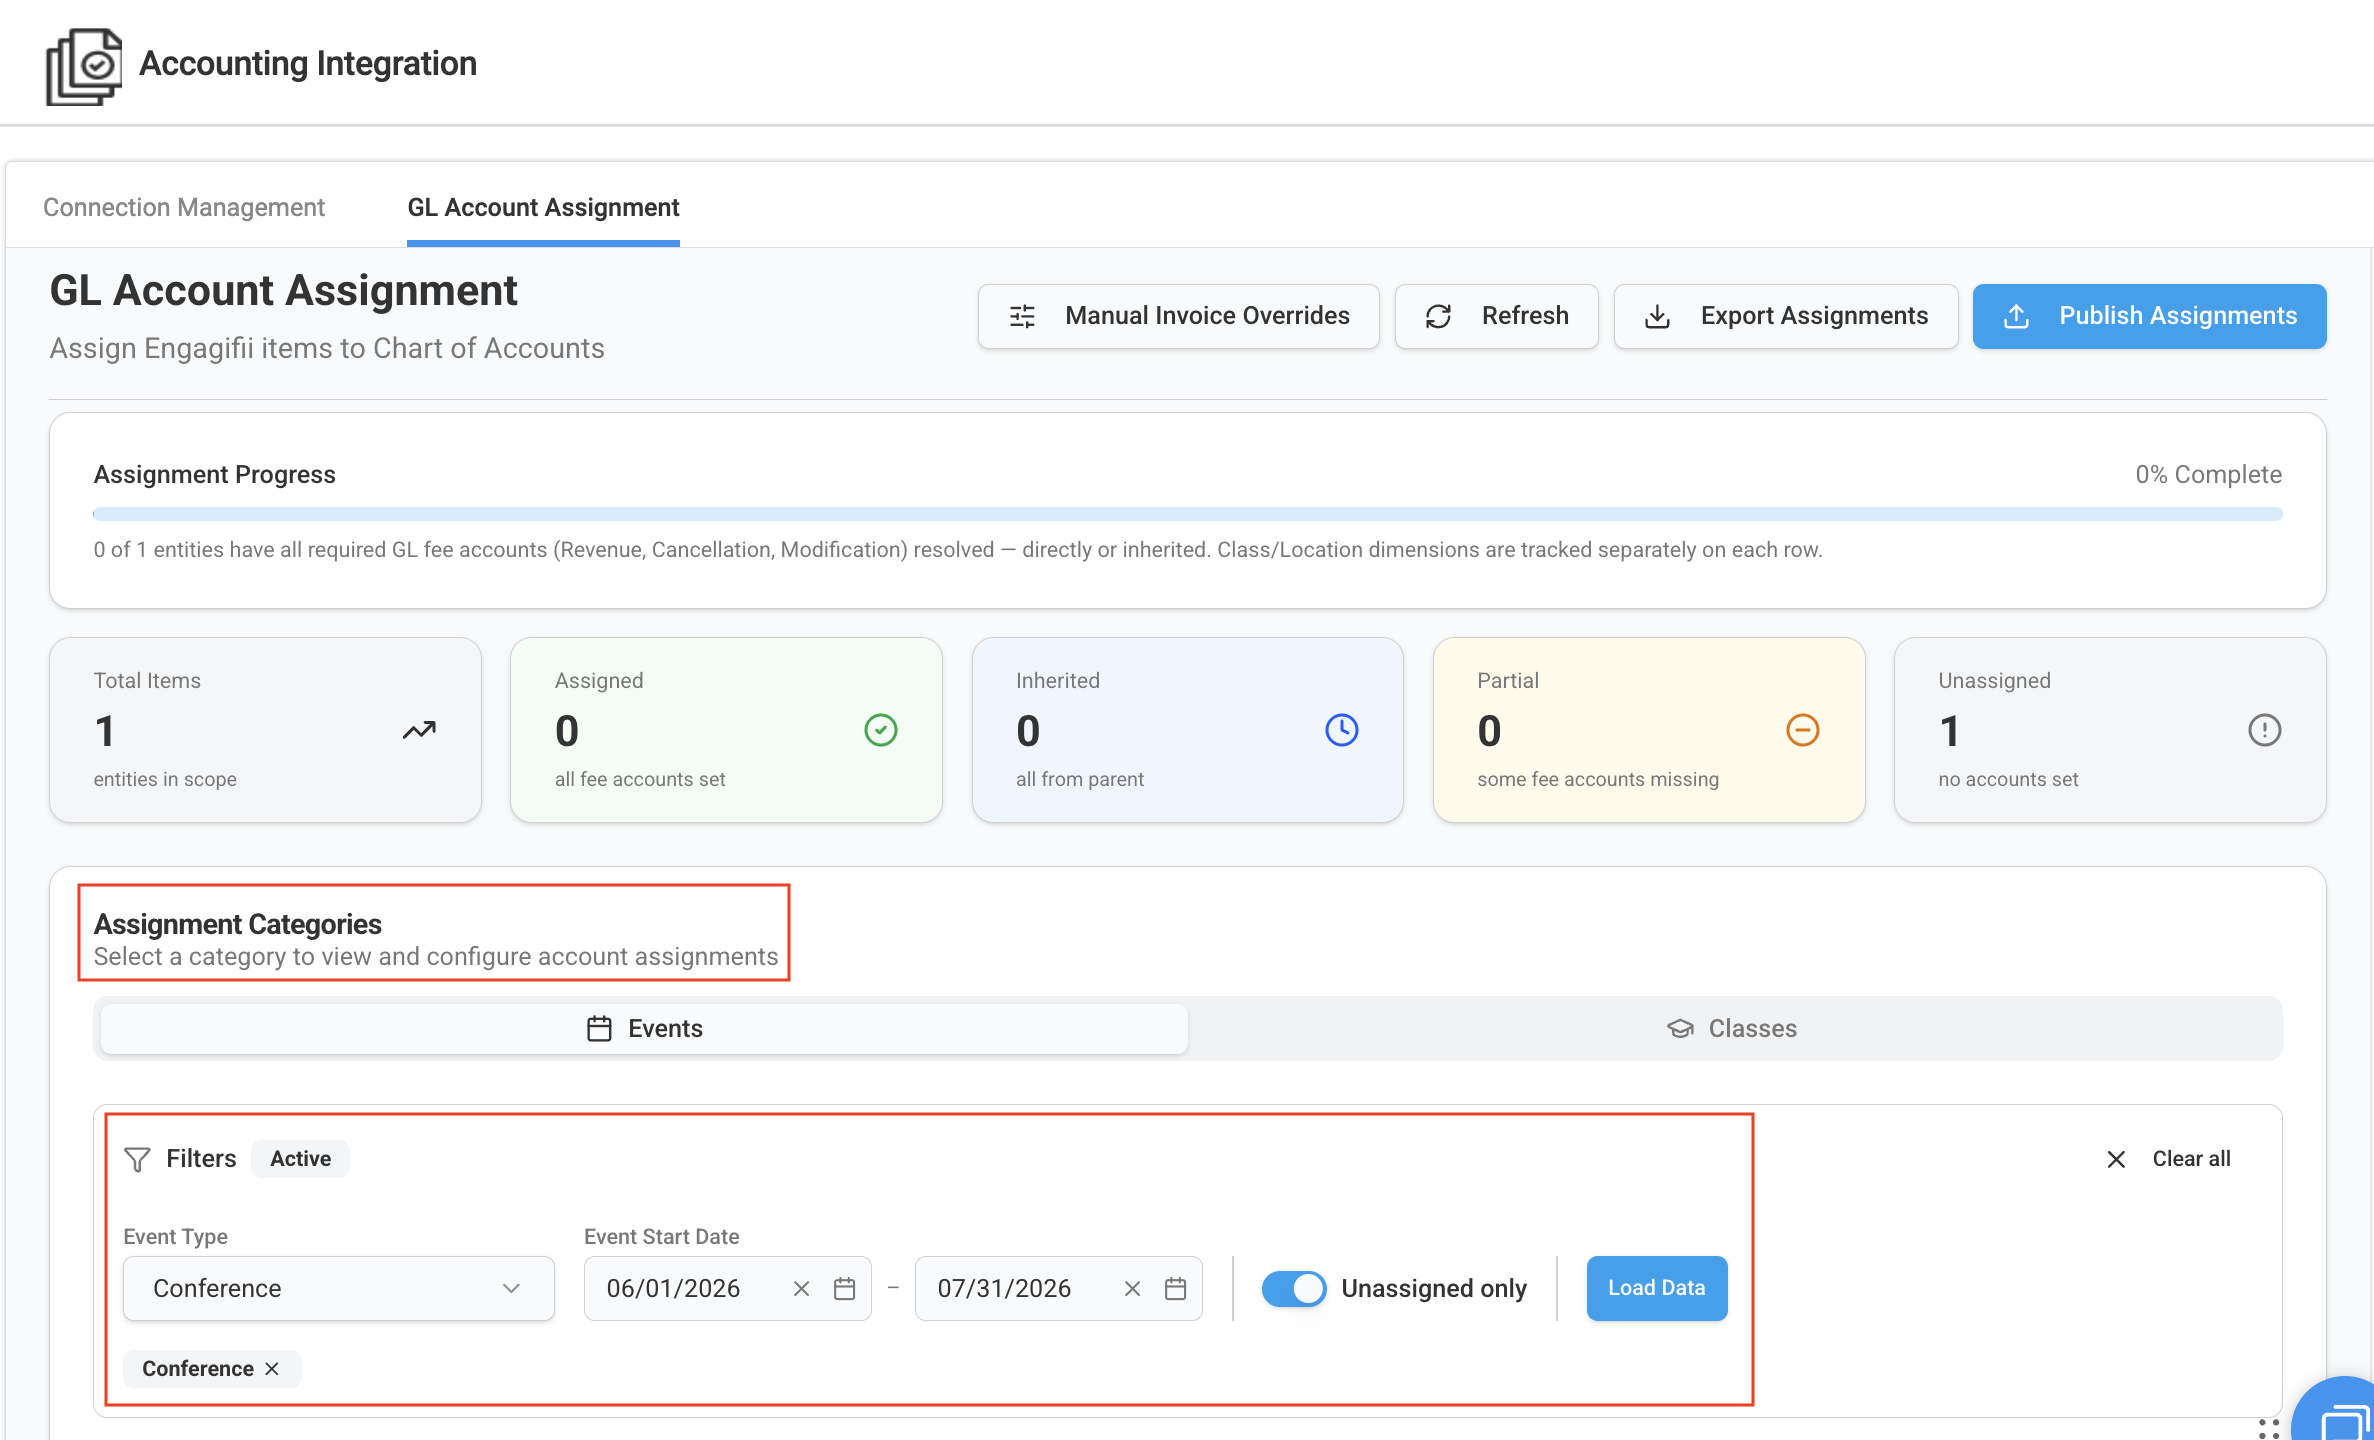
Use the available filters to locate the revenue items you want to configure.
Select the Assignment Category: Events or Classes.
You can filter by selecting:
- Event Type
- Date Range
- Toggle on for Unassigned Items
- Load Data
Filtering helps you quickly identify items that still require GL account assignments.
Step 3. Assign Revenue Accounts
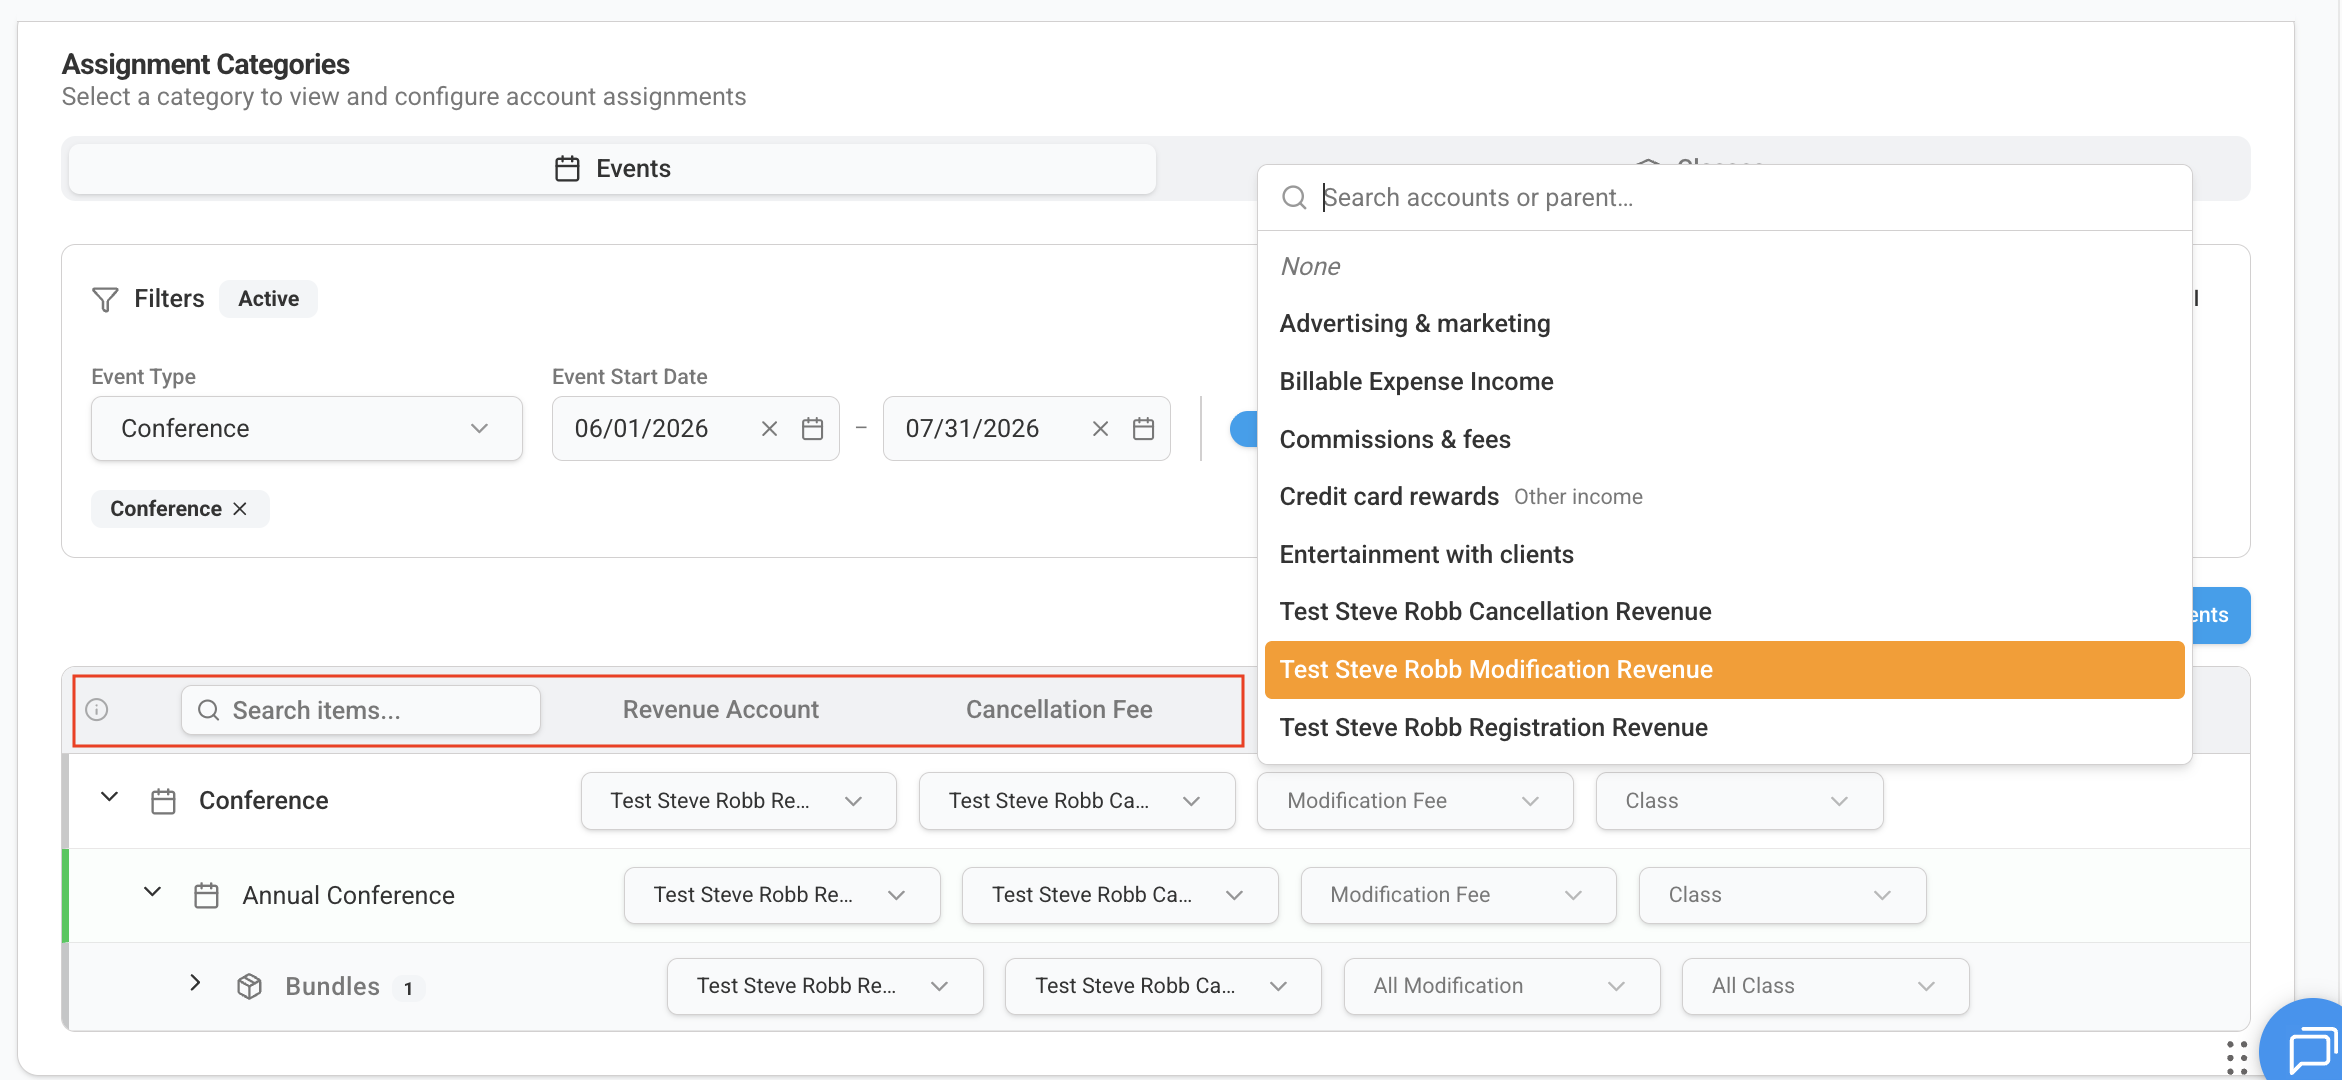
Locate the revenue item and choose the appropriate GL account from the dropdown list.
For example:
|
Revenue Item |
GL Account |
|
Conference Registration |
Conference Revenue |
|
Member Registration |
Registration Fees |
|
Cancellation Fee |
Cancellation Revenue |
|
Bundle |
Event Revenue |
Repeat this process for each revenue item that requires an assignment.
Step 4. Update Your Assignments
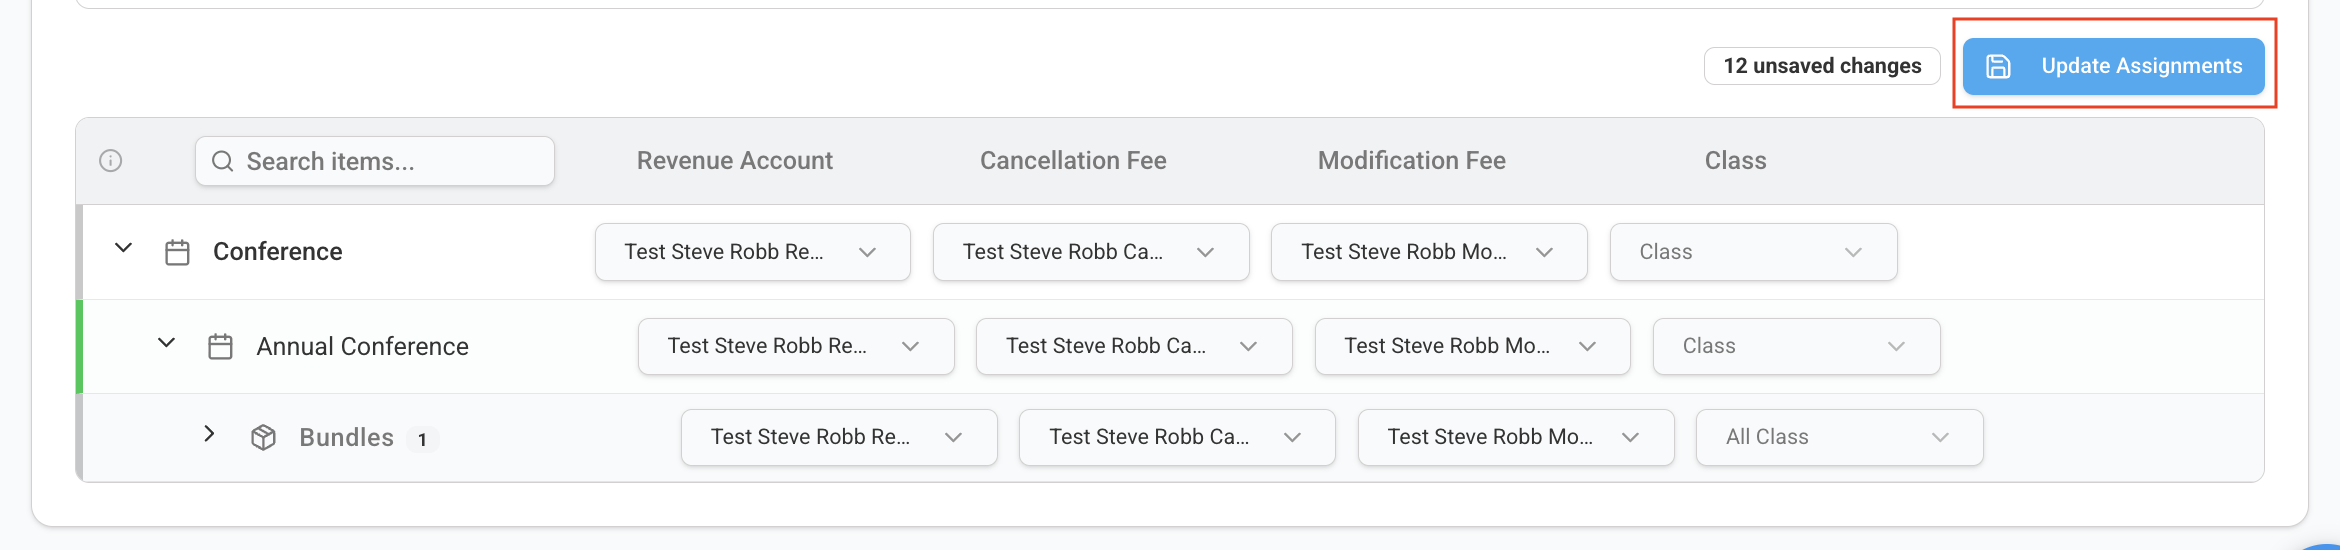
Once you've selected the appropriate GL accounts, click Update Assignments.
Engagifii displays a confirmation window summarizing the changes you've made.
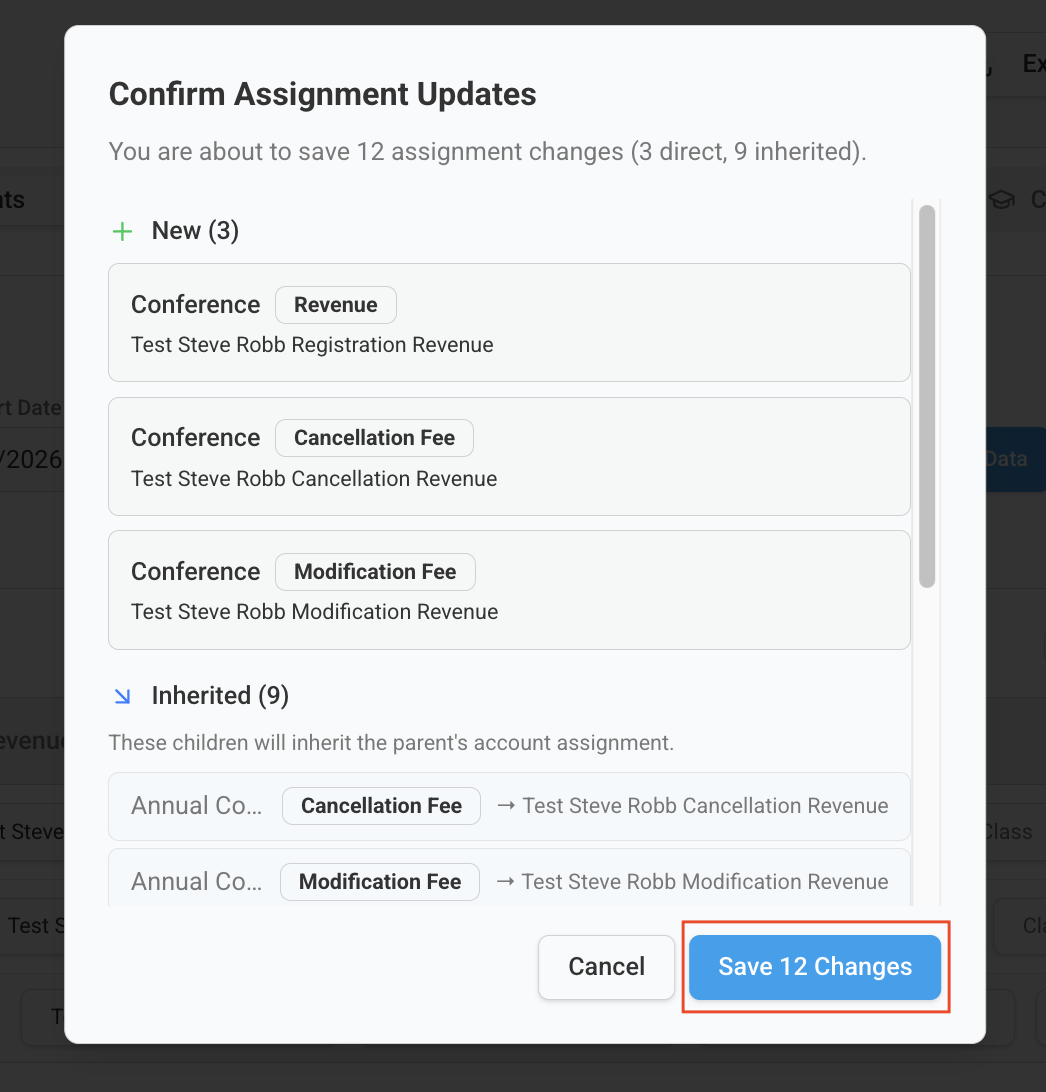
Review the updates and click Save Changes to confirm the assignments.
Step 5. Publish Your Assignments
Saving assignments does not immediately make them available for revenue posting.
Click Publish Assignments to publish the latest assignments.
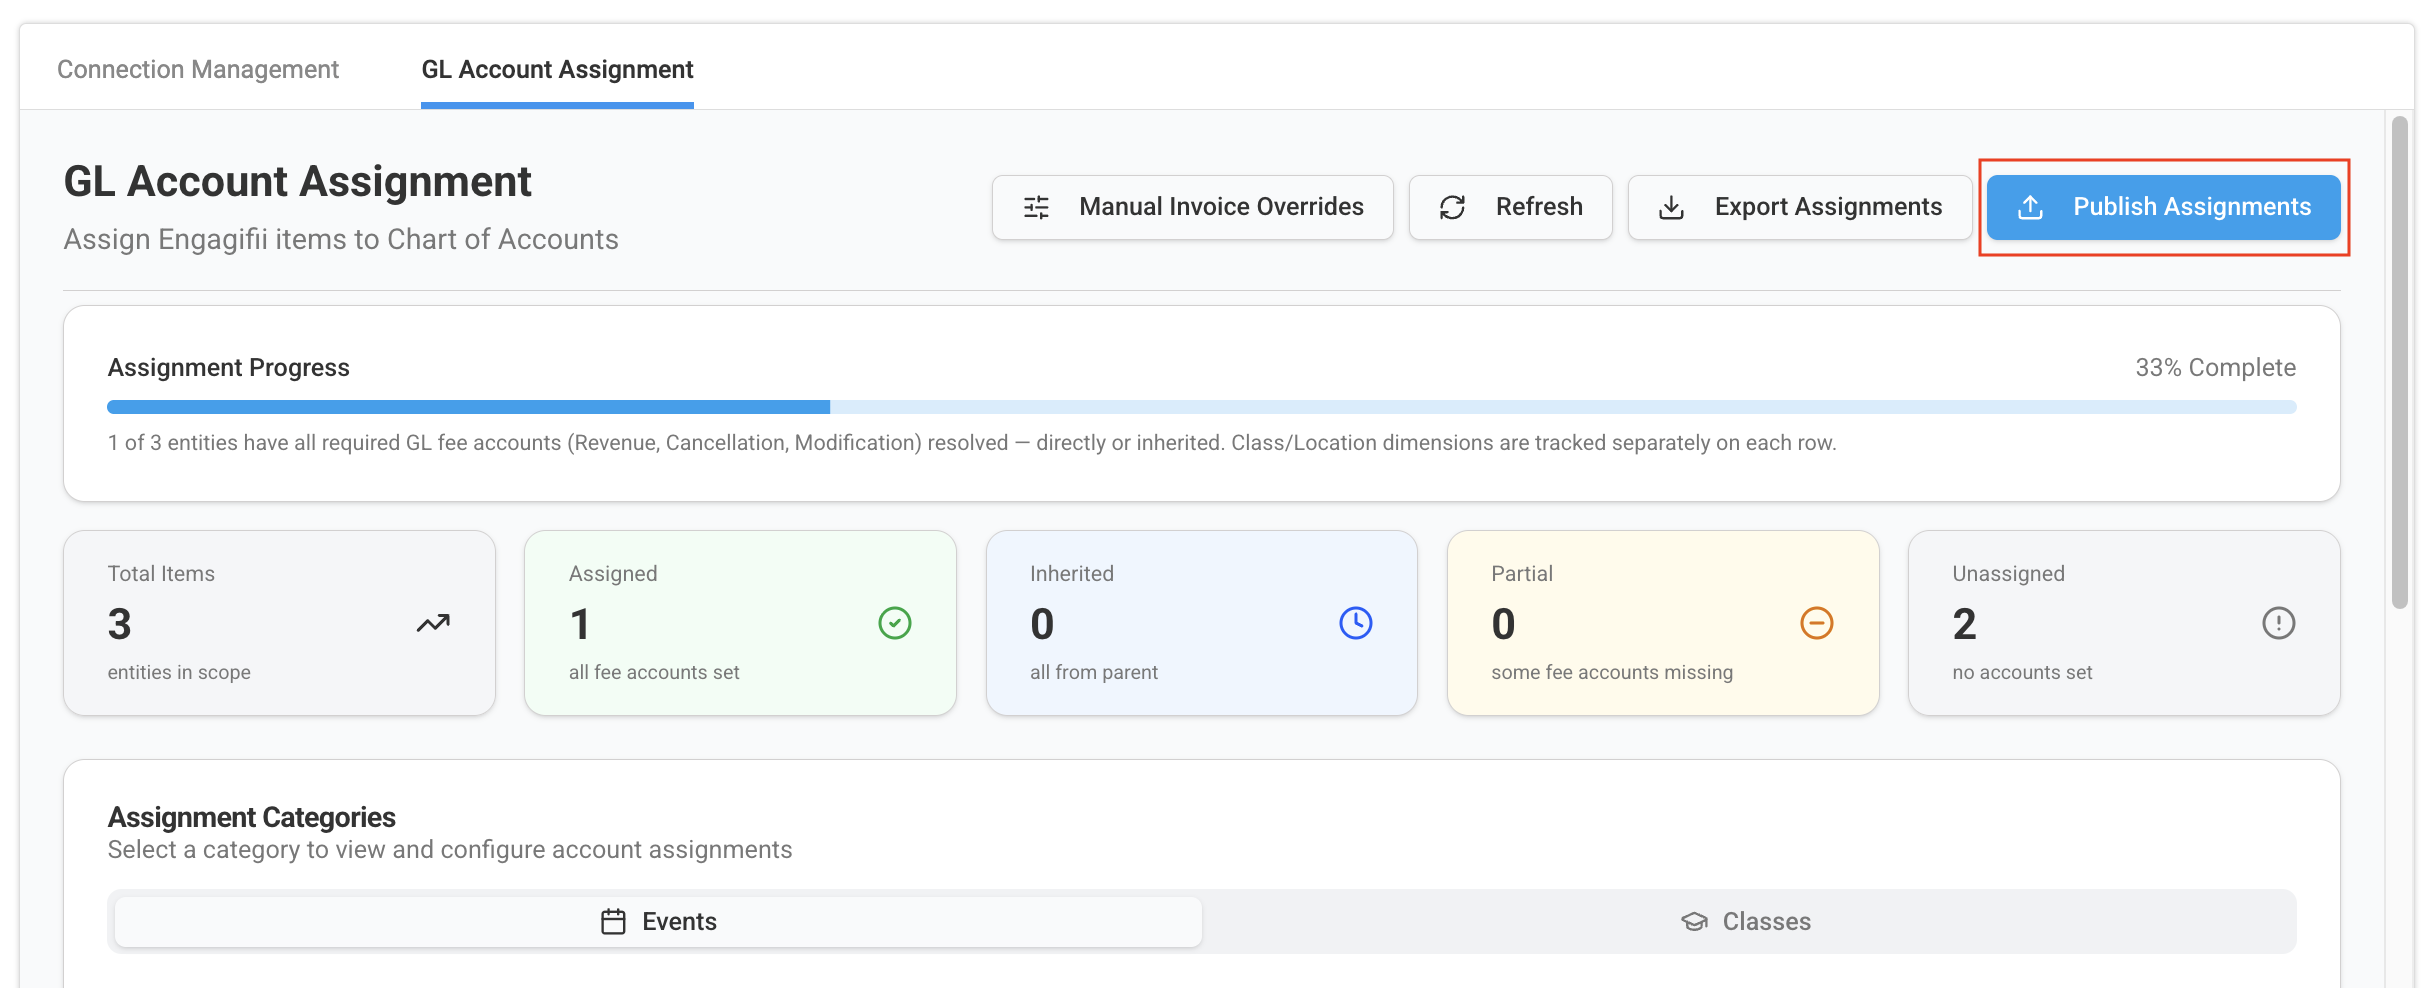
Publishing performs two actions:
- Synchronizes the latest account mappings.
- Makes the assignments available to Engagifii's revenue posting system.
Once published, new journal entry batches will use these mappings automatically.
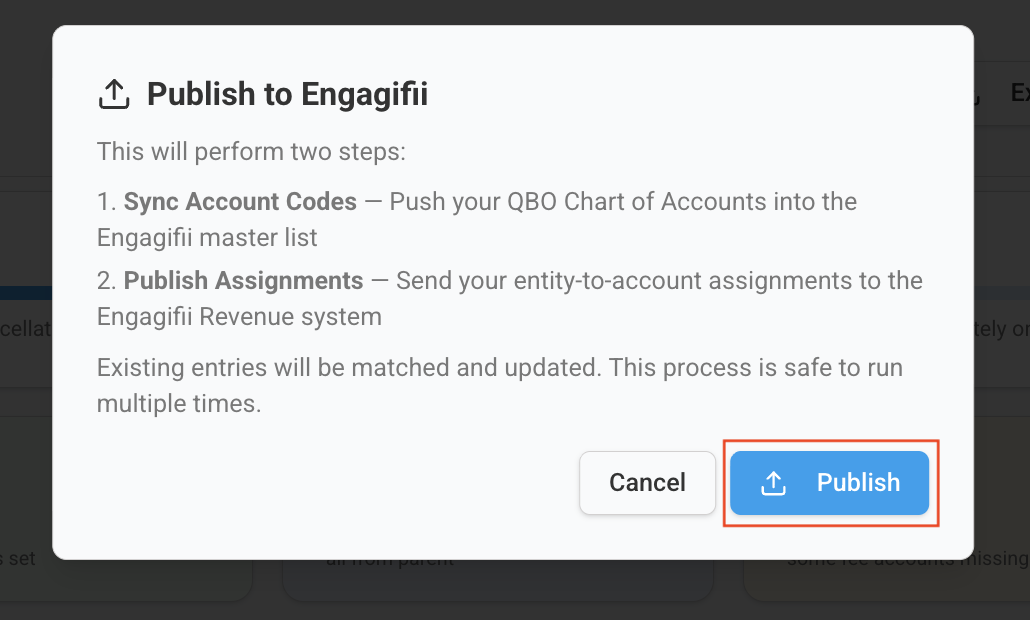
Step 6. Review Assignment History
After publishing your GL account assignments, open Assignment History to review previously published assignments.
Assignment History provides a record of both your latest and previous published assignments, allowing you to reference how revenue items were mapped to GL accounts over time.
Use this section to:
- Review the most recently published assignments
- View older published assignments
- Reference previous mappings when reviewing accounting configuration
When Should You Update Assignments?
GL Account Assignments are generally completed during the initial QuickBooks setup.
You'll only need to update them when:
- A new event is created.
- A new revenue item is introduced.
- New GL accounts are added in QuickBooks.
- Your organization's accounting structure changes.
In most organizations, these updates are infrequent and only performed when new revenue categories are introduced.
Understanding Missing GL Assignments
If a revenue item has not been assigned to a GL account:
- It cannot be included in journal entry batches.
- The system identifies it as a Missing GL Assignment during batch creation.
- Revenue for that item will remain excluded until a valid assignment is configured.
To avoid posting issues, review all unassigned items before generating journal entry batches.
Best Practices
- Assign GL accounts before generating journal entry batches.
- Review new events and revenue items after they are created.
- Publish assignments after making changes.
- Keep your Chart of Accounts synchronized with QuickBooks Online.
- Periodically review assignments to ensure they align with your accounting structure.
What's Next?
Once your GL Account Assignments have been completed and published, you're ready to generate journal entries for posting to QuickBooks Online.
Continue with the next guide:
Generate, Review, and Post Journal Entry Batches
We hope this guide helps you successfully assign GL accounts and prepare your revenue for posting. If you have any questions or feedback, please reach out to us at support@engagifii.com.