Format Spreadsheet Reports Laura Vautour
The Report Format step lets you customize your report.
System Merge Fields
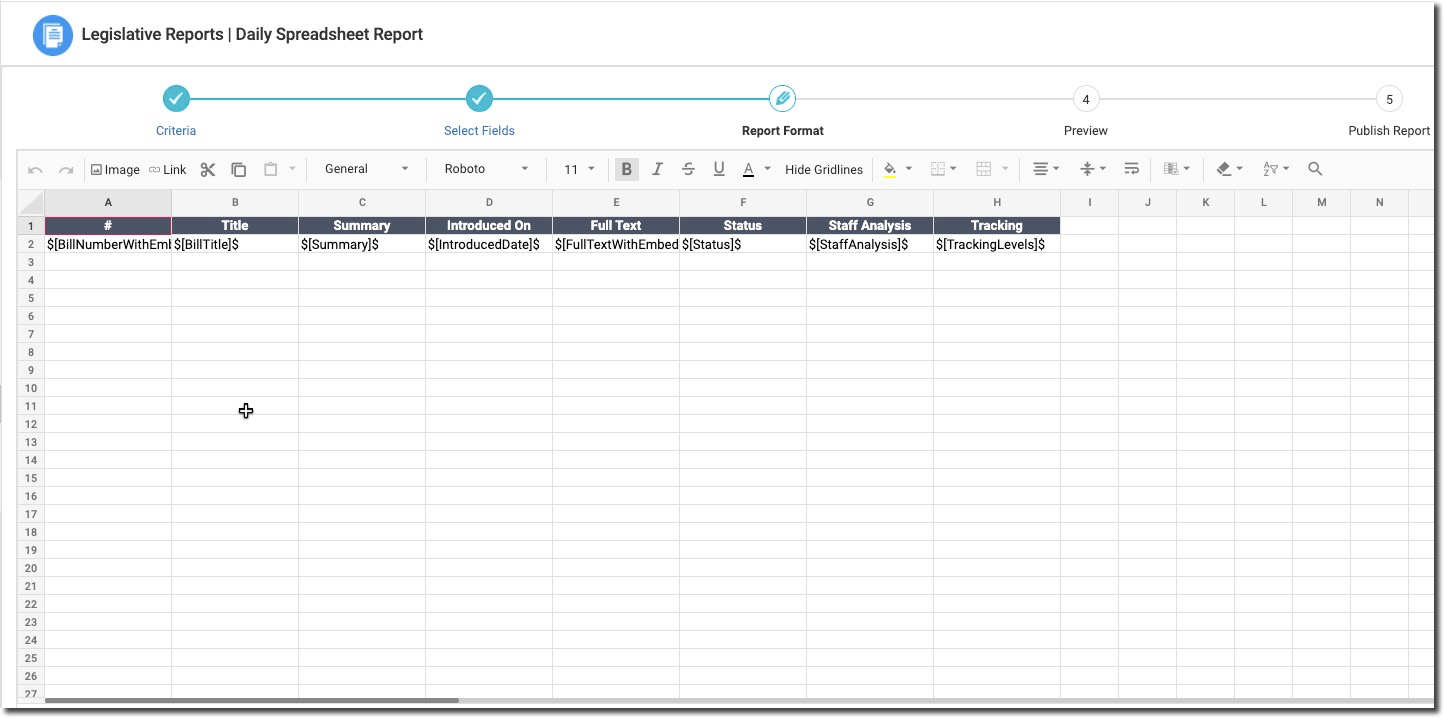
Each field selected in the “Select Fields” step will display as a “merge field” in the report formatter. Engagifii uses merge fields to bring information from your tracked bills into your report.
Merge Fields are delimited with "$[" (dollar sign, open square bracket) at the beginning of the field and "]$" (close square bracket, dollar sign) at the end of the field.
You must leave the special characters around the merge fields, or the system will not know where to put the information from your tracked bills!

Report Formatting Tools


Undo / Redo buttons
Insert Picture (by referencing an image in an online location)
Note: you can also copy and paste an image into a report from the clipboard.Insert Link
Link to other locations/files on the Internet.Cut
Copy
Paste (drop down selection)
All
Values
FormatCell Format Options (drop down selection)
General
Number
Currency
Accounting
Short Date
Long Date
Time
Percentage
Fraction
Scientific
TextFont
Note: Arial and Verdana fonts work very well for on-screen viewing.Font Size
Text Formatting
Bold
Italics
Strikethrough
Underline
ColorHide Gridlines
Fill Color
Borders
Merge Cells
Alignment
Left
Center
RightVertical Alignment (in cell)
Text Wrap
Conditional Formatting
Clear
Clear all
Clear Formats
Clear Contents
Clear HyperlinksSort and Filter Options
Ascending
Descending
Custom Sort
FilterFind
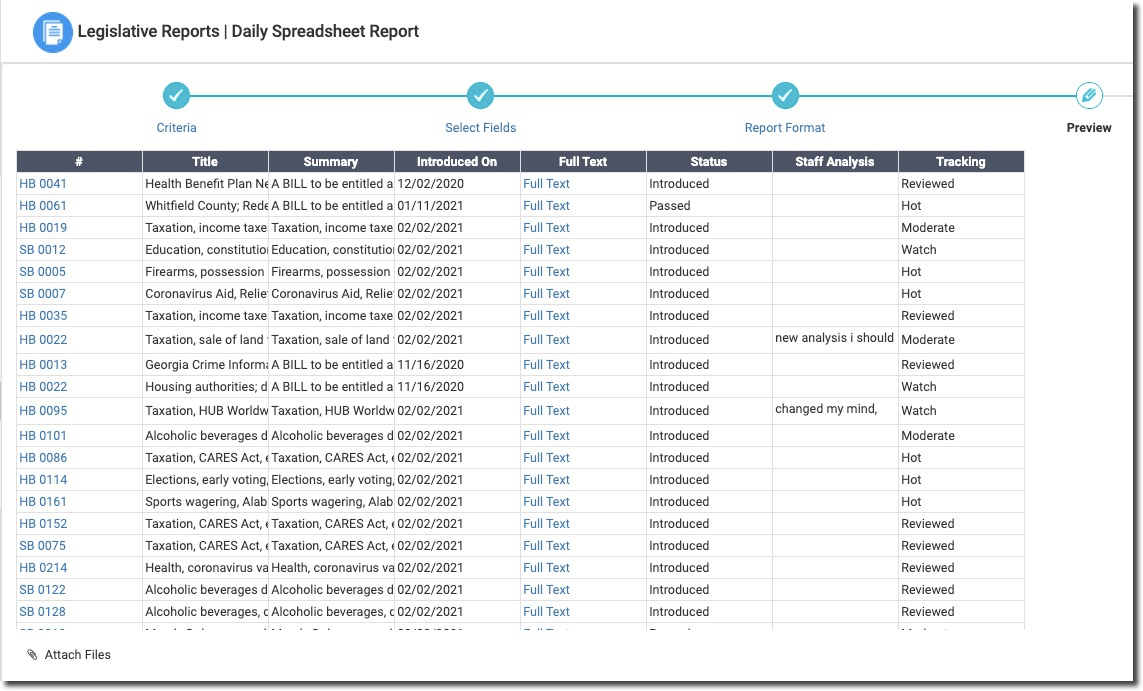
Example Report w/No Formatting:

You can certainly use the report without formatting, however there will be some things that look better if you do a little formatting.

Here are some specific changes that are easy to make on this example:
Replace the # in the column header with the words Bill Number, leave it centered. Make the column smaller.
Sort on this column, bill number.Make the Title column wider to accommodate more words and make the text wrap.
Center the data in the column.
Change the column heading to Link to Full Text and make the column smaller.
Center the information in the Status columm.
Make the Staff Analysis column wider and make the text wrap.
Center the data in the column.
Tips:
To format an entire column, click in the column heading at the top on the column label (letters).
Change the column heading name to make it more clear.
Sort on the bill number column to present the information in order by bill number.
Make columns wider by positioning your mouse on the left or right side of the lettered column headings, until it becomes a 2 headed arrow, then click and drag to the desired width (like Excel).
Use color to make information stand out.
11. When you have completed your formatting, click Save & Next.
Moves you to the Publish step.
Did this answer your question?