How to create new events with custom bundles of Days, Classes, and Sessions.
Events can be complex. They're often multi-day affairs attended by hundreds or thousands of people spanning large conference centers and city centers. The Event Teams at associations need flexibility to arrange the event's elements and pricing to accommodate the many types of people and purposes served by the event.
Engagifii's new Event Bundles functionality lets you club together into packaged sets your various days, classes, and sessions. Then, set pricing at the bundle level for various types of attendees.
Or follow these detailed step-by-step instructions:
Create an Event with Bundles
Steps go here, formatted like the registration steps below.
- On the left sidebar, open Events > All Events
- Look for a button that says 'Add Event' and a pop-up should appear that looks similar to this:

- Enter your desired Event Name & Event Type
- Select between Single Day or Multi-Day Event, then click Choose Day. This will allow you to select the date/s that your event will be on
- Event Creation Step 1 - General
- Ensure to toggle 'this event requires registration' on if you want people to be able to register off-site then set the number of registrants that your event can accommodate
- Add the start and end-date for the registration, these dates will serve as the date when the registration links will open and close respectively
- Add a description to your event through the Markdown Editor
- Upload the PDF file of your event's agenda, if any
- Event Creation Step 2 - Sessions
- Click 'Add Session' and a pop-up should appear like this:
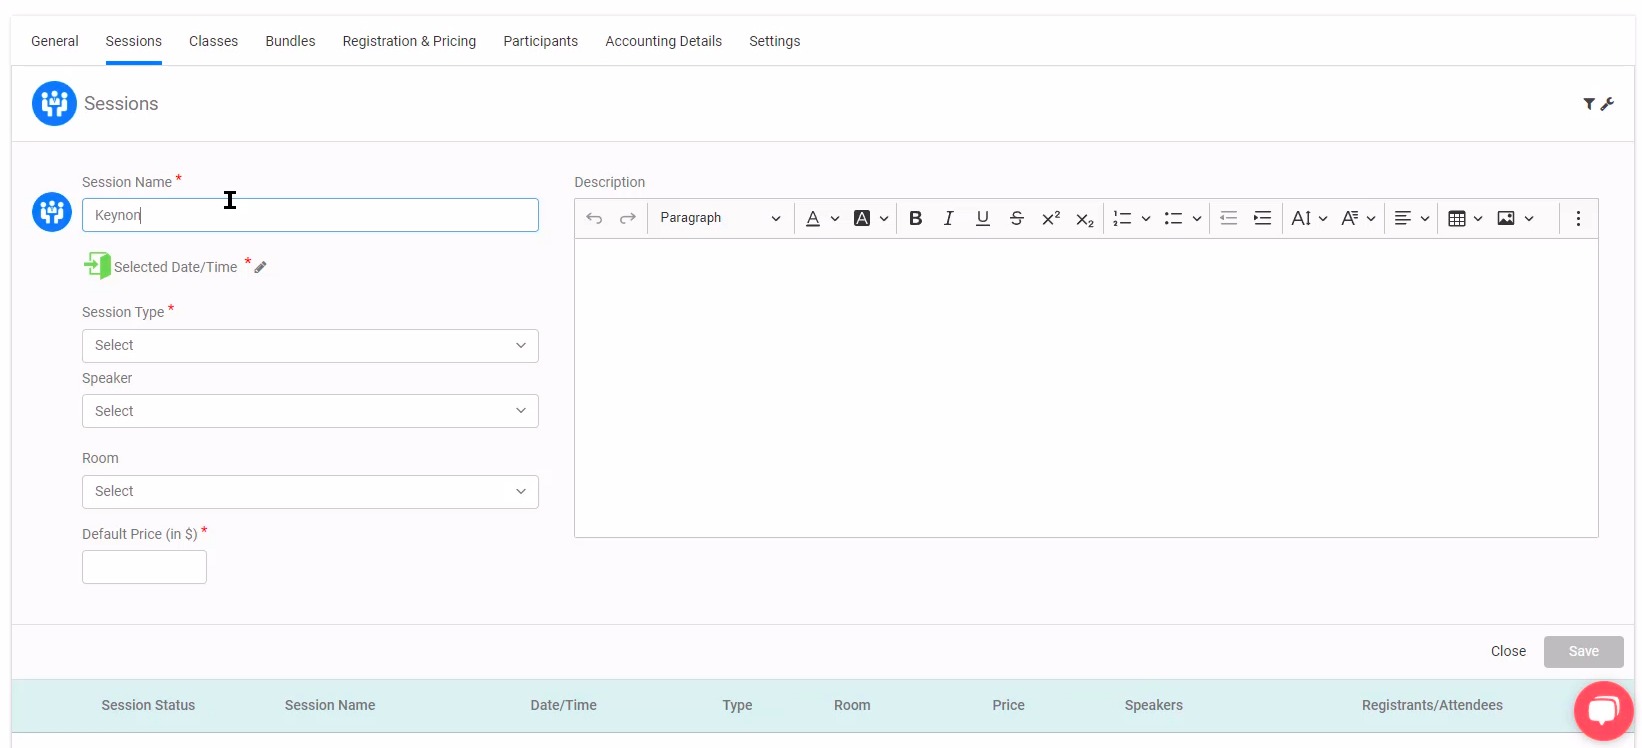
- Enter the Session Name, Session Type, Speaker, Room, Description, and Default Price of the session that you are creating. Since we are to bundle everything together, you can set the default price to $0
- Click 'Add Session' and a pop-up should appear like this:
Warning: If you intend to use bundles, set the default price to $0.
You'll set pricing on the bundles themselves later.
- Event Creation Step 3 - Classes
- Click 'Add Class' and a new section should appear that looks like this:
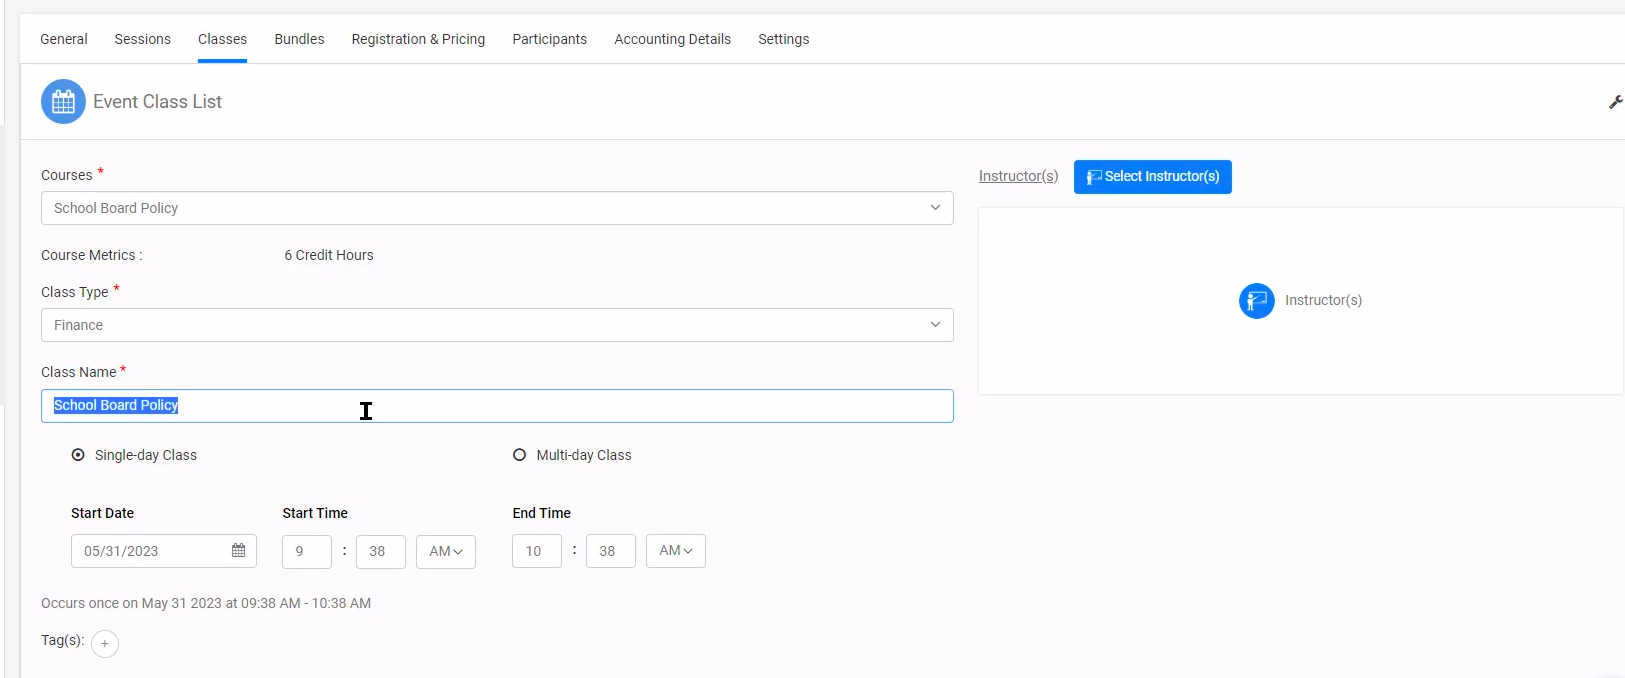
- Fill out the Courses, Class Type, Class Name, and whether it is a Single-day class or Multi-day class
- Click 'Add Class' and a new section should appear that looks like this:
- Event Creation Step 4 - Bundle
- On the same window, click Bundles.
- Click 'Add Bundle'

- Fill out the details that are being asked and you should be able to see this section where in all of your created bundles will be listed in
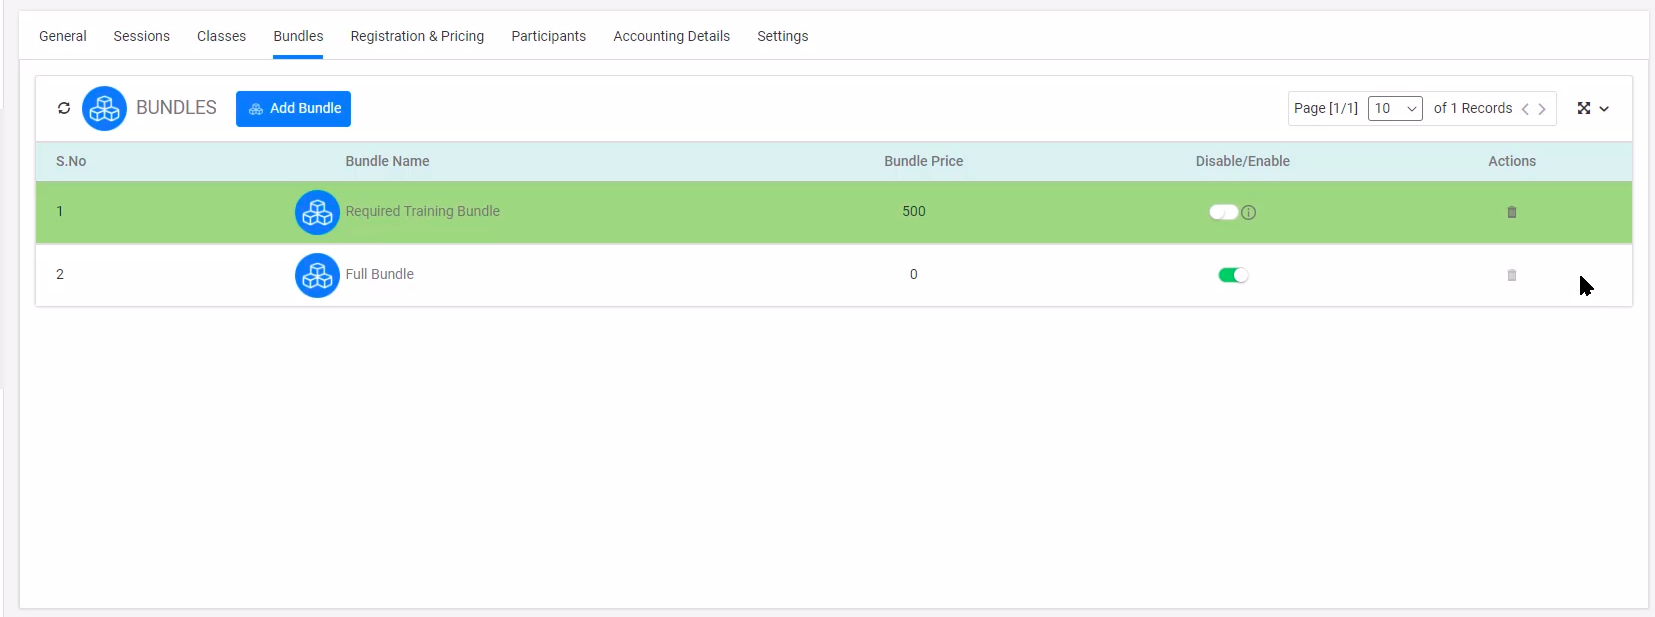
- Click on the bundle that you have just created and then click 'Select Event Elements'. This will allow you to select the classes, events, and sessions that you'd like to be bundled together.
- Event Creation Step 5 - Settings
- On the same page, click on the 'Settings' tab. This should open up:

- Select your desired minimum requirements at the event level.
- On the same page, click on the 'Settings' tab. This should open up:
Note: Explicitly set the default price to 0 if you want to create multiple bundles for the events
Related Article: Creating a Class & Opening for Registration
Registration Experience:
Note: Registration Workflows are variable. Below is a common experience used by most Engagifii administrators, but some of the steps you experience might be in a slightly different sequence.
- On the left sidebar, open Events > All Events
- Open the event you're interested in and click Register.
- Registration Step 1 - Overview
- You'll then land on an overview page, which is step 1 of your registration workflow
- If you need to download the event agenda, click on ‘Preview/Download Event
Agenda’ - Click Next

- Registration Step 2 & 3 - Choose Participants -- Confirm/Update User Information
-
- Confirm/Update User Information - If you're registering yourself, please review and update your profile
- Choose Participants - If you are registering other people on their behalf, you'll see a list of people in your organization(s) to choose from. You may choose as many as you need
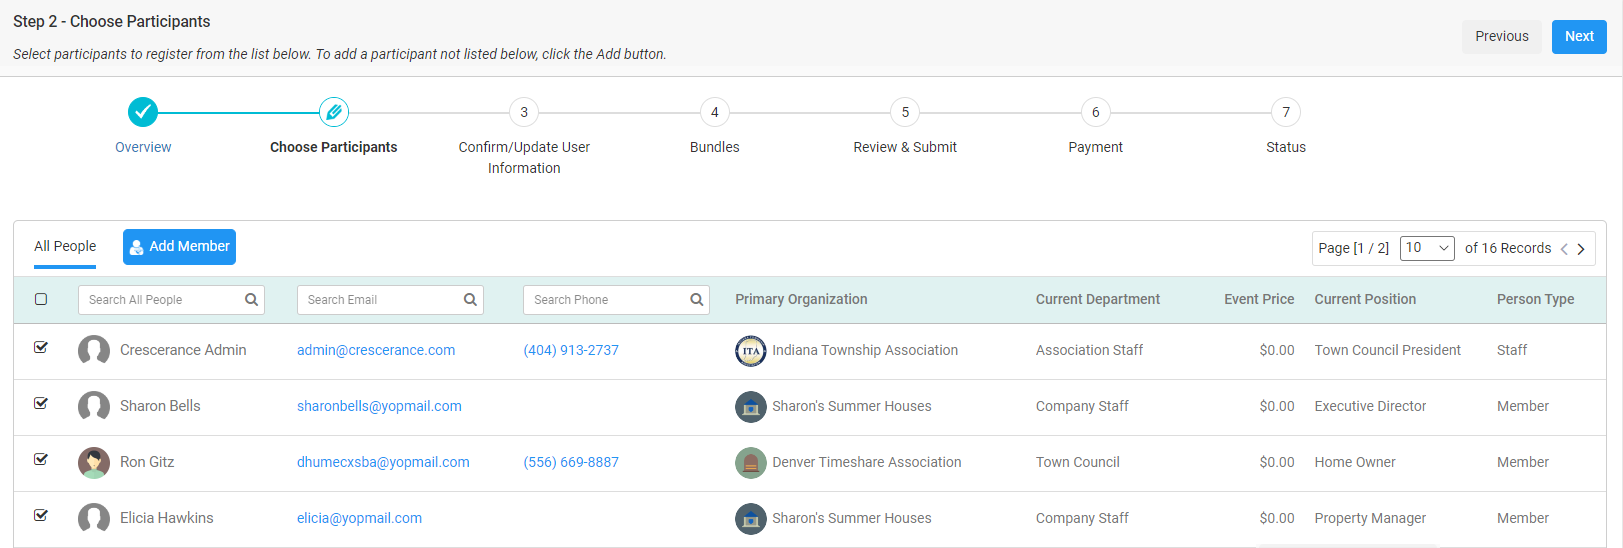
- On the next step, expand the gray ribbons and verify that their information is up to date.

- Click Next
-
- Registration Step 4 - Bundles
- Select the desired bundles for yourself and/or your participants
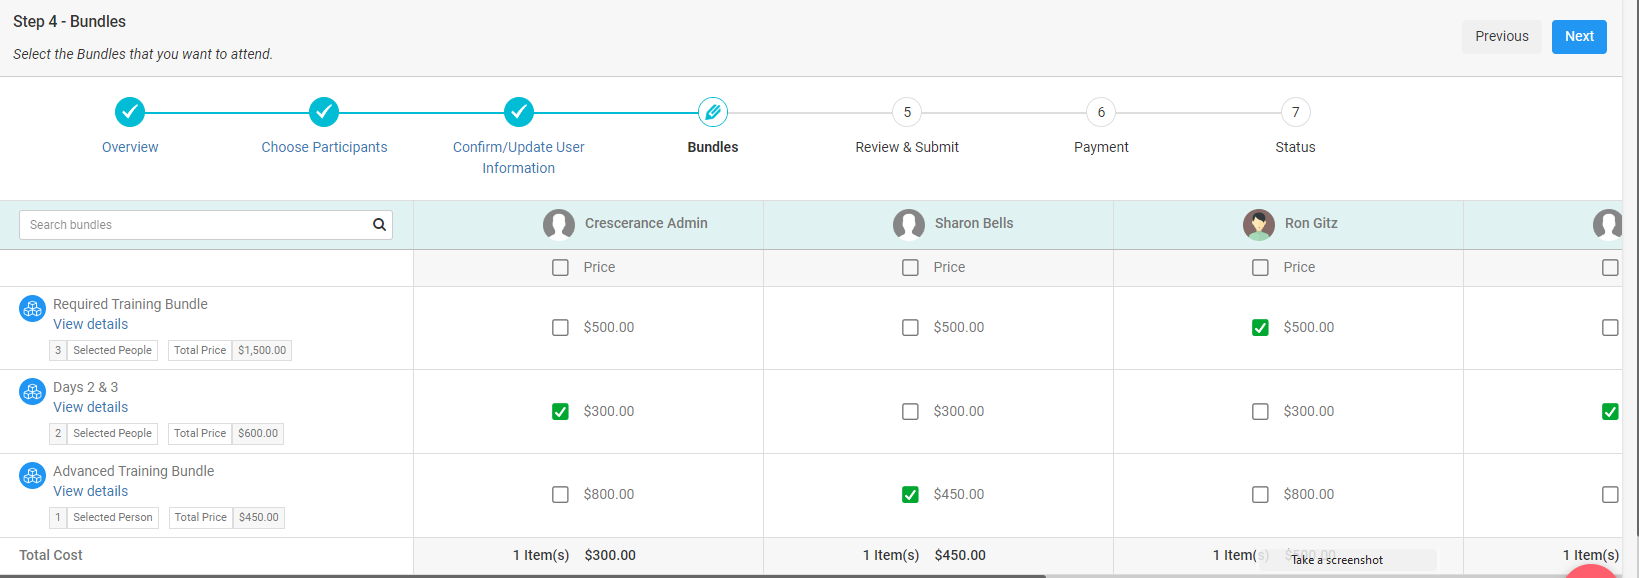
- Select the desired bundles for yourself and/or your participants
Note: A registrant cannot be registered for two classes that are happening simultaneously.
- Registration Step 5 - Review & Submit
- Review your selections for accuracy and certify your choice using the checkbox on the bottom left.
- Take note that users are not allowed to select two classes that occur at the time and day
- Registration Step 6 - Payment
- Review all of your selections
- Choose your payment options
- Bill Me - I want to pay individually. My organization is not responsible.
- Bill My Organization - I want my organization to pay. I am not using my own money.
- Pay Now - I want to pay now with a credit card.
- Pay Later - I (or my billing contact) want to receive an invoice via email.
- Registration Step 7 - Status
- Confirm that all of your attendees were successfully registered for the event.
