Create a Consolidated Invoice Here's how to send out multiple invoices at once Sarah Anderson
Have a few invoices that you need to convert into a single invoice? Look no further! We now have the option to consolidate multiple invoices into one, with a quick click of your mouse!
First step is you'll want to make sure the permission named Add Consolidated Invoice is turned on for the role you'd like to take part in this new feature. It's nestled under the Revenue list of permissions:

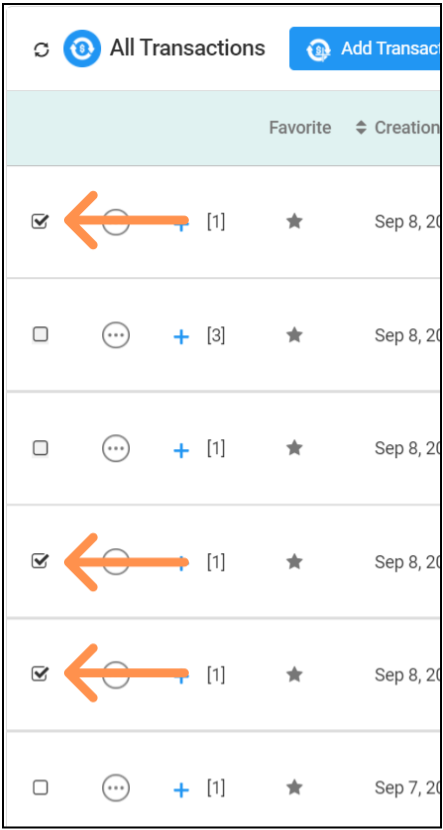
Do a find (CTRL+F) in the list of permissions on the word CONSOLIDATED.Next, head over to your All Transactions list. Click the check box for two or more invoices you'd like to consolidate:

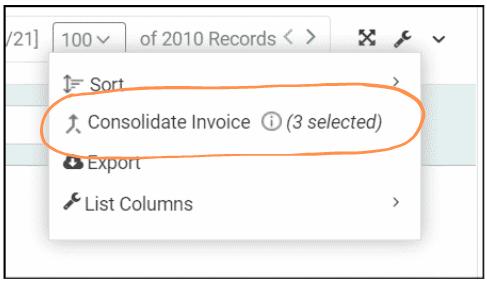
Once you've got all of the invoices selected, head over to the wrench icon in the upper right.
Under this menu, you'll see an option for Consolidate Invoices with the number of invoices you've selected.
If the invoices you've selected are all for the same organization/person, a confirmation screen will pop up for you, asking you to confirm before consolidating.
If you've selected invoices from multiple different organizations, a window will pop up letting you know this as well.
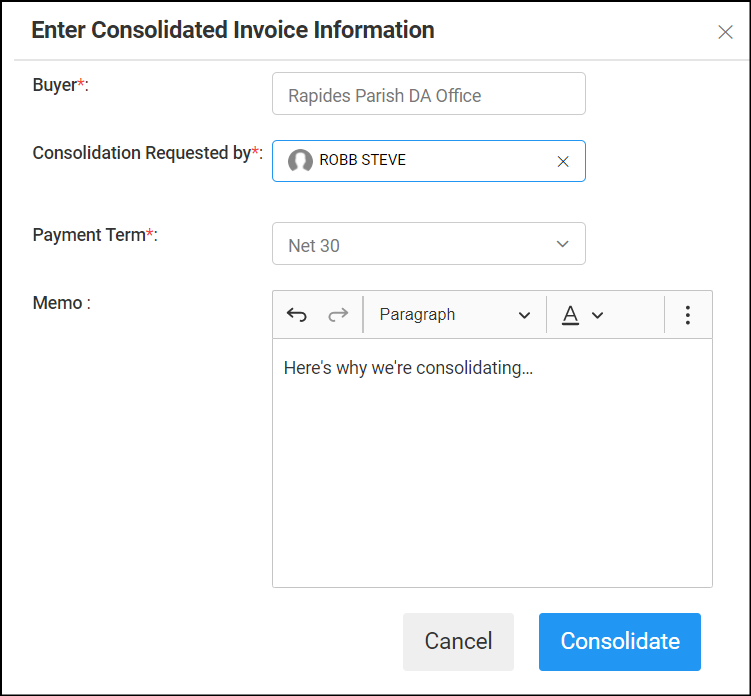
If everything looks good, click Consolidate in the window.Now that the invoices have been consolidated, you'll be presented with a Consolidated Invoice Information window.
Here you can add additional information, such as who requested the consolidation, the payment terms and any notes.
Once you've filled in everything you need, click the Consolidate button.
Next, you'll see the Consolidated Invoice screen.
This is where you can Create and Send your invoice to the Organization Billing Contact.
Check the name of the contact, and click Create and Send in the upper right hand corner and you're done!


 Did this answer your question?
